Table of Contents
Advertisement
Available languages
Available languages
Quick Links
Advertisement
Table of Contents

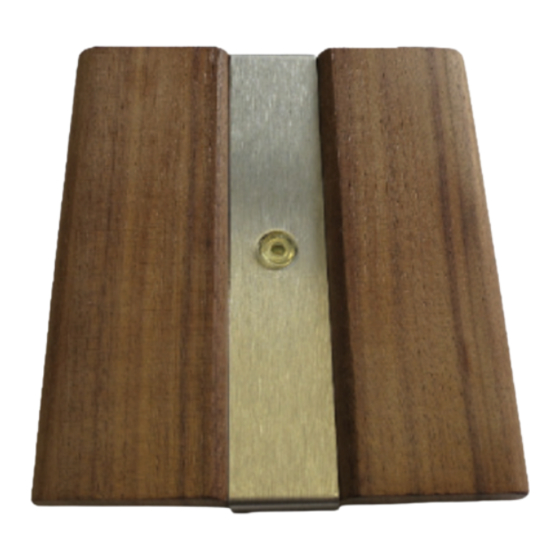
Summary of Contents for EOS Fernstart-Saunabus
- Page 1 Fernstart-Saunabus Remote switch module with on/off button, for sauna bus connection Кнопка дистанционного управления Montage- und Gebrauchsanweisung Installation and operation manual Руководство по монтажу и эксплуатации Made in Germany Druck Nr. 29344596 de en ru / - 17.14...
- Page 2 Verbindungsleitungen verwenden: • 25 m lang Art. Nr. 94.4647 • 50 m lang Art. Nr. 94.4648 Der Fernstart-Saunabus ist ein Zubehör zu fol- genden Saunasteuerungen: (Stand 12/2013): • EMOTEC D (ab Version 1.57) • EMOTEC H (ab Version 1.57)
-
Page 3: Montage
Montage Die komplette Holzblende mit Taster und Pla- Legen Sie den Montageort des Fernstart-BUS tine mit den beiden Spax-Schrauben 3 x 20 fest. festschrauben. Hier erstellen Sie eine Wandöff nung mit Ø 67mm. Die Montagetiefe beträgt mindestens 50 mm. Die Hohlwanddose in der Wand mit den Zylin- derschrauben 3 x 16 festschrauben. -
Page 4: Bedienung
Jumper rote Status-LED Abschließend noch die Schutzfolie von der De- grüne Status-LED korblende entfernen. Stecker der Verbindungsleitung Bedienung Ist die Saunaanlage im Stand-by Betrieb, leuch- tet die runde Taste nicht. Die kleine grüne LED auf der Platine blinkt langsam. Drücken Sie den Taster mind. 3 Sekunden, um die Saunaanlage mit den zuletzt eingestellten Parametern einzuschalten. -
Page 5: Service Adresse
Service-Abteilung einzuschicken. Senden Sie das Gerät stets mit diesem ausgefüllten Service Adresse Garantieschein ein. Eventuell entstehende Beförderungskosten für die EOS Saunatechnik GmbH Ein- und Rücksendung können von uns nicht über- Schneiderstriesch 1 nommen werden. 35759 Driedorf Außerhalb Deutschlands wenden Sie sich im Falle Germany eines Garantieanspruches bitte an Ihren Fachhänd-... - Page 6 Rücksende-Verfahren (RMA) – Hinweise für alle Rücksendungen! Sehr geehrte Kundin, sehr geehrter Kunde, wir wünschen Ihnen viel Freude mit den bestellten Artikeln. Für den Fall, dass Sie ausnahms- weise einmal nicht ganz zufrieden sein sollten, bitten wir Sie um genaue Beachtung der nach- stehenden Verfahrensabläufe.
-
Page 7: Scope Of Delivery
Scope of delivery 1 switch button with wooden panel (1) The remote switch module allows to switch the sauna on or off remotely, for instance from 1 decoration strip, stainless steel (2) the reception, central plant room or supervisor room. 1 hollow wall box (3) 2 screws 3 X 20 (4) In CENELEC countries the remote... -
Page 8: Installation
Installation Insert the board into the hollow wall box and Select the suitable location for the installation screw the wooden panel with switch button of the remote switch module. over it using two 3 x 20 screws. Cut a hole in the wall with Ø 67 mm diameter Make sure that the small groove at the short and at least 50 mm depth. -
Page 9: Operation
Jumper fi g. 5 Status LED red Remove the protective plastic foil from the dec- Status LED green oration strip. Sauna bus connector in the control unit Operation The remote switch module and the button will be automatically detected and confi gured. In the standby mode the status LED lamp in the button will not light on. -
Page 10: Service Address
Outside of Germany please contact your spe- cialist dealer in case of warranty claims. Direct Service Address: warranty processing with our service depart- ment is in this case not possible. EOS Saunatechnik GmbH Schneiderstriesch 1 Equipment commissioning date: 35759 Driedorf, Germany Tel: +49 (0)2775 82-514... - Page 11 Handling procedures for return shipments (RMA) - Details for all returns ! Dear customer we hope that you will be satisfi ed with the purchased EOS product. In the rear case if you may have a claim and will need to return a product, please follow the procedures specifi ed below.
-
Page 12: Объем Поставки
Объем поставки 1 штука Кнопка в сборе с С помощью устройства дистанционного деревянной перемычкой (1) управления Saunabus сауну можно включать / выключать из центрального пункта (у 1 штука Декоративная дежурного, портье, управляющего и т. п.). перемычка (2) 1 штука Приборная коробка В... - Page 13 Уложите плату в коробку для пустотелых Монтаж стен. Затем наложите на нее деревянную Определите место для монтажа модуля дис- накладку с кнопкой и плотно привинтите танционного включения. ее к стене двумя шурупами 3 x 20. Обратите внимание на то, что фрезерованная выемка На...
- Page 14 Jumper красный светодиод После этого удалите защитную пленку с де- зеленый светодиод коративной накладки. Штекер кабеля подключения Управление В режиме ожидания круглая кнопка не горит, на плате будет медленно мигать зеленый светодиод. Нажмите на кнопку не менее 3 секунд, что- бы...
- Page 15 нальной или иной соответствующей упаковке (ВНИМАНИЕ: опасность транспортных по- вреждений). Отправляйте прибор в обязательном сопро- Изготовитель: вождении данного гарантийного талона, за- EOS Saunatechnik GmbH полнив его надлежащим образом. Schneiderstriesch 1 Транспортные расходы за счет потребителя. 35759 Driedorf При рекламациях за пределами ФРГ следует...
- Page 16 Порядок возврата товара (RMA) - указания для обратной доставки! Уважаемый клиент, мы желаем Вам получить удовольствие от заказанных товаров. В случае, если Вы в порядке исключения будете не совсем довольны товаром, мы просим Вас принять во внимание следующий порядок возврата. Только в этом случае гарантируется быстрый и беспрепятственный возврат. При...
Need help?
Do you have a question about the Fernstart-Saunabus and is the answer not in the manual?
Questions and answers