Advertisement
IMPORTANT:
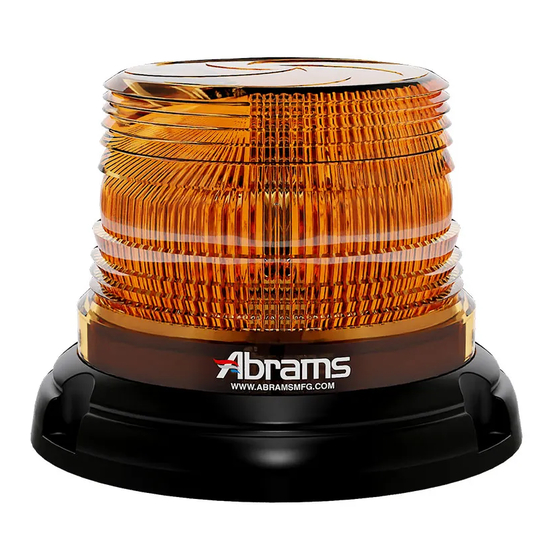
Please read all of the following instructions before installing your new StarEye LED Beacon Series.
Failure to install or use this product according to manufacturer's recommendations may result in property damage, serious injury, and/or
WARNING!!!!
death to those you seek to protect!
*Proper installation of this product requires the installer to have a good understanding of automotive electronics, systems and procedures.
*This product contains high-intensity LEDs. Do not stare directly into these lights. Momentary blindness and/or eye damage could result.
*Use only soap and water to clean the outer lens.
*Do not install this product or route any wires in the deployment area of your air bag. Equipment mounted or located in the air bag deployment area will
damage or reduce the effectiveness of the air bag, or become a projectile that could cause serious personal injury or death. Refer to your vehicle owner manual
for the air bag deployment area. The User/Installer assumes full responsibility to determine proper mounting location, based on providing ultimate safety to
all passengers inside the vehicle.
*If mounting this product requires drilling holes, the installer must be sure that no vehicle components or other vital parts could be damaged by the drilling
process. Check both sides of the mounting surface before drilling begins. Also de-burr any holes and remove any metal shards or remnants. Install grommets
into all wire passage holes.
*Inspect and operate this product regularly to confirm its proper operation and mounting condition. Do not use a pressure washer to clean this product.
*For this product to operate at optimum efficiency, a good electrical connection to chassis ground must be made. The recommended procedure requires the
product ground wire to be connected directly to the NEGATIVE (-) battery post.
*It is recommended that these instructions be stored in a safe place and referred to when performing maintenance and/or reinstallation of this product.
*FAILURE TO FOLLOW THESE SAFETY PRECAUTIONS AND INSTRUCTIONS COULD RESULT IN DAMAGE TO THE PRODUCT OR VEHICLE
AND/OR SERIOUS INJURY TO YOU AND YOUR PASSENGERS!
If this product uses a remote device to activate or control this product, make sure that this control is located in an area that allows both the
vehicle and the control to be operated safely in any driving condition.
Do not attempt to activate or control this device in a hazardous driving situation.
Flash Patterns:
P1.Single Flash 75 FPM Phase 1 (SIM) – sync
P3.Single Flash Rotator 75 FPM
P5.Single Flash 120 FPM Phase 1 (SIM) – sync
P7.Single Flash Rotator 120 FPM
P9.Single Flash 375 FPM Phase 1 (SIM) – sync
P11.Single Flash Rotator 375 FPM
P13.Double Flash 75 FPM Phase 2 (SIM) - sync
P15.Double Flash 130 FPM Phase 2 (SIM) – sync
P17.Triple Flash 130 FPM Phase 1 (SIM) - sync
P19.Quad Flash 75 FPM Phase 1 (SIM) - sync
P21.Quad Flash Rotator 75 FPM
P23.ECE R65 Rotator Flash 60
P25.CA T13 Double Flash 75FPM (SIM)
P27. ModuFlash sim.
P29.Steady Burn
*sync means that pattern has synchronized function*
Phase Operation
Phase 1 (Ph1) flashes simultaneously with Ph1
Phase 2 (Ph2) flashes simultaneously with Ph2
Ph1 alternates with Ph2
Inspect the contents to be certain that the following items are included:
A- LED Beacon
B- Manual
C- Hardware Kit
Wiring:
Red: Positive +10〜30VDC
(need to add 3A Fuse)
Black: Negative
Blue: Pattern Switch
Yellow: Synchronized Function
* Synchronize Feature: Maximum of
8 Beacon can be synchronized*
DUAL SWITCH PLUG (3A FUSE INSIDE):
The One switch have LED is power on/off switch
*
*Another switch is pattern switch
*Input wire: 4C Cable
Note: The PLUG types are not synchronized
Function:
Apply BLUE to BLACK wire or Push Pattern Switch
- Less than 1 sec. for next pattern
- Between 1〜 3 sec. for previous pattern
- Between 3〜 5 sec. for factory default
- More than 5 sec. for turn off
All manuals and user guides at all-guides.com
Installation and Operation Guide
P2.Single Flash 75 FPM Phase 2 (SIM) – sync
P4.Single Flash Rotator 100 FPM
P6.Single Flash 120 FPM Phase 2 (SIM) –sync
P8.Single Flash Rotator 150 FPM
P10.Single Flash 375 FPM Phase 2 (SIM) – sync
P12.Double Flash 75 FPM Phase 1 (SIM) – sync
P14.Double Flash 130 FPM Phase 1 (SIM) - sync
P16.Double Flash Rotator 130 FPM
P18.Triple Flash 130 FPM Phase 2 (SIM) - sync
P20.Quad Flash 75 FPM Phase 2 (SIM) - sync
P22.ECE R65 Rotator Flash 120
P24.CA T13 Single Flash 75FPM (SIM)
P26.NFPA-Quad Flash 75FPM (SIM)
P28.Autorun (Random)
P30.OFF
Recommend Operation Environment
Ambient Temperature: -30 to 50℃ Relative Humidity: 10 to 85% , non-condensing
Troubleshooting
The StarEye LED Beacon series have been factory tested and approved. If the functions of LED Beacon fail, please check
the following:
1. After connecting with the power supply, be sure that the power source end is joined in a correct way. And then, make sure
that there is no short-circuited power occurring.
2. Ensure Power switch is turned to "ON" position.
3. Press the Function Switch to be sure the "OFF" pattern is not selected .If the blue wire touches black wire over 5 seconds,
it would switch to OFF pattern. It would be lighted up again when using blue wire touches black wire over 1 second.
4. Determine the Plug fuse is not broken.
This product was tested and found to be operational at the time of manufacture. Provided this product is
installed and operated in accordance with the manufacturer's recommendations, Abrams guarantees the Edge
Series Light for a period of 5 years from the day of purchase or delivery, whichever is later. Units
demonstrated to be defective within the warranty period will be replaced. Improper installation or use of
inappropriate or inadequate wiring or circuit protection causes the warranty to be void. Failure or destruction
of the product resulting from abuse or unusual use and/or accidents is not covered by this warranty. Abrams
shall in no way be liable for other damages including consequential, indirect or special damages whether loss
is due to negligence or breach of warranty.
ABRAMS MAKES NO OTHER EXPRESS OR IMPLIED WARRANTY INCLUDING, WITHOUT
LIMITATION, WARRANTIES OF FITNESS OR MERCHANTABILITY, WITH RESPECT THIS
PRODUCT.
StarEye Series
B-S1200
Model
Dimensions
Warranty (5 Year Warranty)
T. 844.9.ABRAMS
E. info@Abrams-MFG.com
W. www.Abrams-MFG.com
2013 B
Advertisement
Table of Contents

Related Manuals for Abrams StarEye Series


Summary of Contents for Abrams StarEye Series
- Page 1 Failure or destruction - Between 1〜 3 sec. for previous pattern of the product resulting from abuse or unusual use and/or accidents is not covered by this warranty. Abrams - Between 3〜 5 sec. for factory default shall in no way be liable for other damages including consequential, indirect or special damages whether loss - More than 5 sec.
- Page 2 All manuals and user guides at all-guides.com MAG MOUNT 2013 B...
Need help?
Do you have a question about the StarEye Series and is the answer not in the manual?
Questions and answers