Advertisement
Quick Links
Cantaport made in Japan certified to AU standards
RSC Series Installation Manual
Thank you very much for choosing our company's Cantaport products.
Please be sure to thoroughly read these instructions for assembling the Cantaport product in conjunction with the engineering
details. DIY or Authorisied Cantaport installations must follow the manufactures assembling manual to avoid warranty cover.
Please retain the manual for future reference and maintenance inspection.
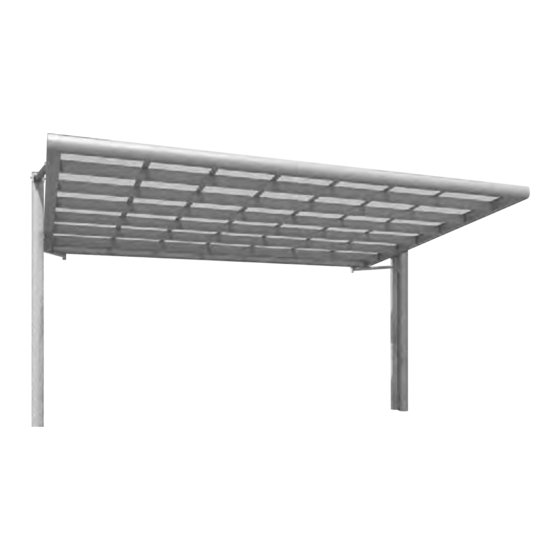
Name of P art
roof retainer
roof rafter
roof panel
side frame
main frame
round gutter
gutter
HZ 0 9 6 6 −E
front frame
ar m
side frame
post
Wide
Advertisement

Related Manuals for cantaport Assembly Instructions

Summary of Contents for cantaport Assembly Instructions
- Page 1 Thank you very much for choosing our company's Cantaport products. Please be sure to thoroughly read these instructions for assembling the Cantaport product in conjunction with the engineering details. DIY or Authorisied Cantaport installations must follow the manufactures assembling manual to avoid warranty cover.
-
Page 2: Colour Selection
Precautions during construction □Follow the instructions and be sure that all the specified screws and bolts for assembly are tightened securely □Tighten the M8 bolts about 13Nm (130kgfcm) tightening torque. □Do not use anything other than the specified parts or accessory parts. □The foundation should comply with the certified engineering specifications page 4 . - Page 3 Dimens ion,P os ition of P os ts and Bas e Dimens ion Dimension,Position of Post Length Dimension(W), Height Dimension(H)and Post Standard Position (post could be changed as the dimension of ← →) 〔Length 50・58size, Height 20 size, 〔 〕Height 23 size〕 Single(D24,D27,D30) Wide(D48,D54,D60) 1089.5(W50) 3464.5(W50) 1100(W50) 3503(W50) 1289.5(W58) 4066.5(W58) 1300(W58) 4105(W58) Depth Dimension(D) 〔Depth24・27・30・48・54・60size〕 Single(D24,D27,D30) Wide(D48,D54,D60) D24:2314 D48:4674 D27:2648 D54:5264 D30:2904 D60:5854...
- Page 4 Base Dimension 1. Concrete Floor more than more than more than more than The projections more than The projections more than which prevent which prevent floating at 4 rounds floating at 4 rounds steel rod steel rod more than more than Length Direction Depth Direction � ln case of using standard size in concrete floor, please install under below condition /N∞Thickness of concrete floor is more than 100mm. /O∞Steel rod and welding wire net are arranged in concrete floor. /P∞Dimension of projection which prevents floating at 4 rounds is more than 50mm○50mm /Q∞Distance ≧ A∞ from outside edge of base to around concrete floor is more than dimension specifications. 2.
- Page 5 P os t・Main Frame Lis t post type section Parts ID main frame type U shaped U shaped U shaped U shaped gutter 5 parts gutter 3 parts gutter 5 parts gutter 3 parts section Parts ID Single Wide component parts component parts type type post post body size body size main frame main frame Depth D Length W standard post long post Depth D Length W standard post long post...
-
Page 6: P Arts Contents
P arts Contents Please open the captioned carton and check all contents in advance. Please check the parts defective or any damage. We packed some extra screw in the parts box.≧x∞number is necessary Q'ty for installation. content content Parts ID Parts ID shape shape name quantity name quantity post set L post set R connecting ≧single∞ post ≧single∞ bracket ≧front frame side∞ post fixing post parts ≧gutter side∞ post post cap connecting parts connecting hexagon bolt bracket ≧with washer,spring washer∞ M8○25 post fixing small truss parts screw 5○10○10... - Page 7 content content Parts ID Parts ID shape shape name quantity name quantity post set R post small truss ≧wide∞ ornament post screw ornament 5○10○10 flat head ornament screw bracket 4○12○8 drilling hexagon nut screw 4○10○8 instruction arm set manual ≧single∞ notice be sure to return to the owner arm set post set R post ≧wide∞ ≧wide∞ ≧front frame side∞...
- Page 8 content content Parts ID Parts ID shape shape name quantity name quantity parts box roof rafter anchor rod ≧single∞ roof rafter arm hanging bracket roof retainer arm holder gutter front frame back plate front frame ≧arm holder∞ ≧single∞ side frame gutter fixing bracket Right Left ≧upper∞ each 2 pcs gutter side frame attachment fixing bracket Right Left ≧end∞ ≧under∞...
- Page 9 content content Parts ID Parts ID shape shape name quantity name quantity parts box parts box drilling screw drilling screw front frame Right Left ≧single∞ each 1 pc front frame Right Left ≧wide∞ each 1 pc gutter cap Right Left ≧single∞ each 1 pc small truss gutter cap screw Right Left ≧wide∞ each 1 pc post ornament arm cap side frame fixing bracket roof panel Right Left cushion each 2 pcs...
- Page 10 content content Parts ID Parts ID shape shape name quantity name quantity parts box parts box snow label elbow caution label assembling drain elbow manual roof panel roof panel ≧polycarbonate SI∞ saddle ≧heat protection polycarbonate∞ ≧heat protection /////FRP∞ When ∩mark is P, it is the polycarbonate mat panel. drilling screw When ∩mark is CP, it is the heat protection polycarbonate panel. When ∩mark is CF, it is the heat protection FRP panel. glue...
-
Page 11: Installation Procedure
Ins tallation P rocedure Assembling the posts Assembling the post ornament Installation of the arm post ornament post post post post fixing parts Installation of the gutter・ Installation of the main frame Installation of the side frame front frame front frame side frame main frame side frame post gutter Installation of the roof rafter Fixing the side frame Installation of the roof panels roof rafter front frame roof rafter front frame side frame panel side frame main frame gutter gutter Attaching the round gutter parts Installation of the roof retainer roof retainer panel post gutter... - Page 12 Ins tallation of P os t step3 U shaped gutter Insert the connecting bracket into the post connecting parts, and fix it with hexagon bolts M8○25. �U shaped gutter of the connecting parts is upper side. hexagon bolt (with washer,spring washer) step1 M8×25 (post set) Attach the connecting brackets step2 on the posts with hexagon bolts Attach the ornament brackets on M8○25. the posts with drilling screw. /5 hole of the ornament bracket is U shaped post side. post connecting parts �Attach the brackets before ≧post set∞ /connecting posts, otherwise it In case of wide, after /can't be screwed. connecting bracket connecting posts put ≧post set∞ the nuts M8 to the bolts ornament bracket M8○25 fixing the ≧post ornament set∞ connecting bracket from post the inside of the post.
- Page 13 As s embling P os t Ornament post ornament cap ≧parts box∞ step1 post ornament Insert the post ornament cover ≧post ornament set∞ from the top and screw it through the post ornament cap with drilling screw 4○10○8. �Don't screw the middle part /of the post ornament cover. post cap drilling screw ≧post set ∞ 4×10×8 (post ornament set) step2 Insert the post caps on the top and screw it with the flat head screw 4○12○8. flat head screw 4×12×8 (post set) ornament bracket ≧post ornament set∞ Install the opposite side in the same way.
- Page 14 Ins tallation of Arm step1 Fix the arm hanging bracket to the post with hexagon bolts M10○150 from the side and M10○25 from the front. arm hanging bracket hexagon bolt ≧parts box∞ M10×150 washer 10 (parts box) ≧parts box∞ hexagon bolt post Be sure to insert M10×95-30 the two washers (parts box) to the bolt M10○95. washer 10 ≧parts box∞ hexagon bolt M10×25 (parts box) spring washer 10 step3 ≧parts box∞ washer 10 Fix the arm to the arm hanging cap nut M10 ≧parts box∞ bracket with hexagon bolts ≧parts box∞ spring washer 10 M10○90. ≧parts box∞ cap nut M10 drilling screw washer 10...
- Page 15 Ins tallation of S ide Frame hexagon bolt (with washer,spring washer) step1 M8×20 (parts box) Insert the back plate (arm holder) into the front frame side of the side frame. Fix the arm holder to the back plate with hexagon bolts M8○20. note arm holder This figure is front frame side. Insert the back plate into the upper side of holder part. back plate back plate ≧arm holder∞ side frame side frame front frame side side frame A view fixing bracket ≧upper∞ hexagon bolt (with washer,spring washer) M8×20 (parts box) step2 Insert the 2pcs back plates (side frame fixing bracket) into the gutter side of the side ...
- Page 16 hexagon bolt M10×95-30 washer 10 step3 (parts box) ≧parts box∞ Be sure to insert the Fix the side frame fixing two washers to the bolt bracket (under) to the washer 10 M10○95. post with hexagon bolts ≧parts box∞ M10○25. spring washer 10 ≧parts box∞ step6 cap nut M10 arm holder side frame ≧parts box∞ fixing bracket ≧upper∞ ≧parts box∞ Fix the bolt M8○20 of ≧parts box∞ the side frame step5 completely. side frame Fix the arm to the arm holder with hexagon bolts M10○95. step4 post side frame Put the side frame on the side fixing bracket ≧under∞ frame fixing bracket(under), and ...
- Page 17 small truss screw 5×10×10 (parts box) step2 After connecting each frames with gutter small truss screws as figure, Insert side the gutter caps and the front frame caps. side frame small truss screw 5×10×10 (parts box) gutter gutter cap front frame side silicon side frame step3 Do silicon work from the inside at the connecting part front frame cap front frame of the gutter caps as below figure. side frame gutter cap note Gutter cap must seal it at this stage /because it's impossible after /installation. Do not seal front frame caps at this /stage, do it after /"/ Installation of the roof retainer ". gutter...
- Page 18 Ins tallation of Main Frame roof panel step1 cushion Attach the roof panel cushions on the top side of all main frames in the center of the notch. A view Attach the roof panel cus hion on the high fin s ide. When attaching the roof panel main frame cus hion,be s ure not to be comes off. 〈S ingle〉 〈Wide〉 roof panel roof panel cushion cushion A view main main frame frame step2 The fin notch faces to gutter side and set it up into side frame with small truss screws. main frame 〈S ingle〉 〈Wide〉 gutter side side frame...
- Page 19 Ins tallation of Roof Rafter Before installing roof rafter Check post interval, flat, and diagonal dimension of roof. In case of not comes out of diagonal dimension precisely, loosing screws at front, gutter, main and side frame and then adjust them one more time. step1 The roof rafter has the Put the roof rafter into the front-back direction. front frame and screw it with driling screws 4○10○8. mark is the front frame side guide hole roof rafter front frame drilling screw A part 4×10×8 (parts box) B part B part B part B part B part step2 A part Screw it to the main gutter frame with driling screws 4○10○8. At A part, screw it to step3 B part detail guide hole . 〈S ingle〉 〈Wide〉...
- Page 20 Fixing S ide Frame step2 After making 3 holes to the side frame guiding holes of the arm holder, fix the arm holder to the side frame with driling screws tighten. (Hole position refer the below screwing points.∞ After making 3 holes to the side step1 arm holder frame guiding holes of the side frame fixing bracket ≧upper∞ ≧ under∞ , fix the side frame to the bracket with driling screws 5○16○10 tighten. side frame fixing bracket ≧upper∞ standard position seal side frame Screwing points of the arm holder side frame fix two screws in 〈S ingle〉 the center side frame fixing bracket ≧under∞ standard position 〈Wide〉 fix all six screws seal drilling screw 5×16×10 (parts box)...
- Page 21 Ins tallation of Roof P anels step1 Peel off the protective sheeting, and put the rolled roof panel on the roof panel rafter. Spread it from front frame side to the gutter side. front frame gutter Roll the panel as the label indicating sunny side of polycarbonate and heat protection polycarbonate is inside, and the unevenness side of FRP is outside. step3 small truss step2 screws Adjusting the position of the 5×10×10 Insert the panel into (parts set) roof panel fix the gutter the front frame. attachment with small truss gutter attachment screws 5○10○10 temporarily. panel Position the roof panel end at 18mm from the fin of the gutter. front frame gutter Sort the panel equally gutter note When using the polycarbonate mat≧SI∞...
- Page 22 Ins tallation of Roof Retainer Do silicon work from the step1 step4 inside at the connecting part Insert the roof retainer into of the front frame caps as the front and strike to the below figure. attached rubber bead. front frame cap roof retainer rubber bead side frame front frame panel small truss screw silicon 4×10×7 end roof retainer (parts set) ≧side frame set∞ step3 Screw the gutter attachment completely. front frame panel step2 gutter attachment Screw the roof retainer in order from the front frame side with small truss screws 4○10○7. roof retainer ≧middle∞ Screw the roof retainer≧end∞...
- Page 23 Attaching Round G utter P arts The length of the round gutter is different according to the post position and the height dimension. Cut to the proper length onsite. 〈S ingle〉 〈Wide〉 Install the rain gutter Install the rain gutter either one of right and both side of right and left. left. Installation of rain gutter Installation of gutter hole cap � Put the gutter hole cap to the unnecessary hole. The gutter hole cap is no need for Wide. drilling screw 4×10×8 drilling screw (parts box) 4×10×8 (parts box) gasket ≧parts box∞ gutter hole cap gutter attachment ≧parts box∞ ≧parts box∞ drain elbow ≧parts box∞ Detailed figure of the silicon part Be sure to do sealing work around round gutter screws in order to prevent danger ≧side frame set∞...
Need help?
Do you have a question about the Assembly Instructions and is the answer not in the manual?
Questions and answers