Table of Contents
Advertisement
Advertisement
Table of Contents

Related Manuals for Crosley Crosley Mission Stack-O-Matic CR72


Summary of Contents for Crosley Crosley Mission Stack-O-Matic CR72
- Page 1 CR72 910-252300-001...
-
Page 2: Warranty
Crosley Radio to service the product. This warranty does not cover products sold AS IS or consumables (such as fuses or batteries). This warranty is valid only in the United States. -
Page 3: Troubleshooting
Turntable will not work Make sure the function switch is set to phono. Make sure the needle cover is flipped up. Check the Turntable switch to make sure it is in the ON position. CD does not play Check to make sure CD is inserted correctly (label side facing up). - Page 4 RISK OF ELECTRIC SHOCKithin707157k043 36.n poi6 Tm096 (DO NOT OPEN on bottom73.8444956.88.79l1533.604.807156.88.79l1l33.604.807156.87.3 The exclamation point within an equilateral triangle is intended to alert user to the presence of important operating and maintenance (servicing) instruction in the literature accompanying the appliance. •Marking plate was located on bottom enclosure...
-
Page 5: Repeat Playback
Table of Contents Getting Started Control Locators... 4,5 Unpacking... 6 About This Manual Power Source... 6 Basic Operation Turntable Operation... 7 Accessory: Adapter for 45 rpm ... 7 Cassette Operation... 8 Radio Operation... 8 CD Operation Playing A CD... 9,10 Programmed Playback... -
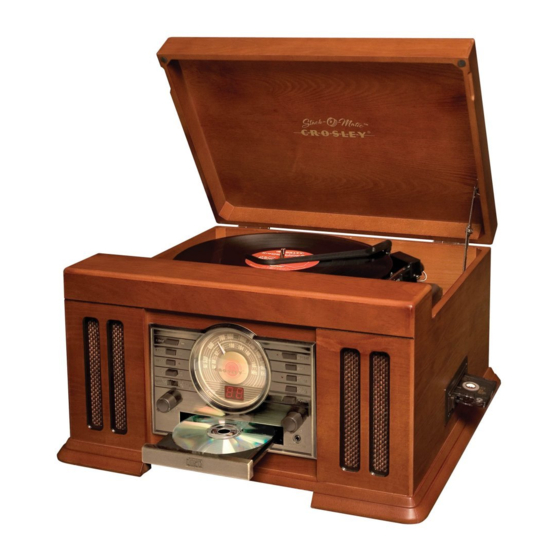
Page 6: Control Locators
Control Locators Unit Controls Speakers Tuner Dial Forward Skip Button Backward Skip Button Program Indicator Program Button AM/FM Button Function Switch Volume Knob 10 Repeat Indicator 11 Repeat Button 12 Stop Button 13 Play/Pause Indicator 14 Play/Pause Button 15 Open/Close Button 16 Power Button 17 Tuning Knob 18 Headphone Jack... -
Page 7: Radio Operation
NOTE: Remove the tape from the unit when it is not not connect the FM WIRE ANTENNA (34) to any in use or stopped. outside antenna. Unit Controls Turntable Supension Screw Center Spindle Tension Arm Tone Arm Size Select Switch... -
Page 8: Getting Started
Note : Adjust the screws one turn at a time and check the last record is finished, the TONE ARM (25) will adjustment after each turn. return to its rest and the turntable will shut off. To manually switch to the next record during playback, move the TURNTABLE SWITCH (28) to the “AUTO”...
Need help?
Do you have a question about the Crosley Mission Stack-O-Matic CR72 and is the answer not in the manual?
Questions and answers