Table of Contents
Advertisement
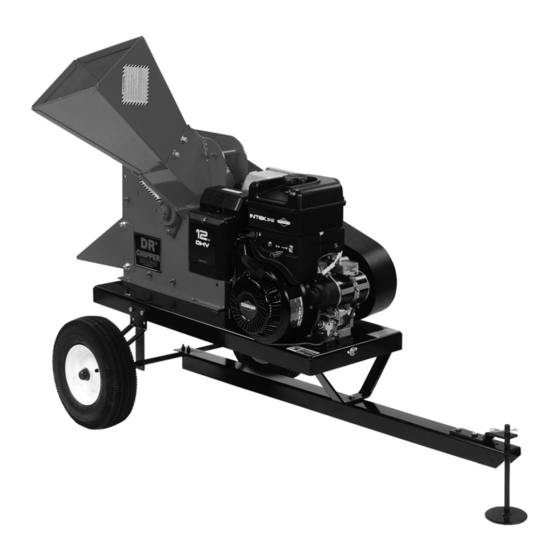
DR CHIPPER
Operating & Assembly Instruction Manual
Model: 12.0 HP
C123E-CHP
This manual contains information concerning proper and improper operating procedures,
warnings, maintenance, troubleshooting, assembly, and tips. Everyone who operates this
machine should read these instructions and be thoroughly familiar with them.
P/N 913-0046
12/30/03
Advertisement
Table of Contents

Related Manuals for Country Home Products DR CHIPPER C123E-CHP

Summary of Contents for Country Home Products DR CHIPPER C123E-CHP
- Page 1 DR CHIPPER Operating & Assembly Instruction Manual Model: 12.0 HP C123E-CHP This manual contains information concerning proper and improper operating procedures, warnings, maintenance, troubleshooting, assembly, and tips. Everyone who operates this machine should read these instructions and be thoroughly familiar with them.
-
Page 2: Section I - Safety
THIS MACHINE IS CAPABLE OF INFLICTING SERIOUS INJURY OPERATED IMPROPERLY -- READ WARNINGS & CAUTION LABELS. Never use your chipper for any other purpose than chipping limbs. It is designed for this use and any other use many cause serious injury. - Page 3 WARNING : The Engine Exhaust from this product contains chemicals known to the state of California to cause cancer, birth def MAKE CERTAIN THAT ALL SAFETY LABELS ON THIS EQUIPMENT ARE KEPT CLEAN AND IN GOOD CONDITION. IF YOU NEED REPLACEMENT LABELS, ORDER BY PART NUMBER.
- Page 4 091-0057 091-0059 091-0062 091-0088 091-0256...
- Page 5 091-0380 091-0381 913-0265...
-
Page 6: Safe Operation Practices
Keep in mind that the operator or user is responsible for accidents or hazards occurring to other people, their property, and themselves. • Your chipper is a powerful tool, not a plaything. Exercise extreme caution at all times. Your unit has been designed to chip. Do not use it for any other purpose. •... - Page 7 • Never place your hands, feet, or any part of your body in the chipper chute, discharge opening, or near or under any moving part while the engine is running. Keep clear of the discharge opening at all times. If it becomes necessary to push material into the chipper chute, use a small diameter stick, NOT YOUR HANDS.
- Page 8 Check engine mounting bolts and other hardware at frequent intervals for proper tightness. Never operate your chipper in poor mechanical condition or when in need of repair. Be sure all safety guards and shields are in proper position. These safety devices are for your protection.
-
Page 9: Your Responsibility
Only operate your chipper from the operator zone. • Know how to turn your unit off. • Never move your chipper or leave it unattended with the engine running. • Follow engine owner’s manual for engine maintenance and repair. •... -
Page 10: Section Ii - Assembly Instructions
1. Remove the carton and place the unit on its wheels. 2. After unpacking the shipping carton, compare the contents with the list above. 3. If any parts are missing or damaged, contact Country Home Products at 800-376-9637. 4. Assembly should be done on a clean, level surface. -
Page 11: Section Iii - Operation
BEFORE STARTING ENGINE, ALWAYS CHECK OIL LEVEL! Refer to the engine owner’s manual for further details regarding OPERATION AND MAINTENANCE OF the engine. NOTE: ENGINE IS SHIPPED WITHOUT OIL! FILL CRANKCASE WITH OIL BEFORE STARTING ENGINE. BE VERY CAREFUL NOT TO ALLOW DIRT TO ENTER THE ENGINE WHEN CHECKING OR ADDING OIL OR FUEL. -
Page 12: Checking And Adding Oil
• Check oil level before starting the engine. • Check level daily, or after every eight hours. • Keep oil level at FULL. • Do not overfill. Oil filling procedure: • Place engine level and clean around oil fill area. •... -
Page 13: Starting And Stopping
• Always wear protective gloves and safety glasses during operation of the chipper. • If it becomes necessary to push material into the chipper hopper, only use a wood stick, never your hands or anything steel. -
Page 14: Section Iv - Chipping
• If branches are 2” or larger in diameter, feed only one branch at a time into the chipper. • If branches are smaller than 2”, more than one at a time can be fed into the chipper. - Page 15 LIMBS. • CHECK TO SEE THAT THE FLYWHEEL WILL TURN FREELY BEFORE YOU START THE CHIPPER. • VISUALLY CHECK CHIPPER KNIFE FOR DAMAGE EACH TIME YOU USE YOUR CHIPPER. • CHECK KNIFE CONDITION, WEAR PLATE CONDITION, GAP SETTING AND THE NUTS AND BOLTS THAT HOLD THE KNIFE IN PLACE FOR TIGHTNESS EVERY 8-10 HOURS OF OPERATION.
-
Page 16: To Free A Jammed Flywheel
• Remove the spark plug wire and keep away from the spark plug. • Disconnect battery at negative terminal (if so equipped). • Remove any material left in the chipper hopper. • Remove the deflector. NOTE: Never pry against the scroll weldment when removing the deflector or at any other time. -
Page 17: Section V - Maintenance And Storage
Check for loose parts, bolts, and nuts. 1. When not in use, your chipper should be stored out of the reach of children. Be sure there are no gasoline fumes in the storage area. For long periods of storage (over winter), refer to the engine owner’s manual. -
Page 18: Knife Sharpening
• The chipper knife (or knives) should be taken to a machine shop for proper sharpening. • If your chipper is equipped with two knives, it is extremely important that they be balanced to equal weights to eliminate vibration. • If your chipper is equipped with two knives, replace in pairs only. -
Page 19: Knife Installation
• Visually inspect and clean the knife. • Hand tighten the knife to the chipper disk with bolts and nylock locking nuts. If you are installing a new knife, use the new hardware that comes with the knife when attaching it to the chipper disk. -
Page 20: Changing Oil
BE SURE TO REINSTALL THE KNIFE CORRECTLY AND DOUBLE CHANGING OIL • Your chipper is equipped with an oil drain valve to make changing the oil easy. • The valve is located on the engine, on the towing side of the machine. -
Page 21: Belt Replacement
INSTRUCTIONS FOR ADJUSTING OR REPLACING BELT BELT ADJUSTMENT The belt on your chipper should deflect 3/8” under three pounds of pressure as shown in figure 1 below. If it doesn’t, adjust per the following directions. • Remove belt guard. • Loosen engine bolts. - Page 22 Do not operate at less than full RPM’s. • At engine start-up, the engine of your chipper operates under no load until approximately 1000-1200 RPM’S at which speed the centrifugal clutch engages and begins driving the rotor.
-
Page 23: Clutch Maintenance
CLUTCH MAINTENANCE The centrifugal clutch on this machine is permanently lubricated and does not require oil or grease. If, after long periods of use, the drum wobbles excessively, replace the drum assembly. Always replace shoes and springs in sets. Whenever shoes are changed, replace all springs. - Page 24 030-0202 CLUTCH BREAKDOWN Item Part No. 030-0202-3 030-0164-2 030-0202-5 030-0202-2 030-0202-1 030-0164-6 Not Shown 030-0202-6 Description Hub Assembly Shoe Spring Drum Assembly Retaining Ring Retaining Ring Roller Bearing...
-
Page 25: Troubleshooting
Flywheel won’t turn. Chipping action seems too slow or flywheel stalling. When chipping, log seems to vibrate excessively & “hammers” hands. Chipper knife is hitting wear plate. Engine runs but flywheel doesn’t rotate. TROUBLESHOOTING PROBLEM Clutch is slipping or flywheel is jammed or stopped. -
Page 26: Lubrication And Maintenance
• Check belt tension. • Check all nuts and bolts for tightness. • Check engine oil. • Check chipper knife for sharpness. • Check knife and wear plate gap. • Clean air filter. • Grease bearings in basic chipper. -
Page 27: Section Vi - Parts List & Assembly Drawings
SECTION VI – PARTS LIST & ASSEMBLY DRAWINGS... - Page 28 080-0053 090-0610 090-0077 030-0350 805-0180 030-0387 030-0388 030-0389 913-0097 913-0098 CHECK OIL LEVEL BEFORE STARTING CHIPPER DESCRIPTION FRAME WELDMENT TOW BEAM HITCH PLATE AXLE AXLE BRACKET TIRES PUSH CAP BASIC CHIPPER MACHINE DEFLECTOR 12 HP B&S INTEK ELECT START ENGINE...
- Page 30 DRIVE SIDE PLATE WELDMENT 5/16-18 NYLOCK NUT KNIFE 5/16-18 X 1 ½” FHSHCS CHIPPER DISK SCROLL WELDMENT CHIPPER SIDE PLATE WELDMENT ¼-20 NYLOCK LOCKNUT ¼ SAE FLATWASHER 5/16-18 X 4” HHCS 5/16-18 X ¾” CARRIAGE BOLT CHIPPER HOPPER WEAR PLATE ¼-20 X 1”...
- Page 32 NOTES COUNTRY HOME PRODUCTS Meigs Road, P.O. Box 25, Vergennes, Vermont 05491 1(800)DR-OWNER(376-9637) 12/30/03...
Need help?
Do you have a question about the DR CHIPPER C123E-CHP and is the answer not in the manual?
Questions and answers
Was inquiring if there is a wiring diagram available for this model.
No, the provided information does not include a wiring diagram for the Country Home Products DR CHIPPER C123E-CHP.
This answer is automatically generated