
Related Manuals for Steffes 5120


Summary of Contents for Steffes 5120
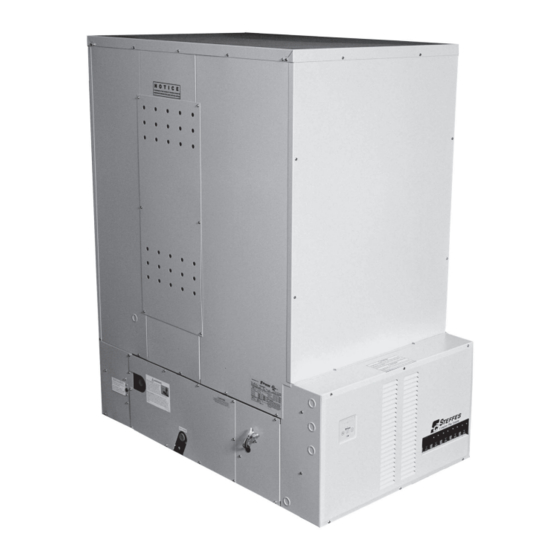
- Page 1 OWNER'S AND INSTALLER'S MANUAL Comfort Plus Hydronic Heating Systems Equipped with Variable Speed for Optional Air Handler Models: 5120, 5130, & 5140 Applicable to Software Version 2.00 - 2.19...
- Page 2 Children shall not play with the appliance. • Disclaimer: In compiling this manual, Steffes has used its best judgement based upon information available, but disclaims any responsibility or liability for any errors or miscalculations contained herein, or any revisions hereof, or which result, in whole or in part, from the use of this manual or any revisions hereof.
- Page 3 SAFETY PRECAUTIONS WARNING Install all ceramic heat storage brick before energizing the system. Failure to do so may result Risk of explosion. Can cause injury or in equipment damage. death. Operating the system without the pressure relief valve installed can cause Install the pressure relief valve provided before an explosion.
-
Page 4: Table Of Contents
Table of Contents Operation General Operation .................................1.01 System Use During Construction Phase ..........................1.01 System Start-up ..................................1.01 Turning System "OFF" and "ON" ............................1.01 Control Panel ..................................1.02 Operating Status ..................................1.02 Room Temperature Control ..............................1.03 Brick Core Charge Control ..............................1.03 Charge Control Override ................................1.03 Maintenance and Cleaning ..............................1.03 Optional Accessories Single Electrical Feed Kit ..............................2.01... -
Page 5: General Operation
Operation GENERAL OPERATION The Steffes Comfort Plus Hydronic heating system stores off-peak electricity in the form of heat. Off-peak electricity is available during times of the day or night when electricity is plentiful and the power company may supply it at a lower cost. -
Page 6: Control Panel
AM and PM Indicator Lights The AM and PM indicator lights are only utilized if the Steffes Time Clock Module is being installed and using 12 hour time display. With this module installed, the system displays time on AM/PM intervals. -
Page 7: Room Temperature Control
(PSI) as low water levels cause poor performance and possible damage to the system. Ask the installer of the equipment for information on how to measure these levels. When using the Steffes Air Handler with the Comfort Plus Hydronic System, periodically check and replace the air filter. -
Page 8: Optional Accessories
The Comfort Plus Hydronic system requires a primary water loop which serves to regulate heat transfer from the unit’s heat exchanger. To minimize installation time and costs for field design and engineering of this loop, Steffes offers a primary loop kit. The kit contains the components generally installed with hydronic heat systems. -
Page 9: Comfort Plus Stand
Some applications (such as garages) may require that the heating appliance be elevated in order to meet building codes. The Steffes Comfort Plus stand elevates the 4100 or 5100 series Comfort Plus system 18". This stand is shipped as a kit and requires field assembly. -
Page 10: Installation
The information below describes the items shipped with each system: INFORMATION PACKAGE HEATING ELEMENTS (includes Owner's Manual, Quick Reference Guide, and Warranty Registration Card) MODEL ELEMENTS 5120 5130 5140 (shipped in box above electrical compartment) (adhered to outer side of shipping box) -
Page 11: Placement And Clearance Requirements
FIGURE 2 6" REQUIRED CLEARANCE 5140 3" REQUIRED CLEARANCE Front View " TOP VIEW 5130 " FRONT VIEW 36" REQUIRED 5120 CLEARANCE 3" REQUIRED CLEARANCE " 3" REQUIRED CLEARANCE 36" REQUIRED TEFFES CLEARANCE 36" REQUIRED CLEARANCE TEFFES ELECTRI C THERMAL STORAGE 29 3 16 "... -
Page 12: Initial Set
INITIAL SET-UP Step 1 Remove the Information Package from the outside of the IMPORTANT shipping box and unpackage the Comfort Plus Hydronic heating system. To ensure proper operation, read and Step 2 Move the heating system into its installation location. follow installation instructions carefully. -
Page 13: Heating Element And Air Channel Installation
Rows 2, 4, 6, 8, 10 and 12 in 5140 Indicator in Brick Half Brick Half Brick 5120 - Load in Row 5 Rear Facing Indicator 5130 - Load in Row 4 and 8 5140 - Load in Row 6 and 12... -
Page 14: Brick Core Temperature Sensor Installation
BRICK CORE TEMPERATURE SENSOR INSTALLATION Step 1 Remove the screw(s) around the brick core temperature sensor CAUTION hole(s) in the galvanized front panel. NOTE: Models 5130 and 5140 have an upper and a lower Risk of improper operation. brick core temperature sensor. Proper installation of the brick core temperature sensor(s) Step 2... - Page 15 (See Figure 10.) The maximum connected amperage on either of these circuits is 1.2 amps. Step 3 Attach the junction box cover using the screws provided. 5120 Line Voltage LINE VOLTAGE WIRING DIAGRAM Wiring Diagram 240/208 Volt FIGURE 10 Use copper or aluminum conductors rated at 75°C or higher for field connections of this device.
-
Page 16: Low Voltage Electrical Connections Peak Control
TIME CLOCK MODULE PEAK CONTROL The Steffes Time Clock Module is another option for providing a peak control signal to the Comfort Plus Hydronic. It mounts inside the system’s low voltage electrical compartment and interfaces with the relay board via an inter- face cable. - Page 17 TEMPERATURE SENSOR (REQUIRED) Installation Methods: A) Hard wired to system to the two IMPORTANT "Outdoor" terminals (default) If connecting to the Steffes power line B) Connected to Power Line Carrier carrier (PLC) system, follow the instal- (PLC) lation instructions in the PLC system's Owner's and Installer's Guide.
- Page 18 A low voltage (24VAC) room thermostat is required for room temperature control with the Comfort Plus Hydronic system. Steffes recommends using a digital thermostat. If utilizing a mechanical thermostat, a load resistor may be necessary due to the low current draw (.01 amps) on the heat call input circuit of the Comfort Plus system. Contact the factory for information on thermostats available from Steffes.
-
Page 19: Outdoor Temperature Sensor
SINGLE STAGE HEAT PUMP APPLICATION FIGURE 14 Hydronic Heat Thermostat, Zone Valve End Switch, or Pump Control Honeywell TH5220D To Heat Pump Y - Compressor C - Low Voltage Common R - Low Voltage Hot O - Reversing Valve W - Not Used G O/B Outdoor Sensor IMPORTANT... -
Page 20: Pressure Relief Valve Installation
PRESSURE RELIEF VALVE INSTALLATION WARNING Risk of explosion. Can cause injury or death. The factory supplied pressure relief valve MUST be connected to the system with the supplied fittings. DO NOT modify this assembly. DO NOT cap, plug, or otherwise obstruct the outlet of the pressure relief valve. - Page 21 Set Temperature PUMP SPECIFICATIONS • Steffes recommends a Taco 007 or equivalent single speed 115VAC pump for the primary pump. • Air Handler pump should NOT be a split phase pump. • Air Handler pump should NOT have any type of auxiliary control built into or onto the pump.
-
Page 22: Auxiliary Load Control
Use of a check valve, zone valve, or other device may help prevent involuntary flow. TYPICAL SYSTEM PLUMBING (SHOWN WITH STEFFES AIR HANDLER) FIGURE 18 Secondary Loop Primary Loop... -
Page 23: Configuration Menu
C003 Power Line Carrier (PLC) Channel Selection - If using PLC communication, this setting must match the channel setting in the Steffes PLC transmitting device. A value of zero indicates power line carrier communication is disabled. C004... - Page 24 C013-C021 Time Clock Module Configuration - These configuration settings are used to configure the peak control times when utilizing the optional Steffes Time Clock Module. Refer to the installation and configuration instructions included with the module for more information NOTE: 208V SYSTEMS ONLY: In standard configuration, Steffes heaters are dual rated for 240V and 208V power connections.
-
Page 25: Installer's Final Check-Out Procedure
Step 11 Verify, once again, that the “Operating Mode” displayed on the control panel corresponds with the power company's peak control signal. Step 12 In applications utilizing the Steffes Power Line Carrier control system, complete the Installer’s Final Check-out Procedure in the Owner’s and Installer’s Manual provided with that device. -
Page 26: Appendix
In addition, if the unit is not installed within the heated area, heat lost statically must be taken into account when sizing a system. Contact Steffes for assistance in selecting an appropriately sized system. -
Page 27: Parts Diagram
PARTS DIAGRAM Comfort Plus Hydronic Appendix A.02... -
Page 28: Parts List
PARTS LIST NOTE: When ordering parts, please include the system model and serial number. DWG. REF. DESCRIPTION 5120 5130 5140 ITEM NO. ITEM NO. ITEM NO. Electrical Panel Cover 5940853 5940852 5940852 (non-recessed breakers) " Electrical Panel Cover 5940845 5940845... - Page 29 PARTS LIST - CONTINUED NOTE: When ordering parts, please include the system model and serial number. DWG. REF. DESCRIPTION 5120 5130 5140 ITEM NO. ITEM NO. ITEM NO. Core Limit Jumper 1041710 1041710 1041710 Left Side Front Painted Panel 5940597...
-
Page 30: Internal System Wiring Diagrams - Line Voltage
INTERNAL SYSTEM WIRING DIAGRAMS - LINE VOLTAGE Line Voltage Wiring Diagram - Model 5120 240V OR 208V SYSTEMS ONLY NOTE: Use copper or aluminum conductors rated for 75°C or higher for field connection of this device. NOTE 1: Line Voltage Field Wiring Connections. See Figure 9 for information on proper circuit phasing. - Page 31 INTERNAL SYSTEM WIRING DIAGRAMS - LINE VOLTAGE Line Voltage Wiring Diagram - Model 5130 240V OR 208V SYSTEMS ONLY NOTE: Use copper or aluminum conductors rated for 75°C or higher for field connection of this device. NOTE 1: Line Voltage Field Wiring Connections. See Figure 9 for information on proper circuit phasing. NOTE 2: For more information regarding pump (circulator) wiring, reference Figures 10, 16 and 17 in the Installation section of this manual.
- Page 32 INTERNAL SYSTEM WIRING DIAGRAMS - LINE VOLTAGE Line Voltage Wiring Diagram - Model 5140 240V OR 208V SYSTEMS ONLY NOTE: Use copper or aluminum conductors rated for 75°C or higher for field connection of this device. NOTE 1: Line Voltage Field Wiring Connections. See Figure 9 for information on proper circuit phasing. NOTE 2: For more information regarding pump (circulator) wiring, reference Figures 10, 16 and 17 in the Installation section of this manual.
-
Page 33: Internal System Wiring Diagram - Low Voltage
24 VAC for powering be segregated from line voltage external low voltage devices (60 VA maximum). circuits in the system. UPPER CORE THERMOCOUPLE YELLOW 5130/5140 LOWER CORE THERMOCOUPLE YELLOW 5120/5130/5140 CONTROL BOARD "R" YELLOW "Y2" YELLOW/BLACK ORANGE "R" "O2"... -
Page 34: Help Menu
HELP MENU The Comfort Plus Hydronic system contains a "HELP" menu which may be accessed through the control panel. To access the "HELP" menu, press and release the M button until the faceplate displays “HELP”. Scroll through this menu by pressing either the up or the down arrow button. Display Reading Description... - Page 35 There is no communication occurring with the second relay expansion board. The board interface cable may be defective or the second expansion board may be unresponsive. There is no communication occurring with the Steffes time clock module. Temperature sensor offset/reference is out of range and indicates one of the sensors is shorted to ground, the processor control board is out of calibration, or the blower/control circuit is connected to an improper input voltage.
-
Page 36: Disassembling The Comfort Plus Hydronic System
Can be broken down into individual panels. 29 3/16" 42 5/16" FIGURE A 4140/5140 56" 4130/5130 45" 4120/5120 28 7/8" 38 1/8" 34 1/2" FIGURE B 4140/5140 54 3/4" 4130/5130 43 3/4" 4120/5120 32 3/4"... -
Page 37: Glossary
GLOSSARY Air Separator ~ Device used to remove air from Location Value ~ The specific information set and the water so the air does not get into the closed loop stored in a location on the system's microprocessor system and cause damage to other components or which defines system operation. -
Page 40: Warranty
WARRANTY STATEMENT Steffes Corporation warrants for a period of five (5) years following delivery, limited to seven (7) years from date of manufacture, of any goods provided under this Agreement that the goods purchased hereunder will be of merchant- able quality, free from defects in material and workmanship, and that the goods provided will be new and conform to the mechanical and performance specifications referenced in any drawings provided by Steffes Corporation.
Need help?
Do you have a question about the 5120 and is the answer not in the manual?
Questions and answers