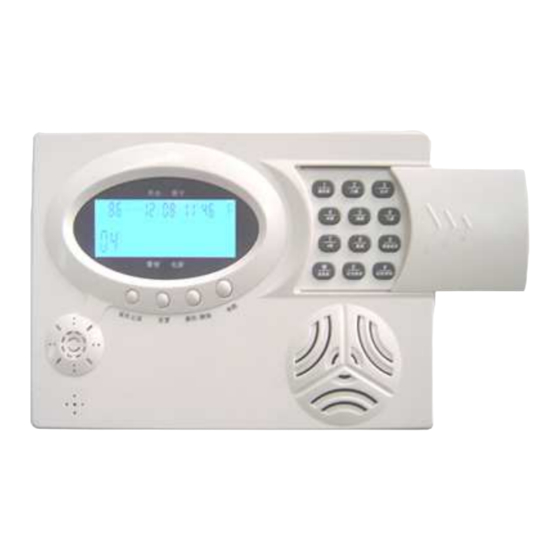
Summary of Contents for ARGSeguridad ZDAS-300
- Page 1 Luxury Voiced LCD Alarm System USER’S MANUAL Model: ZDAS-300 Thank you for choosing our panel Ple ase read th e manual carefu lly befo re fix in g it.
-
Page 3: Table Of Contents
Quick reference Table of Contents 00: C.S. Comms. 11= send out information about arming, disarming and alarms; 10 = only send out the alarm information; 00= not net work. 1 OVERVIEW................1 01: Exit delay time. The time is double-digit (XX). The actual time is the product of XX times 1.1 Introduction .............. -
Page 4: Overview
1.OVERVIEW 1.1 Introduction 1. Blue backup LCD display everything you want to konw about the panel. 2. Full compliance with ADEMCO Contact ID. a. when alarming, you can hear which sensor in which zone is alarming b. voice prompt you how to operate for every step 3 . -
Page 5: Component Parts
The above chart shows the basic principle of operation of the System. The security Zone 3 selected system contains alarm panel, remote key fob, pir detectors, door/window magnetic contact and high decibel integral siren Also available are some optional Devices such as wired/ TYPE wireless Smoke detectors, Gas detector, Flood detector, Temperature detector.The wireless detector Communicates to the Control Panel by radio on 433 MHZ Frequency and each... -
Page 6: Description
Wired/Wireless Smoke detector: (option) 5 ZONE CONFIGURATION AND EXPLANATION The Smoke detector is used to detect potentially dangerous smoke emissions in the home. Once the detector detects the presence of smoke as a danger and possible Fire Risk it will Zone 7 selected transmit an alarm signal to the control panel and also activate its own integral local sounder. -
Page 7: The Lcd Character Details And Description
Note: If after 15 seconds the user does not press the * key to confirm the alarm, the panel will GND: the negative electrode of the auto dial next phone number. power supply , siren , wired After the entry of the listening in status, the next operating steps are same as the remote detector and alarm output control In section 4.9 previous. - Page 8 After entering correct PIN code the panel will follow the instructions given using the If no action has been performed on the keypad and the panel is in the DISARMED mode, DTMF tones from the keypad of the remote phone. the panel LCD screen will show as following: Press 1 to tell the panel to switch to listen in mode Press 2 to tell the panel to switch to speak mode...
-
Page 9: Installation Information
4.5 Selectable key fob require assistance with/without sounder How to set the function: Press 'Sensor ’ key and - - - appears on the LCD. Press the disarm key on the registered Key Fob or entering the preprogrammed PIN code, LCD will display 'DEL Sensor' Use Key pad to select Zone(s) 0, then select key fob number 1 to 9.Program the character of the Key Fob with 0 or 1 to suit. -
Page 10: Registering Key Fobs
4.2 24 Hours Arming 3.2 Registering Key Fobs 24 hours arming is used for the detectors ( i.e. smoke detector and gas detector etc ), These zones are armed 24 hours whether the system is armed or disarmed. They can at no Logging in Key Fob: Press the PROG key on the Keypad, a series of - - - will appear on time be omitted or disarmed. -
Page 11: Installing Wired Detector
4 USER INFORMATION: 3.4 Installing wired detector and its zone setting: Various wired detector could be connected to the panel via the N.C terminal. Seven wired connection in all, and the terminals for connection are 1\2\3\4 \5\6\7, GND is the common 4.1 Methods of Arming and Disarming terminal. -
Page 12: Deleting Registered Key Fobs
Press the key fob Dis-Arm will return the control panel back to normal status. Otherwise If no further actions take place the panel will automatically return to normal state after the Walk Test will Auto extinguish approximately 30 seconds after last test signal was approximately 30 seconds. - Page 13 If no further actions take place the panel will automatically return to normal state after How to allocate and set zones: Press the PROG key on the Keypad, a series of - - - will approximately 30 seconds. Otherwise at the end, press the ESC on the keypad or the Dis-Arm appear on the LCD.
-
Page 14: The System Configuration Setting
N.B. For a more detailed example refer to section 5. Zone Configuration and Explanation. If no further actions take place the panel will automatically return to normal state after approximately 30 seconds. Otherwise at the end, press the Dis-Arm key on a registered Key Fob to return the panel to normal state. - Page 15 08: Setting time and date. The system time should be set with Year-Month-Date Figure13: The LCD display when NO 2 remote armed the system Hour-Minute - Day using the numeric keypad of the panel. 7 = Sunday; 1 = Monday; 2 = Tuesday; 3 = Wednesday; ARMED 4 = Thursday;...
-
Page 16: The Phone Numbers Setting
Press disarming key on any current registered key fob or entering the preprogrammed PIN code, and the word 'Sensor' will appear on the LCD. Pressing the * key on the Keypad, System config Auto disarmed time the LCD will show the words 'Zone type'. Pressing the # key on the Keypad, the LCD will show the words 'SYS phone'.

Need help?
Do you have a question about the ZDAS-300 and is the answer not in the manual?
Questions and answers