
Related Manuals for Kera SELENA HY-4 Series

Summary of Contents for Kera SELENA HY-4 Series
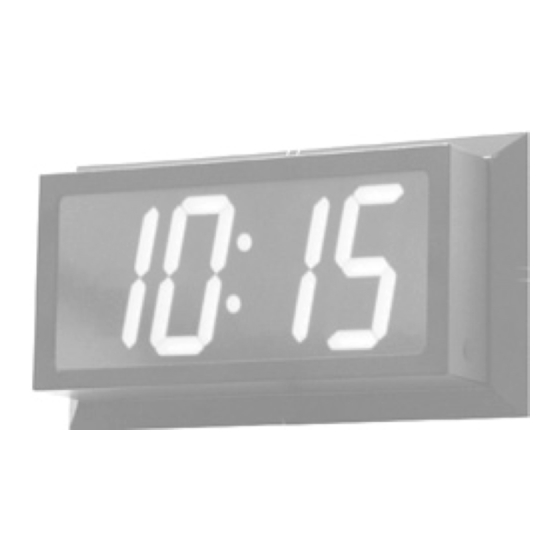
- Page 1 SELENA Multifunctional LED CLOCK series HY-4 and HY-6 Rev. 18 KERA Technologies Inc. E-mail: sales@ledclocks.com www.ledclocks.com...
-
Page 2: Table Of Contents
INDEX PAGE Features ......................3 General Information....................4 Installation ......................5 Power Connection ....................5 IR Remote Control....................6 REMOTE CONTROL KEYS description............... 6 Function Setup Procedure..................7 LIST OF FUNCTIONS ..................8 Clock Setup ....................... 12 Initiating Remote Control operation .............. -
Page 3: Features
Features ♦ Super/Ultra Bright LEDs ♦ Red/Green//Blue/Yellow display ♦ Digital Clock in 12 or 24 hour or military format ♦ Day/Date/Month/Year alternating display option ♦ Day/Date/Month/Year Text display option ♦ Julian Day display option ♦ Synchronized Master/Slave Clock System ♦ Variety of ASCII Time Code and BCD sync protocols ♦... -
Page 4: General Information
General Information Primary application for the SELENA Digital Clock is timekeeping and time/date display, however it is also equipped with a variety of additional functions that can be accessed and activated by the user. Some of them, like the stopwatch and temperature indication, may require some additional, optional sensors. -
Page 5: Installation
INSTALLATION NOTE: Before installation, determine voltage rating required for the particular clock model. Clock may be installed using special ceiling mounting kit or on a wall as per attached installation drawing and instructions. Models for use as desk top should be plugged into a power line outlet using attached power cord extending from the back side. -
Page 6: Ir Remote Control
IR Remote Control SELENA ‘s All operation and settings are accomplished by means of a Remote Control. dedicated Remote Control is recommended, however most RCA TV compatible remotes will function properly. Use the reference list and drawing below to determine the function of keys used to operate the clock. List of REMOTE CONTROL keys MUTE TALK... -
Page 7: Function Setup Procedure
SELECT NXT 1. After invoking the remote programming mode (by pressing MUTE 5 times), ACTIVATES Clock/Temperature data preset mode. 2. During data preset, MOVES cursor to next position. 3. During Hi/Lo Temperature Alarm data preset, MOVES to next alarm data preset. 4. -
Page 8: List Of Functions
LIST OF FUNCTIONS In the Function Selection Mode the display of Functions is preceded by text “Fn” followed by the Function ID Number. FUNCTION ID NUMBER Fn 0 INSIDE TEMPERATURE thermometer display with presettable Lo/Hi Alarm and Min/Max Memory. The Clock may have an internal or external temperature sensor that monitors local temperature. Fn 1 OUTSIDE TEMPERATURE thermometer display with presettable Lo/Hi Alarm and Min/Max Memory. - Page 9 When this function is NOT SELECTED the internal relay will ONLY be switched OFF in response to HIGH Temperature or Timer ALARM and ON when Temperature is LOWER than PRESET for HIGH ALARM even if it is lower than preset LOW ALARM. 2.
- Page 10 This option should be used only when External Inputs Terminals are installed (see Fn 36) . Fn 36 TIMER/COUNTER Control by EXTERNAL Signal. When selected, this function enables External Dry Contact to control the Up/Down Timer or Counter operation. A Dry Contact must be wired to the INPUT terminals. For this function to control Up/Down Timer the TIMER/ STOPWATCH mode (Fn 39) OR for Counter operation the Event Up/Down Counter option (Fn 31) must be enabled.
- Page 11 When selected, this function will enable the programming and operation of up to 16 events/day for each day of week separately. The thermostat will control 2 internal Relay; one for Heating and the other for Air-Conditioning control. Fn 53 MASTER-SLAVE SYNC SIGNAL RANGE EXTENDER-REPEATER function. See description in the manual. Fn 54 Time Slot Channel selection bit 0 for RANGE EXTENDER ( see Fn 53 ).
-
Page 12: Clock Setup
CLOCK SETUP After the clock has been powered down for longer than 2 weeks the time keeping system may have to be preset to the current time and date. NOTE: If 10 Year Battery Backup is installed, the clock will preserve correct timekeeping for appx. 10 years of accumulated power failure periods. -
Page 13: Wake-Up Alarm Clock Setup
HALTING the ALTERNATING DISPLAY User may (ON DEMAND) HALT the alternating display by pressing HOLD key at any time. The format currently on display will remain active until either a programming mode is initiated or a SCAN key is depressed. Similarly, whenever the Timer/Counter START, STOP or RESET is performed externally via the remote, the display will switch to the timer/counter mode. - Page 14 To Preset the COUNT UP/DOWN TIMER/EVENT COUNTER: NOTE: Count-Down operation of the Timer is selected by presetting the START TIME as different than 00:00(.00). Otherwise it will function as a Count-Up Timer. Event counter can count Up or Down independent of the preset but will not go DOWN past the 000000 count.
- Page 15 EXTERNAL START/STOP/RESET INPUTS FOR UP/DOWN TIMER/STOPWATCH and EVENT COUNTER SELENA timers and event counter may be set up to use external inputs for Start, Stop (count UP, count Down) and Reset. These inputs are available via the screw terminal accessible at the back panel. To activate External Inputs for Up/Down Timer/Stopwatch or Event Counter, enable function Fn36.
-
Page 16: Temperature Monitoring And Control
TEMPERATURE MONITORING and CONTROL The clock is capable of monitoring and controlling temperature sensed by an external or internal probe (use function Fn27 to select control probe) . External probe can be located at a significant distance away. The system also stores Minimum and Maximum Temperature readings that can be displayed ON DEMAND. -
Page 17: Internal Control Relay
Internal CONTROL RELAY Presettable Timer/Counter operation, Programmable Thermostat and Temperature HIGH/LOW ALARM can activate internal Control Relays that can be used to switch external loads up to 10Amp/240VAC. The Relays have SPDT contacts with Arc- Free switching protection. For Programmable Thermostat only either Normally Open or Normally Closed SPST contacts are usually wired from both internal relays. - Page 18 Control Relay Operation in LOW/HIGH Temperature ALARM application Internal Relay can be controlled by Low/High Temperature Alarm ONLY when Function Fn 37 is NOT ENABLED. Internal Control Relay operates in two different modes depending upon the setting of Function Fn 18. 1.
-
Page 19: Min/Max Temperature Memory
MIN/MAX Temperature MEMORY This option may be activated by enabling function Fn 20. External (or Internal) temperature Maximum and Minimum readings are saved in memory that can be accessed for display at any time. To read MAXIMUM Temperature press COUNT-UP key. To read MINIMUM Temperature press COUNT-DN key. - Page 20 NOTE: In systems with a WIRED Impulse Synch transmitted through a separate Cable, High Voltage or Low Voltage, The operation is similar except SIGNAL Frequency selection is NOT NECESSARY and the function Fn 13 must be also enabled. The sync signal should then be connected to a pair of designated terminals on the back panel of the clock.
- Page 21 L = Leap second Indicator ( Space, L ) HdHd = UTC time difference hours ( 00 - 23 ) MdMd = UTC time difference minutes ( 00 - 59 ) D = Daylight Savings Time indicator ( S,I,D,0 ) TZ = Time Zone XX = Time Zone Switch Setting ( 00-23 ) If a SELENA clock is used as the Master, that clock should be setup as follows:...
- Page 22 2-WIRE MASTER – SLAVE SYSTEM INSTALLATION with PC as MASTER A PC may be used as the MASTER for entire clock system. Software driver package “PCT2Kera.exe” must be installed on the Master PC to allow it to send the internal PC clock data as Master Synchronization signal to all SELENA clocks.
-
Page 23: Minute Impulse Sync System
MINUTE IMPULSE Sync System for 2-wire, 3-wire and Reverse Polarity 1 Minute and 1/2 Minute Impulse A 24VDC MINUTE IMPULSE Synchronization slave mode may be activated by enabling Function Fn47. SELENA clocks will respond to Minute Pulses within the range of +/- 7 to 30 VDC presented at appropriate inputs. The current requirement on Line A and Line B inputs are very low and are equivalent to an Input Resistance of 10 Kohm per input. - Page 24 MASTER CLOCK (SELENA or Other) PC COMPUTER With installed PC2KERA driver S/W OPTIONAL (when required) CLOCK WITH OPTO-REPEATER TO OTHER SLAVES IN THE NETWORK...
- Page 25 Multi-zone Clock System The Master Clock and each of the Slave Clocks in the Multi-zone configuration have to be setup separately with the zone time and date. Each Zone can be setup to any time and/or date. The Synch signal is transmitted by the master once per minute on the 34th second of every minute, so the zones time can be setup to differ even by as little as 1 minute from the Master Clock or from each other.
-
Page 26: Programmable Event Timer
PROGRAMMABLE EVENT TIMER Programmable event timer modes allow for presetting of time instances (hours and minutes of the day and weekday) at which internal buzzer and/or relay may be activated in order to perform operation of some external device and/or sounding an Alarm. The duration of each event is also individually programmable. -
Page 27: Programmable Heat/Cool Thermostat
PROGRAMMABLE HEAT/COOL THERMOSTAT Programmable Thermostat modes allow for presetting of time instances (hours and minutes of the day and weekday) and Target Temperatures per each such event. Either one of 2 available Programmable Thermostat modes may be selected. A) 16 events per day, 7 days, repeated each week Programmable Thermostat by enabling function Fn52. B) 2016 events per week, repeated each week Programmable Thermostat by enabling function Fn53. - Page 28 Wait a few seconds for the system to return to Normal Operating Mode. Thermostat presets and schedule will be executed automatically. IMPORTANT NOTES: A) In both “AUTO” and “MANU”al modes: In order to ensure proper operation of COOLING and HEATING Auto Switch-Over function, the presets for SUNDAY Events 14 and 15 MUST be programmed and stored.
- Page 29 disable corresponding function: Fn,52 or Fn53. (see FUNCTION SETUP Procedure section). All previously preset events data will be retained in memory unaffected. Selecting INTERNAL or EXTERNAL probe: Either INTERNAL or EXTERNAL temperature PROBE may be selected for control by enabling (INTERNAL selected) or disabling (EXTERNAL selected) function Fn27.
- Page 30 DATE / TEXT display This option may be activated by enabling the Function Fn 70. In clocks with the optional Alpha Numeric text display installed, several modes for displaying of the current date may be selected by enabling the functions: Fn 64,65,66 and 67 as per table below: Fn64 Fn65 Fn66...
-
Page 33: Electrical Specifications
ELECTRICAL SPECIFICATIONS Supply voltage ......120 VAC, 50/60Hz or optional 208-240VAC, 50/60Hz or optional 12/24V AC/DC Power consumption ...... 12VA max. Fuse ..........0.25A, 250V Slow Blow, 20mm Power backup....... 14-Day Battery-Less backup or optional 10-Year Lithium battery Ambient temperature ....0C (32F) to 50C (122F) Ambient humidity ...... - Page 34 WARNING NOTE: The Federal Communications Commission established technical standards regarding radiation of radio frequency energy by computing devices. Your display is considered to be a Class A Computing Device, and the following information must be supplied to the User in accordance with paragraph 15.818 of the FCC Regulations, Title 47, Chapter 1, Part 15, Subpart J.
-
Page 35: Warranty
LIMITED WARRANTY For a period of one year from the date of delivery, (90 days for the keyboard) the Manufacturer warrants to original user that the display system shall be free from defects in materials and workmanship. This warranty shall be void if the unit is altered or modified in any way by the user.
Need help?
Do you have a question about the SELENA HY-4 Series and is the answer not in the manual?
Questions and answers