
Related Manuals for OSI Systems Rapiscan Metor 6E

Summary of Contents for OSI Systems Rapiscan Metor 6E
- Page 1 Rapiscan Systems 1 (1) DO NOT PRINT THIS PAGE PRINT FOLLOWING DOCUMENT AS: 2-SIDED COLOR PRINTING FORMAT A5 ON A4 BOOKLET FOLD AND STAPLE AT CENTER DO NOT PRINT THIS PAGE Printing instructions_A4.doc...
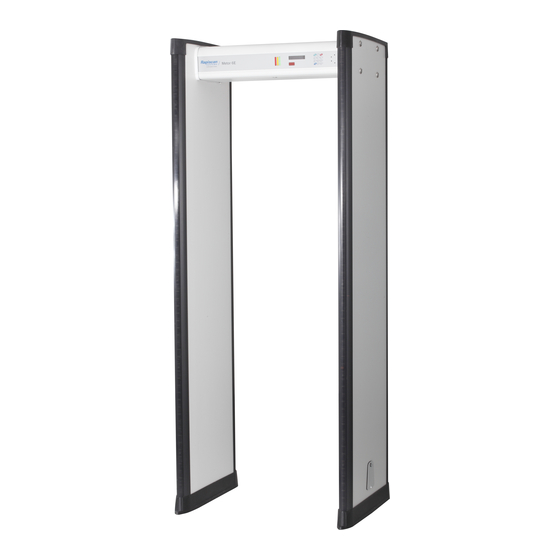
- Page 2 Installation Quick Guide Metor 6E P/N 92109435 – Rev. 2...
- Page 3 Page 2 Metor 6E P/N 92109435 Installation Quick Guide Rev. 2 Foreword Thank You for choosing a Metor product. This installation quick guide is intended for experienced users that are fully trained on the operation of Metor Walk-Through Metal Detectors. In addition to these instructions, local laws and regulations, and requirements by authorities shall be observed.
- Page 4 P/N 92109435 Metor 6E Page Rev. 2 Installation Quick Guide Revision History Name of Document: Installation Quick Guide, Metor 6E Document Number: 92109435, Revision 2 Rev. ECN # Date Name Comments 2013-05-20 Initial draft. 2013-06-06 Several additions. 03829 2013-06-28 Release version. 04550 2013-10-14 DC symbol added.
-
Page 5: Table Of Contents
Page 4 Metor 6E P/N 92109435 Installation Quick Guide Rev. 2 Table of Contents IMPORTANT INSTRUCTIONS......................5 Types of Alert Messages....................... 6 Symbols used on Unit and in Manual..................6 TECHNICAL DATA .......................... 7 INSTALLATION ..........................8 Mechanical Assembly......................8 Floor Fixing.......................... -
Page 6: Important Instructions
P/N 92109435 Metor 6E Page Rev. 2 Installation Quick Guide IMPORTANT INSTRUCTIONS Read through this chapter carefully before operating the equipment. Keep this manual so that it is always readily available to the user. The instructions in this manual shall be followed in all situations, when installing, using, or servicing the equipment. -
Page 7: Types Of Alert Messages
Page 6 Metor 6E P/N 92109435 Installation Quick Guide Rev. 2 1.1 Types of Alert Messages WARNING Indicates a potentially hazardous situation which, if not avoided, could result in death or serious injury. CAUTION Indicates a potentially hazardous situation which, if not avoided, may result in minor or moderate injury and/or equipment damage or generally unsafe practices. -
Page 8: Technical Data
P/N 92109435 Metor 6E Page Rev. 2 Installation Quick Guide TECHNICAL DATA Power Input, nominal...........12.5 VDC, 2.1 A Input, absolute limits ........12 – 15 VDC, 4 A Power consumption, typical .....26 W (12 VDC) Power consumption, maximum....37 W (12 VDC) ... -
Page 9: Installation
Page 8 Metor 6E P/N 92109435 Installation Quick Guide Rev. 2 INSTALLATION 3.1 Mechanical Assembly The items needed in mechanical assembly are packed in the box containing the cross piece. For checking the distance of the coil panels there is a pasteboard gauge in the cross piece box. - Page 10 P/N 92109435 Metor 6E Page Rev. 2 Installation Quick Guide Switching the zone displays to other side of the coil panels: Lay the Metor 6E down. Place a support under the cross piece so that only the coil panel bottoms touch the ground (e.g.
-
Page 11: Floor Fixing
Page 10 Metor 6E P/N 92109435 Installation Quick Guide Rev. 2 3.2 Floor Fixing Lift the unit up to a vertical position in its final mounting location. Check that the panels are parallel both in walking direction and sidewise. Use the pasteboard gauge provided to ensure that distance between panels is the same at top and at bottom. -
Page 12: Electrical Connections
P/N 92109435 Metor 6E Page Rev. 2 Installation Quick Guide 3.3 Electrical Connections Open cross piece hatch to access connections to the electronics. Power supply can be connected to either panel. Remove cable hatch of the selected panel to connect power supply. ... -
Page 13: Connections For Digital I/O
Page 12 Metor 6E P/N 92109435 Installation Quick Guide Rev. 2 3.4 Connections for Digital I/O The Metor 6E has two configurable digital inputs and two configurable digital outputs. Refer to Installation and Operating Mnaual for instructions how to configure the I/O. The digital inputs have a pull-up resistor to 12 V. -
Page 14: Startup And Shutdown
P/N 92109435 Metor 6E Page Rev. 2 Installation Quick Guide STARTUP AND SHUTDOWN Metor 6E is turned on and off from the power switch on the main electronics inside the cross piece. To access the switch open the cross piece hatch with the key provided. -
Page 15: Maintenance
Page 14 Metor 6E P/N 92109435 Installation Quick Guide Rev. 2 MAINTENANCE 5.1 Periodic Maintenance The Metor 6E is virtually maintenance-free. However, the operation should be checked regularly, preferably daily, to ensure that the security is not compromised. For additional information on maintenance please refer to the Maintenance Manual. 5.2 Replacing Input Fuse Inside the electronics (MELS 5261) there is a 5.0AT fuse F8 protecting the electronics. -
Page 16: Appendix A: Contact Information
P/N 92109435 Metor 6E Page Rev. 2 Installation Quick Guide APPENDIX A: Contact Information Use these addresses when ordering spare parts and in warranty or repair issues. E-mail sales@rapiscansystems.com service@rapiscansystems.com United Kingdom’s Customer Service Center for Europe, Africa, Mid East Rapiscan Systems Ltd.
Need help?
Do you have a question about the Rapiscan Metor 6E and is the answer not in the manual?
Questions and answers