Table of Contents
Advertisement
Quick Links
Advertisement
Table of Contents

Summary of Contents for Kalor QUADRA 12D
- Page 1 USER MANUAL QUADRA 12D...
- Page 2 Regulations Part J. It is very important that you regularly test your carbon monoxide alarm and replace batteries as necessary to ensure its correct operation. Commissioning All Kalor stoves & boilers MUST be commissioned for safety and to activate products warranty. Contact us on 083 123 6445 or office@woodpelletstoves.ie...
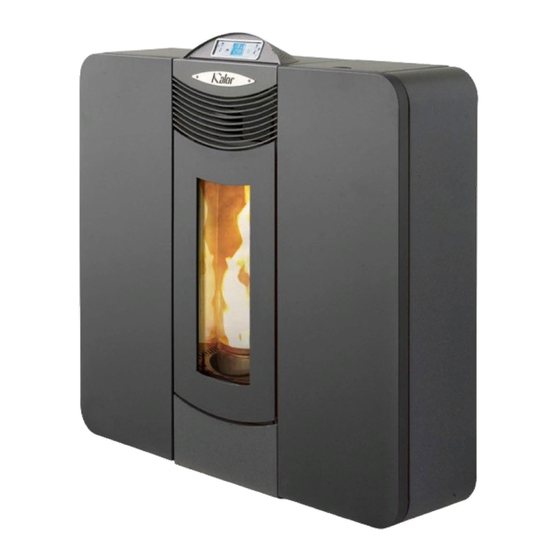
- Page 3 Quadra 12 Dear Customer, Cod. 001109 We thank you for having chosen one of our products, the fruit of technological experience and of continual research for a superior quality product in terms of safety, dependability, and service. In this manual you will find all the information and useful suggestions to use your product with the maximum safety and efficiency.
-
Page 4: Norms And Declarations Of Conformity
Norms and declarations of conformity Our company declares that the stove conforms to the • Installation in non-conformity with the norms in force in following norms for the EC European Directive labelling: the country; • 2014/30 (regulation EMCD) following • Installation by unqualified or untrained personnel; amendments;... - Page 5 Charge pellet Fuel is loaded from the upper part of the stove by opening Never remove the protection grille in the a door. Pour the pellets in the hopper. hopper. When fi lling, do not let the sack This is easier if performed in two steps: of pellets touch any hot surfaces.
-
Page 6: Remote Control
Remote Control The remote control (Fig. 3) used to adjust water temperature power and the on/off functions for the pellet stove. To start the stove, press key and the stove will automatically enter the starting phase. Press keys (1) and (2) to adjust temperature, and use keys (6) and... - Page 7 In order to achieve the test report results, please load the performance parameters retained by the manufacturer and the qualified technician. They will use these parameters once verified that, during the installation, it is possibile to reproduce the laboratory conditions.
- Page 8 QUADRA 12C PARAMETER M. UNITS Heat input 12,01 Nominal heat output 11,14 Reduced heat output 2,92 CO concentration at nominal refer- mg/m 75,7 ence (13% O CO concentration at reduced refer- mg/m 137,1 ence (13% O Nominal efficiency 92,74 Reduced efficiency 95,93 Pellet consumption (min-max) Kg/h...
-
Page 9: Operating Area
Operating area For proper functioning and a good temperature distribution, the stove shoul be positioned in a location where it is able to take in the air necessary for combustion of the pellet (about 40 m /h must be available), as laid down in the standard governing the installation and in accordance with local national standards. - Page 10 Connection to the flue pipe The flue pipe must have internal dimensions not larger than 20x20 cm, or diameter 20 cm. In the event of larger dimensions, or of the flue pipe being in poor condition ( for example cracks, poor insulation, etc.), it is advisable to fit a stainless steel pipe of suitable diameter inside the flue pipe throughout its length, right up to the top.
- Page 11 Smoke discharge The discharge system must be for the stove only (it is not permissible to discharge into fl ues in common with other devices). The smoke discharge takes place through the 8 cm. A “T” with a condensation collection cap should be provided.
- Page 12 The chimney cap Minimum aeration for comburant air intake The combustion air must be taken from the outdoor The chimney cap must respect the following requirements: ambience absolutely. • It must have the equivalent diameter and internal form For a correct and safe placement of the air intake all the of the fl ue.
- Page 13 Sliding top cover (where present) The display for the programming of the heater is mounted on the stoves side. Under the door are positioned: • a knob for cleaning the tube bundle; • a handgrip for the manual adjustment of air. The numbering allows distribution of air only frontally or towards the vertical or horizontal ducting.
-
Page 14: Stove Ignition
Stove ignition Remove any components which might burn from the fi rebox and from the glass (various instructions and adhesive labels) Charge pellet Fuel is loaded from the upper part of the Stove by opening a door. Pour the pellets in the hopper. When empty, this is easier if performed in two steps: •... -
Page 15: Information On The Display
Preliminary checks Before switching on the pellet Stove, make sure that the pellet hopper is full, the combustion chamber is clean, the glass door is closed, the power supply plug is connected and the switch on the back is set to “1.” Information on the display TURNED OFF 21 : 10... -
Page 16: Alarm Signals
Alarm signals In the event of a working defect, the system informs the user about the type of failure occurred. The following table summarises the alarms, kind of problem and possible solution: Display Kind of problem Solution As soon as the power supply is back, the Stove starts a coo- ALAR 1 BLACK OUT There is no power supply... -
Page 17: Programming Menu
Programming menu Menu 02 SET CLOCK To access the set clock option, press the “SET” button (3), with the button - (5) scroll through the submenus until MENU 02 - SET CLOCK and with buttons 1 and 2 select the current day. Press the “SET” button (3) to confi rm. Then use buttons 1 and 2 to set the time and press “SET”... - Page 18 level 1 level 2 level 3 level 4 value 03 - set thermostat 01 - activate thermos. 01 - activate thermos. on/off 02 - day programme 01 - daily thermostat on/off 02 - start 1 day hour 03 - stop 1 day hour 04 - start 2 day hour...
- Page 19 35 - friday prog. 4 on/off 36 - saturday prog. 4 on/off 37 - sunday prog. 4 on/off 04 - week-end program. 01 - therm. week-end 02 - start 1 03 - stop 1 04 - start 2 05 - stop 2 input menu level Menu 03 SET CHRONO...
- Page 20 PROGRAMME 1 PROGRAMME 2 menu level selection meaning possible values menu level selection meaning possible values 02-03-02 START PROGRAM 1 activation time time - OFF 03-03-11 START PROGRAM 2 activation time time - OFF 02-03-03 STOP PROGRAM 1 shut-off time time - OFF 03-03-12 STOP PROGRAM 2...
- Page 21 Failure on electrical devices Mancata accensione If the fl ame does not light up during the switching on or if the smokes temperature does not reach a suitable value in the foreseen time gap, the Stove switches off and you will read the words “ N O L IGH TI N ”.
-
Page 22: Maintenance And Cleaning
Maintenance and cleaning cleaning parts must carried with stove completely cold and unplugged to avoid burns and thermal shock. The stove does not need much maintenance if used with certifi ed quality pellet. The need for maintenance varies depending on the conditions of use (switching on and off repeatedly) and depending on the performance required. -
Page 23: Safety Devices
Safety devices Pressure switch: monitors Reduction motor: if the motor Flue gas temperature sensor: depression in the smoke duct. stops, the Stove continues to thermocouple that measures It is designed to shut down function until the fl ame goes the temperature of the fumes the pellet feed screw in the out for lack of fuel, and until while keeping the operation or... - Page 25 Cleaning of the combustion chamber (once a month) Cleaning of the “T” fi tting (every 60/90 days) To access the scraper is necessary to slide the door on Raise the cover to the left of the combustion chamber. the top of the stove. (foto 1) (foto 1) Unscrew the two retaining screws of the stove Extract the scraper by lifting the black knob.
- Page 26 Cleaning the metal parts Daily cleaning by scraper (where present) To clean the metal parts of the stove, use a soft cloth With stove off and cold, activate 5-6 times the duct scraper dampened with water. Never clean the metal parts with of the heat exchange by raising and lowering the knob alcohol, thinners, petrol, acetone or other degreasing placed in the compartment under the door of the top.
- Page 27 Cleaning the glass Once the preceding points have been observed, it only means that the state of the stove has been verified. It is The glass is a self cleaning type, therefore, while the necessary to thoroughly clean the smoke discharge tube stove is working, a veil of air is blown across its surface to or flue and check the condition of the basket.
-
Page 28: Problems And Solutions
Problems and solutions All repairs must be carried out exclusively by a specialised technician, with the stove completely cold and the electric plug pulled out. Is prohibited from any unauthorized modification to the device and the replacement of parts with other non-original. - Page 29 1. Fill the tank with pellets 2. Check the electrical wiring and fuses, replace if the 1. The tank is empty. resistance is broken 2. The resistance does not reach 3. Replace the resistance the temperature 4. It is recommended to unplug the power supply 3.
- Page 30 1. Perform periodic cleaning. See paragraph stove in- stallation in the user manual. Check chimney cleaning 2. Decrease in the parameters the charge level of the pellets 3. Clean the brazier after waiting for the total shut- 1. Flue with presence of stretches down of the stove If you repeat contact your too long or clogged...
- Page 31 . Fill the tank with pellets 2. Check plug and presence electricity 3. Fill the tank with pellets 1. The pellet tank is empty 4. Clean the brazier 2. No power 5. Let the stove cool down completely, reset the man- 3.
- Page 32 GENERAL GUARANTEE GUARANTEE LIMITATIONS All products are subject to accurate testing and are covered Limited Warranty covers manufacturing defects, provided that by warranty for 24 months from the date of purchase, the product has not been damaged by improper use, impro- documented by invoice or purchase receipt that will be per handling, incorrect connection, tampering, and installation presented to authorized technicians.
- Page 33 NOTES...
- Page 34 NOTES...
- Page 35 Kalor Warranty Your new Kalor appliance warranty is valid for two years (one year on electrical components) provided it is installed, commissioned and maintained, as recommended by the manufacturer. It is very important to understand that any and all warranty claims may be rejected should your stove/boiler not be commissioned by one of our Authorised Technicians.
- Page 36 Wood Pellet Stoves.ie Newport, Co. Mayo, Ireland Tel: 086 012 7744 Email: info@woodpelletstoves.ie Web: www.woodpelletstoves.ie...
Need help?
Do you have a question about the QUADRA 12D and is the answer not in the manual?
Questions and answers