
Subscribe to Our Youtube Channel
Related Manuals for McIntosh MX180


Summary of Contents for McIntosh MX180
- Page 1 McIntosh Laboratory, Inc. 2 Chambers Street Binghamton, New York 13903-2699 Phone: 607-723-3512 www.mcintoshlabs.com MX180 A/V Processor Owner’s Manual...
-
Page 2: Safety First
If you need further technical assistance, please contact your provides the backbone of your cutting edge audio visual Dealer who may be more familiar with your particular setup including other brands. You can also contact McIntosh with system. additional questions or in the unlikely event of needing •... -
Page 3: Table Of Contents
Safety First ............. 2 Figure 01– MX180 Dimensions ......5 Display Mode ..........13 Thank you from all of us at McIntosh ....2 Figure 02– Custom cutout dimensions ....6 LED Channel Status Indicators ..... 13 Make a Note ............2 Figure 03–... -
Page 4: Trademark And License Information
The McIntosh MX180 incorporates copyright property rights of Rovi Corporation. Reverse engi- protected technology that is protected by U.S. patents neering and disassembly are prohibited. and other intellectual property rights. The MX180 uses the following technologies: Trademark Logo License Information... -
Page 5: What's In The Box
2 inches (5.1cm) below the bottom install the MX180 directly above a heat generating • 1 inch (2.5cm) on each side of the MX180 so component such as a high-powered amplifier. If all that airflow is not obstructed the components are installed in a single cabinet, a •... -
Page 6: Making The Cuts
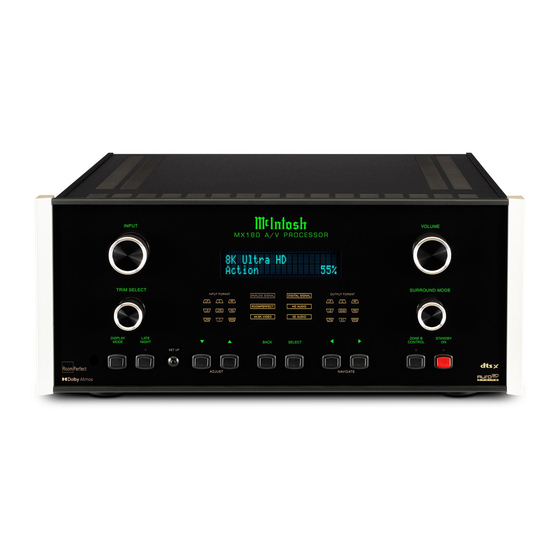
" 3/16 43.66cm INPUT VOLUME M X 18 0 A V P R O C E S S O R MX180 Front Panel " TRIM SELECT SURROUND MODE 9/16 INPUT FORMAT OUTPUT FORMAT... -
Page 7: Connections On The Back
Connections on the Back The Outputs One 8 multichannel RCA Inputs One Moving Magnet RCA stereo pair The MX180 A/V Processor has a wealth of Two HDMI Outputs Two USB file/update Inputs connections. They can be divided into Inputs and... -
Page 8: Making Connections
This allows for more intelligent operation between 3. Data Out (TXD) 8. N/C components as well as less cable clutter. Make sure Use an ethernet cable to connect the MX180 to a 4. N/C 9. N/C this feature is enabled in your TV’s setup menu. -
Page 9: Digital Inputs
AC Power way, if Zone B is in another room, a Remote Control rear of the MX180. The left male RCA jack of can be used to adjust the MX180. a stereo pair should plug into the top jack and This connection is essential. -
Page 10: Power Control (Trigger) Outputs
Ground a multitude of possible configurations, and the Figure 06– Power control (trigger) mini plug MX180 is very flexible in its setup to adapt to many configurations. For components that will power on when Zone A Often surround setups are referred to by numbers is active, use Power “A”... -
Page 11: The Front Panel
The Front Panel The Input Knob When the power management is set to Deep Sleep, the MX180 can not be woken up from the network The Input Knob can be turned clockwise or interface. The Power management can be setup... -
Page 12: Trim Select Knob
Dolby upmixing, and will a few seconds and this will happen Channels. Use the up/down buttons to work on non-Dolby signals as well. The MX180 automatically. The built-in equalization settings adjust from -10dB to + 10dB in 1dB increments. Surround Processing Modes are: are: Neutral (flat), Music, Music II, Relaxed, •... -
Page 13: Zone B
Zone B Firefox browsers are recommended. Other browsers • ROOMPERFECT™ Output of the MX180. Zone B can be set to any may not function correctly. • HD AUDIO Input or can be set to follow whatever Input is The procedures and screens are essentially the same •... -
Page 14: Speaker Setup
To bring up the interface on your browser, put the IP address of the MX180 in the address bar. To determine the IP address, push the DISPLAY MODE button until the IP address appears in the display. -
Page 15: Speaker Types For Setup
To use this tool, attach the included microphone and Height Left Surround Audio Processing and Voicing setup. cable to the MIC jack in the rear of the MX180 and Left Top Middle position the microphone in the primary listening Top Ceiling/Voice of location. -
Page 16: Audio Processing
Audio Processing To add a source, select the “Add source” button in speech Primarily dialog with little spatial the top right corner of the menu. This will bring information such as news up options for the source. You will see these same SETUP>Audio setup>Audio processing Voicing Setup options when selecting to edit an existing source. -
Page 17: Video Setup
Select One or Always in this case. color accuracy. Note that if multiple Dolby outputs to be the Main output of the MX180. With Always, a non-HDR TV may not like the HDR Vision TVs are connected, the signal will only For each HDMI Output (HDMI OUTPUT 1, HDMI signal. -
Page 18: System Configuration
Default volume settings allow a maximum volume to allow the volume control of the TV to control the to be set above which the MX180 can not be set. audio volume. You also can set whether the MX180 starts up with SETUP>System configuration>Trigger setup... -
Page 19: Network Setup
Network setup has a Manual and Auto setting. The After investing time in setting up your system, it is • Go to the SETUP MENU Auto setting is simplest in that the MX180 will be recommended that you save your settings. • Choose “Manage software”... - Page 20 • Select the file you wish to install • Choose Start update The MX180 will install the update and then shut down. Do not manually power off the unit while installing the update. The Update software page displays software information. Here you will find version numbers for various software used in the MX180.
-
Page 21: Dolby Atmos And Auro-3D Setup Examples
Dolby-enabled speakers Dolby Atmos and Auro-3D Setup Examples For Dolby Atmos setups, it is possible to add Dolby Enabled Speakers instead of The system supports Dolby Atmos as well as Auro-3D. If Dolby Atmos using top speakers mounted in the ceiling. material is played in an Auro-3D setup, the system will try to match the Auro- Dolby Enabled Speakers are extra speakers placed on top of or built into the 3D specific speakers to the nearest Dolby Atmos equivalent;... -
Page 22: Bass Management Examples
Bass Management Examples The following examples show a few different possible setups and how the bass is routed in them. The examples only mention where the LFE channel and the redirected bass is played; the high part of any channel is always played by the speaker for that channel. The same goes for bass that is not redirected, so this will not be specifically mentioned. -
Page 23: Voicing Curves
Voicing Curves Here are examples of default Voicing equalization curves included with the MX180. Voicings are accessible through the Voicing trim settings. Default equalization curves can be edited. New curves can be designed using multiple filters. Custom Voicings can be selected the same manner as default Voicings using the TRIM SELECT knob (see “Trim Select Knob”... -
Page 24: Description Of Remote Control Buttons
Push-buttons (0 thru 9) Selects AM Tuner Operating Functions (when Selects FM Tuner Operating Functions (when connected to a McIntosh tuner), also Track Selection connected to a McIntosh), also Track Selection on on certain McIntosh CD Players... -
Page 25: Remote Control Batteries
When satisfied, choose “Done”. You will be given the equipment opportunity to backup the MX180 to a USB or SD • Make sure speakers have been setup and “Verify card. Speakers” has been run When the RoomPerfect™... -
Page 26: Re-Packing The Mx180
Re-packing the MX180 MICROPHONE When shipping the MX180, it is highly recommended that the unit be packed as it was MICROPHONE originally shipped to avoid damage. Failure to STAND properly pack the unit will likely result in damage. MINI BOOM... -
Page 27: Technical Specifications
±0.5dB from 20Hz-20,000Hz Standby, less than 0.5 watt HDR, Dynamic HDR, HDR 10+, HLG, Dolby Vision Subwoofer: Note: Refer to the rear panel of the MX180 for the eARC, Dynamic Lip-sync, 4:4:4 Color, ±0.5dB from 20Hz-8000Hz correct voltage. REC. 2020, 3D Video pass-through... - Page 28 McIntosh Laboratory, Inc. 2 Chambers Street Binghamton, NY 13903 www.mcintoshlabs.com The continuous improvement of its products is the policy of McIntosh Laboratory Incorporated who reserve the right to improve design without notice. Printed in the U.S.A. McIntosh Part No. 24114301...
Need help?
Do you have a question about the MX180 and is the answer not in the manual?
Questions and answers