
Subscribe to Our Youtube Channel
Related Manuals for KREAFUNK aVIBE


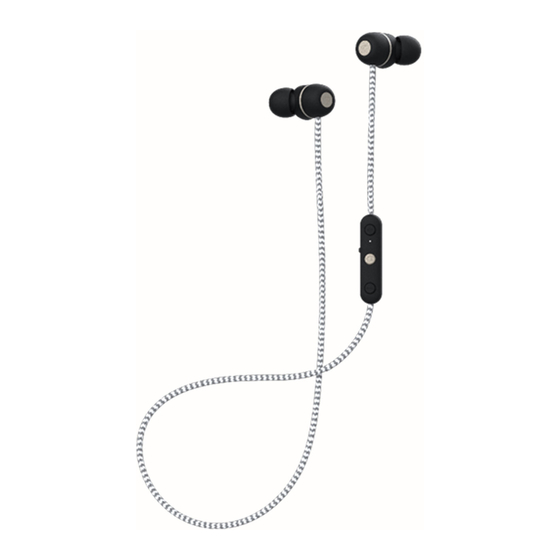
Summary of Contents for KREAFUNK aVIBE
- Page 1 Wireless Bluetooth earphones Operation manual Bedienungshandbuch Manual de instrucciones Manuel d’utilisation Brugermanual Manuale operativo...
-
Page 3: Table Of Contents
English Deutsch Español Français Dansk Italiano Chinese This product is in compliance with the essential requirements and other relevant provisions of Directive 2014/53/EU. The declaration of conformity may be consulted at: www.kreafunk.com/declaration-of-conformity/... -
Page 4: English
English Operation manual English... - Page 5 SAFETY AND MAINTENANCE INSTRUCTIONS 1. Please read this operation manual carefully before use. 2. The safety and maintenance instructions in this operation manual should be retained for future reference and must be followed at all times. 3. Keep the product away from heat sources such as radiators, heaters or other appliances that produce heat.
- Page 6 If you do experience any problems with your product please contact the retailer you purchased the product from. The retailer will provide you with guidance and if that does not solve the problem the retailer will handle the claim directly with KREAFUNK. English...
- Page 7 Micro USB 5V/1A English...
- Page 8 BLUETOOTH® PAIRING 0:02 Press and hold the multi-function button for 2 seconds to turn aVIBE on. The LED indicator will light up white and a sound prompt is heard. English...
- Page 9 Find the list of visible / connected units on your device and select “aVIBE”. The LED indicator will turn solid white, a sound prompt is heard and aVIBE is ready to play. English...
- Page 10 MANUAL BLUETOOTH® PAIRING MODE 0:05 aVIBE will always re-connect to last connected device, when turned on. If you wish to connect a new device, you can manually activate Bluetooth® pairing mode: for 5 seconds (until a second sound prompt is heard) to activate Bluetooth®...
- Page 11 MULTI-FUNCTIONS English...
- Page 12 BATTERY AND CHARGING CHARGING Green Orange 100 % 0-99 % Micro USB 5V/1A Charging time is approximately 2 hours using the included USB cable. The LED indicator turns solid orange when charging. The LED indicator turns solid green when the battery is fully charged. English...
- Page 13 BATTERY STATUS When the battery level is below 15%, the LED indicator turns solid red. When English...
-
Page 14: Deutsch
Deutsch Bedienungshandbuch Deutsch... - Page 15 SICHERHEITS- UND WARTUNGSANLEITUNG 1. Bitte lesen Sie diese Bedienungsanleitung vor dem Gebrauch sorgfältig durch. 2. Die Sicherheits- und Wartungsanweisungen dieser Bedienungsanleitung sollten für zukünftige Bezugnahme aufbewahrt werden und müssen jederzeit befolgt werden. 3. Halten Sie das Produkt von Wärmequellen wie Heizkörpern, Heizgeräten oder anderen Wärme erzeugenden Geräten fern.
- Page 16 Wenn Sie Probleme mit Ihrem Produkt haben, wenden Sie sich bitte an den Händler, bei dem Sie den Produkt gekauft haben. Der Händler wird Sie beraten und wenn dies das Problem nicht löst, wird der Händler die Reklamation direkt mit KREAFUNK abwickeln. Deutsch...
- Page 17 Micro USB 5V/1A Deutsch...
- Page 18 BLUETOOTH®-KOPPLUNG 0:02 Drücken und halten Sie die Multifunktionstaste für 2 Sekunden, um aVIBE einzuschalten. Die LED-Anzeige leuchtet weiß und Sie hören einen Sound. Deutsch...
- Page 19 10:02 Bluetooth Bluetooth aVIBE Wenn die LED-Anzeige von aVIBE weiß zu blinken beginnt, vergewissern Ihrem Gerät die Liste der sichtbaren/verbundenen Geräte und wählen Sie „aVIBE“. Die LED-Anzeige leuchtet durchgehend weiß, es ertönt ein Sound und aVIBE kann loslegen. Deutsch...
- Page 20 Schalten Sie aVIBE aus. Wenn aVIBE ausgeschaltet ist, halten Sie die Multifunktionstaste 5 Sekunden lang gedrückt (bis ein zweiter Sound ertönt), um den Bluetooth®-Kopplungsmodus zu aktivieren. Die LED-Anzeige blinkt weiß und Sie können nun aVIBE mit einem neuen Gerät koppeln. Deutsch...
- Page 21 MULTI-FUNKTIONEN Deutsch...
- Page 22 AKKU UND AUFLADEN AUFLADEN Green Orange 100 % 0-99 % Micro USB 5V/1A Die Ladezeit beträgt mit dem mitgelieferten USB-Kabel ca. 2 Stunden. Die LED-Anzeige leuchtet beim Laden durchgehend orange. Die LED-Leuchte wechselt auf grün, wenn der Akku vollständig geladen ist Deutsch...
- Page 23 LADESTANDSANZEIGE Wenn der Akku bei unter 15 % liegt, leuchtet die LED-Anzeige durchgehend rot. Wenn der Akku bei unter 10 % liegt, blinkt die LED-Anzeige rot. aVIBE schaltet sich bei Inaktivität nach 60 Minuten aus. Deutsch...
-
Page 24: Español
Español Manual de instrucciones Español... - Page 25 INSTRUCCIONES DE SEGURIDAD Y MANTENIMIENTO 1. Por favor lea con atención este manual de funcionamiento antes del uso. 2. Conserve las instrucciones de seguridad y mantenimiento de este manual para consultarlas en el futuro y sígalas en todo momento. 3. Mantenga el producto alejado de fuentes de calor como radiadores, calentadores y otros aparatos que produzcan calor.
- Page 26 Si tiene cualquier problema con su producto, póngase en contacto con la tienda donde compró el producto. La tienda minorista le orientará sobre lo que debe hacer, y si eso no resuelve el problema, la tienda minorista manejará el reclamo directamente con KREAFUNK. Español...
- Page 27 Micro USB 5V/1A Español...
- Page 28 CONEXIÓN CON BLUETOOTH® 0:02 Mantenga presionado el botón multifuncional durante dos segundos para encender el aVIBE. El indicador LED se iluminará en blanco y se escuchará un sonido de aviso. Español...
- Page 29 Bluetooth Bluetooth aVIBE Cuando el indicador LED del aVIBE comience a parpadear en blanco, asegúrese de que la función Bluetooth de su dispositivo esté activada. Busque la lista de equipos visibles / conectados en su dispositivo y seleccione “aVIBE”. El indicador LED se pondrá blanco, se escuchará un sonido de aviso y el aVIBE estará...
- Page 30 ACTIVAR MANUALMENTE EL MODO DE CONEXIÓN CON BLUETOOTH® 0:05 El aVIBE siempre se volverá a conectar con el dispositivo con el que se conectó la última vez, cuando lo encienda. Si desea conectarlo a un dispositivo nuevo, puede activar manualmente el modo de conexión con Bluetooth®:...
- Page 31 Apague su aVIBE. Cuando el aVIBE esté apagado, mantenga presionado el botón multifuncional durante cinco segundos (hasta que se escuche un sonido de aviso) para activar el modo de conexión con Bluetooth®. El indicador LED parpadeará en blanco y en ese momento usted podrá...
- Page 32 BATERÍA Y CARGA CARGA Green Orange 100 % 0-99 % Micro USB 5V/1A El proceso de carga dura aproximadamente 2 horas, usando el cable USB que viene incluido. El indicador LED se pondrá naranja durante el proceso de carga. El indicador LED se pondrá verde cuando la batería esté completamente cargada.
- Page 33 Si el nivel de carga de la batería es inferior al 15%, el indicador LED se pone rojo. Cuando es inferior al 10%, el indicador LED comienza a parpadear en rojo. El aVIBE se apagará automáticamente cuando no se use por 60 minutos. Español...
-
Page 34: Français
Français Manuel d’utilisation Français... - Page 35 CONSIGNES DE SECURITE ET D’ENTRETIEN 1. Veuillez lire attentivement ce manuel d’utilisation avant d’utiliser l’appareil. 2. Les instructions de sécurité et d’entretien de ce manuel d’utilisation doivent être conservées pour toute référence ultérieure et doivent être suivies en toutes circonstances. 3.
- Page 36 Si vous rencontrez des problèmes avec votre produit, veuillez contacter le revendeur auprès duquel vous avez l’avez acheté. Le revendeur vous guidera pour régler le problème ou traitera la réclamation directement avec KREAFUNK. Français...
- Page 37 Micro USB 5V/1A Français...
- Page 38 JUMELAGE BLUETOOTH® 0:02 Appuyez sur la touche multifonction et maintenez-la enfoncée pendant 2 secondes pour allumer aVIBE. Le voyant LED devient blanc et un signal sonore se fait entendre. Français...
- Page 39 Bluetooth Bluetooth aVIBE Lorsque le voyant LED blanc du aVIBE commence à clignoter, assurez-vous que la fonction Bluetooth de votre appareil est activée. Trouvez la liste des appareils visibles / connectés sur votre appareil et sélectionnez “aVIBE“. Le voyant LED devient blanc et ne clignote plus, un signal sonore se fait entendre et aVIBE est prêt à...
- Page 40 MODE DE JUMELAGE BLUETOOTH® MANUEL 0:05 Le aVIBE se reconnectera toujours au dernier appareil connecté lorsqu’il est allumé. Si vous souhaitez jumeler un nouvel appareil, vous pouvez activer manuellement le mode de jumelage Bluetooth® : Désactivez aVIBE. Lorsque aVIBE est éteint, appuyez sur la touche multifonctions et maintenez-la enfoncée pendant 5 secondes (jusqu’à...
- Page 41 Bluetooth®. Le voyant LED blanc clignote et vous pouvez maintenant jumeler aVIBE avec un nouvel appareil. MULTI-FONCTIONS Français...
- Page 42 BATTERIE ET CHARGE CHARGEMENT Green Orange 100 % 0-99 % Micro USB 5V/1A La durée de charge est d’environ 2 heures à l’aide du câble USB fourni. Le Français...
- Page 43 ÉTAT DE LA BATTERIE Lorsque le niveau de la batterie est inférieur à 15 %, le voyant LED devient LED clignote en rouge. Le aVIBE s’éteint automatiquement lorsqu’il n’est pas utilisé pendant 60 minutes. Français...
-
Page 44: Dansk
Dansk Brugermanual Dansk... - Page 45 12. Placer eller læg ikke batteriet vilkårligt nær ild eller intens varme for at undgå eksplosionsfare. Hvis du oplever nogen problemer med dit produkt, bedes du kontakte den forhandler du købte produktet hos. Forhandleren vil give dig vejledning og hvis dette ikke løser problemet, vil forhandleren håndtere kravet direkte med KREAFUNK. Dansk...
- Page 46 Micro USB 5V/1A Dansk...
- Page 47 BLUETOOTH® FORBINDELSE 0:02 Tryk og hold multifunktionsknappen i 2 sekunder for at tænde for aVIBE. LED-indikatoren lyser hvidt, og der høres en lydprompt. Dansk...
- Page 48 Bluetooth Bluetooth aVIBE Når LED-indikatoren på aVIBE begynder at blinke hvid, skal du sørge for, at Bluetooth på din enhed er tændt. Find listen over synlige/tilsluttede enheder på din enhed og vælg “aVIBE”. LED-indikatoren bliver solid hvid, der høres en lydprompt og aVIBE er klar til afspilning.
- Page 49 MANUEL BLUETOOTH® FORBINDELSESTILSTAND 0:05 aVIBE vil altid forbinde til den sidst tilsluttede enhed, når den er tændt. Hvis du ønsker at oprette forbindelse til en ny enhed, kan du manuelt aktivere Bluetooth® forbindelsestilstand: Dansk...
- Page 50 Sluk aVIBE. Når aVIBE er slukket, skal du trykke på multifunktionsknappen i 6 sekunder (indtil en anden lydprompt høres) for at aktivere Bluetooth® forbindelsestilstand. LED-indikatoren blinker hvidt, og du kan nu parre aVIBE med en ny enhed. MULTI-FUNKTIONER Dansk...
- Page 51 BATTERI OG OPLADNING OPLADNING Green Orange 100 % 0-99 % Micro USB 5V/1A Opladningstiden er omkring 2 timer ved brug af det inkluderede USB-kabel. LED-indikatoren skifter til orange, når den oplades. LED-indikatoren skifter til grøn, når batteriet er fuldt opladt. Dansk...
- Page 52 BATTERISTATUS Når batteriniveauet er under 15%, skifter LED-indikatoren til rød. Når batteriniveauet er under 10%, blinker LED-indikatoren rødt. aVIBE slukker automatisk, når den ikke har været i brug i 60 minutter. Dansk...
- Page 53 Dansk...
-
Page 54: Italiano
Italiano Manuale operativo Italiano... - Page 55 ISTRUZIONI DI SICUREZZA E MANUTENZIONE 1. Per favore, leggere attentamente il presente manuale di istruzioni prima dell’utilizzo. 2. Le istruzioni di sicurezza e manutenzione contenute in questo manuale devono essere conservate per riferimento futuro ed essere seguite in ogni momento. 3.
- Page 56 Se riscontri problemi di qualsiasi tipo con il tuo prodotto, ti preghiamo di provvederà a fornirti assistenza e, nel caso in cui il problema non venga risolto, il rivenditore gestirà il reclamo direttamente con KREAFUNK. Italiano...
- Page 57 Micro USB 5V/1A Italiano...
- Page 58 CONNESSIONE BLUETOOTH® 0:02 Tenere premuto il pulsante multifunzione per 2 secondi per accendere aVIBE. L’indicatore LED si illuminerà di bianco e verrà emesso un segnale acustico. Italiano...
- Page 59 10:02 Bluetooth Bluetooth aVIBE Quando l’indicatore LED su aVIBE inizia a lampeggiare in bianco, assicurarsi che il Bluetooth sul dispositivo sia acceso. Trovare l’elenco delle unità visibili / collegate sul dispositivo e selezionare “aVIBE”. L’indicatore LED diventerà riproduzione. Italiano...
- Page 60 CONNESSIONE MANUALE DEL BLUETOOTH® 0:05 aVIBE, quando acceso, si ricollegherà sempre all’ultimo dispositivo connesso. Se si desidera collegare un nuovo dispositivo, è possibile attivare manualmente la modalità di connessione Bluetooth®: Italiano...
- Page 61 Spegnere aVIBE. Quando aVIBE è spento, tenere premuto il pulsante attivare la modalità di connessione Bluetooth®. L’indicatore LED lampeggerà in bianco e sarà ora possibile associare aVIBE a un nuovo dispositivo. MULTIFUNZIONE Italiano...
- Page 62 BATTERIA E RICARICA Ricarica Green Orange 100 % 0-99 % Micro USB 5V/1A Il tempo di ricarica è approssimativamente 2 ore utilizzando il cavo USB Italiano...
- Page 63 STATO DELLA BATTERIA Quando il livello della batteria è inferiore al 15%, l’indicatore LED diventa LED lampeggia in rosso. aVIBE si spegnerà automaticamente se non utilizzato per 60 minuti. Italiano...
-
Page 64: Chinese
Chinese Chinese... - Page 65 Chinese...
- Page 66 Micro USB 5V/1A Chinese...
- Page 67 0:02 Chinese...
- Page 68 10:02 Bluetooth Bluetooth aVIBE Chinese...
- Page 69 0:05 Chinese...
- Page 70 Chinese...
- Page 71 Green Orange 100 % 0-99 % Micro USB 5V/1A Chinese...
- Page 72 Chinese...
- Page 73 Chinese...
- Page 74 FCC STATEMENT This device complies with part 15 of the FCC rules. Operation is subject to the following two conditions: 1. This device may not cause harmful interference and 2. This device must accept any interference received, including interference that may cause undesired operation. Important: compliance and negate your authority to operate the product.
Need help?
Do you have a question about the aVIBE and is the answer not in the manual?
Questions and answers