Table of Contents
Advertisement
Quick Links
Advertisement
Table of Contents

Subscribe to Our Youtube Channel
Related Manuals for Signature Kitchen Suite SKSIT3601G


Summary of Contents for Signature Kitchen Suite SKSIT3601G
- Page 1 OWNER’S MANUAL CERAMIC-GLASS INDUCTION HOB Read this owner’s manual thoroughly before operating the appliance and keep it handy for reference at all times. SKSIT3601G www.signaturekitchensuite.com/it Copyright © 2021 SIGNATURE KITCHEN SUITE. All Rights Reserved. MFL54169110_02...
-
Page 2: Table Of Contents
Before Using the Hob Activating the Hob Tips for Induction Cooking Using the Cook Modes Using the Flexible Cooking Zone Using the Dual Cooking Zone Other Functions SMART FUNCTIONS SIGNATURE KITCHEN SUITE Application Open Source Software Notice Information PRODUCT FICHE... -
Page 3: Important Safety Instructions
IMPORTANT SAFETY INSTRUCTIONS IMPORTANT SAFETY INSTRUCTIONS ead and follow all instructions when using the range to prevent the risk of fire, electric shock, personal injury, or damage. his guide does not cover all possible conditions that may occur. lways contact your service agent or manufacturer about problems that you do not understand. - Page 4 IMPORTANT SAFETY INSTRUCTIONS WARNING se only hob guards designed by the manufacturer of the cooking appliance or indicated • by the manufacturer of the appliance in the instructions for use as suitable or hob guards incorporated in the appliance. he use of inappropriate guards can cause accidents. CAUTION DO NOT touch cooking zones or areas near these surfaces.
- Page 5 • SIGNATURE KITCHEN SUITE C ustomer nformation enter for service. CHILD SAFETY...
- Page 6 IMPORTANT SAFETY INSTRUCTIONS void placing metal cooking utensils on the cooking surface areas. etal objects • can become hot and cause burns. lean the appliance regularly to keep all parts free of grease that could catch fire. • xhaust fan ventilation hoods and grease filters should be kept clean. o not allow grease to accumulate on hood or filter.
- Page 7 IMPORTANT SAFETY INSTRUCTIONS iquids such as water, coffee or tea are able to be overheated beyond the boiling point • without appearing to be boiling, due to surface tension of the liquid. isible bubbling or boiling is not always present when the container is removed from the hob. his could result in very hot liquids suddenly boiling over when the container is disturbed or a spoon or other utensil is inserted into the liquid.
- Page 8 IMPORTANT SAFETY INSTRUCTIONS eep meltable objects or materials away from the ceramic glass surface, for example, • plastic utensils, aluminum foil, or cooking wraps. f any materials or foodstuffs melt on the ceramic-glass surface, these should be cleaned up immediately. NOTE here is a risk of burning yourself when the glass scraper is used on a hot cooking zone! o not use cookware with any dirt buildup on the bottom.
-
Page 9: Introduction To Induction Cooking
INTRODUCTION TO INDUCTION COOKING INTRODUCTION TO Induction Cookware INDUCTION COOKING NOTE Before using the induction cooking elements, carefully read and follow these cookware How Induction Cooking Works recommendations and the instructions in the pan sensing sections. An induction coil beneath the ceramic glass cooking When purchasing pans for use on the induction hob, surface generates magnetic... - Page 10 10 INTRODUCTION TO INDUCTION COOKING Incompatible Cookware Noises during Hob Operation • Aluminum, nickel-silver pots The electronic processes involved with induction cooking may create some background noises. You • Heat-resistant glass pots may hear a slight buzzing sound when cooking on the •...
- Page 11 INTRODUCTION TO INDUCTION COOKING Recommended Cookware Size Cookware Placement Use the proper cookware and place it correctly on ① the hob. One or more of the cooking elements will not heat if any of the incorrect conditions shown is ② ②...
- Page 12 12 INTRODUCTION TO INDUCTION COOKING Cookware placement in Flexible For Best Results: Cooking Zones Always follow the recommendations for proper cookware type and size. In addition: • Do not use dirty pans with grease buildup. Always use pans that are easy to clean after cooking, and make sure that the bottoms of the pans are clean and dry.
-
Page 13: Parts And Features
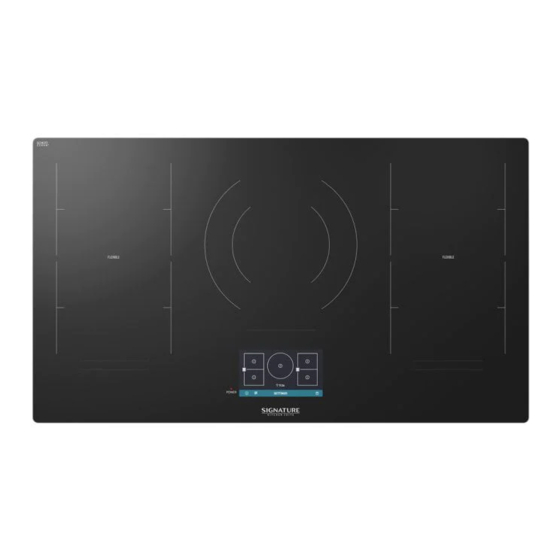
PARTS AND FEATURES PARTS AND FEATURES Parts and Features of the Hob Throughout this manual, features and appearance may vary from your model. Induction Hob Dual Cooking Zone Φ 28 0 / Φ 17 8 cm Single Cooking Zone Single Cooking Zone 21.6 ×... -
Page 14: Touch Control Features
14 PARTS AND FEATURES Touch Control Features Locations of Surface Elements and Controls The surface burner elements are positioned in the same locations on the hob and the control panel for ease of use. 1 Power 4 Settings Touch and hold for 1 second to turn the entire hob Touch to adjust settings. -
Page 15: Operating Instructions
First Operation navigate through the Settings screens. The first time that power is supplied to the hob, the SIGNATURE KITCHEN SUITE logo is displayed for 1 second. Getting Started After turning on the hob for the first time, adjust the settings to suit your preferences. - Page 16 16 OPERATING INSTRUCTIONS Lockout Wi-Fi The Lockout feature automatically prevents most hob Connect the appliance to a home Wi-Fi network. controls from being turned on. It does not disable the Setting Up Wi-Fi clock or timer. • If Lockout is turned on, all hob functions are Touch Settings at the center bottom of the Main disabled except the POWER button.
-
Page 17: Before Using The Hob
OPERATING INSTRUCTIONS Language Selection Touch OK. Set the display language to English or Italian. Selecting a Language Touch Settings at the center bottom of the Main NOTE screen, and touch Language Selection. • When Demo Mode is on, the appliance will not Select the desired language. -
Page 18: Activating The Hob
18 OPERATING INSTRUCTIONS Activating the Hob Selecting the Cooking Zone Place an induction-compatible pan on top of the To turn ON the hob, touch the POWER key for desired cooking zone. approximately 1 second. The LCD panel will turn on. To turn OFF the hob, touch the POWER key. - Page 19 OPERATING INSTRUCTIONS Setting the Power Level Power Level Indicator • Cooking Element LED Bar The power level for the selected cooking zone can be The range provides an LED bar for each cooking set from 1 to 9. element on the hob. Check the display and use the LEDs to monitor the Selecting the Power Level power levels of the elements.
-
Page 20: Tips For Induction Cooking
20 OPERATING INSTRUCTIONS Tips for Induction Cooking Turning OFF the Cooking Zone After the cooking is complete, touch the x icon to Getting the results you want when cooking can take a bit turn off the cooking zone. of time and effort. If you are not familiar with induction cooking, it may take a bit of practice or adjusting of your usual methods to achieve the expected results. - Page 21 OPERATING INSTRUCTIONS Cooking Example Food Item Power Level Notes/Comments Function Stir continuously to prevent scorching. • Chocolate Over Direct 1 or Melt If using a double boiler to melt chocolate, use power Heat Melting level 2. • Butter Monitor carefully to prevent poor results. Monitor carefully and stir frequently to achieve Reheating •...
-
Page 22: Using The Cook Modes
22 OPERATING INSTRUCTIONS Using the Cook Modes TURBO Use the Turbo function to boil water or heat up large SIMMER quantities of food quickly. To prevent damage to the product, if one of the right- Use SIMMER to simmer sauces or stews. side elements is turned on when the center dual element is using the Turbo setting, the power setting Turning Simmer On... -
Page 23: Using The Flexible Cooking Zone
OPERATING INSTRUCTIONS Using the Flexible Cooking Using the Dual Cooking Zone Zone The dual element, located in the center position, offers two different sized elements to accommodate Adjoining cooking zones can be combined to create different pan sizes. Depending on the material and one large cooking zone with the Flex function. -
Page 24: Other Functions
24 OPERATING INSTRUCTIONS Other Functions Timer Kitchen Timer Pause The Kitchen Timer acts as a simple timer and does The pause function reduces the power level of a not turn off the cooking zone. This function informs cooking zone to level 1 and maintains it at that you that the set cooking time has passed using an level until deactivated. - Page 25 OPERATING INSTRUCTIONS Cooking Timer Automatic Power Level Control The Cooking Timer also acts as a simple timer and The power level displayed may be different from the automatically turn off the cooking zone. This function actual power level at the high end of the temperature informs you that the set cooking time of each cooking range.
- Page 26 26 OPERATING INSTRUCTIONS Cookware Heating Index Using the Heating Index Turn off all burners. The container heating index can be used to determine if a container will heat well on an induction burner. • If more than one burner is running, this function will not work.
-
Page 27: Smart Functions
• The appliance supports 2.4 GHz Wi-Fi networks Application only. To check your network frequency, contact your Internet service provider or refer to your The SIGNATURE KITCHEN SUITE application allows wireless router manual. you to communicate with the appliance using a • SIGNATURE KITCHEN SUITE is not smartphone. -
Page 28: Open Source Software Notice Information
SIGNATURE KITCHEN SUITE will also provide open source code to you on CD-ROM for a charge covering the cost of performing such distribution (such as the cost of media, shipping, and handling) upon email request to opensource@signaturekitchensuite.com. -
Page 29: Product Fiche
PRODUCT FICHE PRODUCT FICHE Product Fiche_COMMISSION DELEGATED REGULATION (EU) No 66/2014 Trademark SIGNATURE KITCHEN SUITE Model identifier SKSIT3601G Type of hob Built-in hob Heating technology induction cooking zones and cooking areas Number of cooking zones and/or areas For circular cooking zones or area: diameter of Front Left 21.5 x 18.0 cm... -
Page 30: Maintenance And Cleaning
30 MAINTENANCE AND CLEANING MAINTENANCE AND Burned-On Residue CLEANING hile the hob is still warm, remove any burnt on deposits or spilled food from the glass-ceramic cooking surface Cleaning the Hob with a suitable metal razor scraper. prevent burns, wear an oven mitt or pot Normal Daily Use Cleaning holder while using the metal scraper. - Page 31 MAINTENANCE AND CLEANING damage to the glass-ceramic surface. Metal Marks and Scratches hen used correctly, the scraper will not ANY DAMAGE OR FAILURE OF THE damage the hob surface. or your safety, PRODUCT RESULTING FROM please use an oven mitt or pot holder BELOW MAY NOT BE COVERED while scraping the hot cooking surface.
-
Page 32: Installation Instructions
32 INSTALLATION INSTRUCTIONS INSTALLATION Tools Needed INSTRUCTIONS nstallation and service must be performed by qualified personnel. Pencil Saber Saw IMPORTANT ave these instructions for local electrical inspector’s use. ead and save these Phillips screwdriver Flat-blade screwdriver instructions for future reference. Before You Begin Pliers Tape measure... -
Page 33: Technical Specifications
INSTALLATION INSTRUCTIONS Technical Specifications SKSIT odels 3601 escription nduction onnection ~, 50 z, 44.3 voltage lectrical aximum pecifications connected 10200 power load imensions 930 mm ( ) × 91 mm ( ) ×535 mm ( tandard nstallation - 873 mm( ) ×... -
Page 34: Preparing The Installation Location
34 INSTALLATION INSTRUCTIONS Preparing the Installation Location Important Installation Information ll electric hobs run off a single phase, three-wire( round), 230 volt, 50 hertz, • only electrical supply with ground. inimum distance between hob and overhead cabinetry is 762 mm. •... - Page 35 INSTALLATION INSTRUCTIONS lush nstallation o not obstruct these areas! Radius 10 mm 93 cm nduction min. 762 mm 91 mm 62 mm Right side 91 mm Height of conduit: 29 mm 102 mm x 203 mm 32 mm opening to route armored 7 mm cable if panel is present min.
- Page 36 36 INSTALLATION INSTRUCTIONS Recommended Spacing between Hob and Drawer CAUTION t is very important to keep 84 mm distance between the hob and the drawer. verhead cabinet should not exceed a maximum depth of 330 mm. 146 mm 84 mm min.
-
Page 37: Electrical Connections
INSTALLATION INSTRUCTIONS Electrical Connections Electrical Requirements bserve all governing codes and local Important Safety Instructions ordinances. e sure the hob is installed and grounded • 3-wire( round) single-phase properly by a qualified installer or service olt, 50 -only electrical technician. supply is required on a separate his hob must be electrically grounded in •... - Page 38 38 INSTALLATION INSTRUCTIONS Electrical Connection bserve all governing codes and local ordinances. onnect the flexible armored cable that isconnect the power supply. extends from the surface unit to the junction box using a suitable strain relief at the point t the circuit breaker box, fuse box or the armored cable enters the junction box.
-
Page 39: Hob Installation
INSTALLATION INSTRUCTIONS Hob Installation ttach the retainer brackets to the bottom of the hob; then snug the bolts against the bottom of the countertop as isually inspect the hob for damage. shown. ake sure all hob screws are tight (see below for locations). -
Page 40: Troubleshooting
40 TROUBLESHOOTING TROUBLESHOOTING Before Calling for Service Before you call for service, review this list. It may save you time and expense. This list includes common occurrences that are not the result of a defect in workmanship or materials. Symptoms Possible Cause / Solutions •... - Page 41 TROUBLESHOOTING Symptoms Possible Cause / Solutions The following noises are normal. • Humming/buzzing sound - Caused by the magnetic field transmitting power to the cookware. It is most noticeable at high power settings and becomes quieter if the power is reduced. •...
- Page 42 42 MEMO MEMO...
- Page 43 MEMO MEMO...
- Page 44 Centro di assistenza clienti Customer Information Center 800-978-866 800-978-866...
Need help?
Do you have a question about the SKSIT3601G and is the answer not in the manual?
Questions and answers