
Related Manuals for Soundstream VR-64HBL

Summary of Contents for Soundstream VR-64HBL
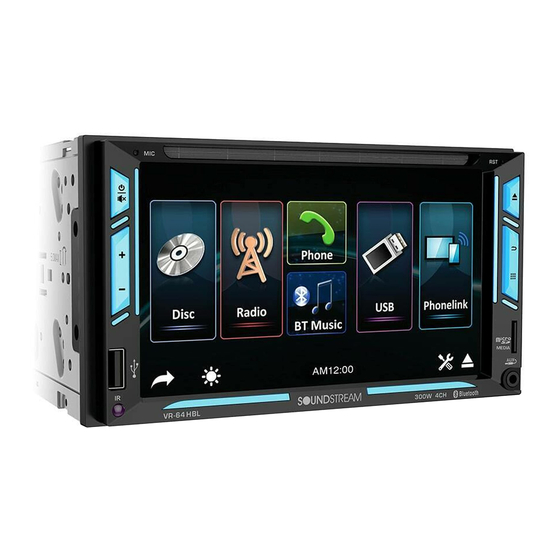
- Page 1 Owner’s Manual 2 DIN 6.2'' Monitor 2-Din DVD Headunit Touch screen DVD/CD/MP3/MP4/USB/SD AM/FM Radio Support Android Phone Link Support Bluetooth VR-64HBL...
-
Page 2: Table Of Contents
• Before use Contents IMPORTANT NOTICE & PRECAUTIONS Before use Thank you for using our company multi-media • Important notice & precaution player! To operate the unit correctly, please Protecting the monitor read the operation manual carefully before Cleaning the unit using. -
Page 3: Installation
Installation Installation Note: Connecting the revising line to taillight on the car. 1. Make sure the ignition i s turned off, and disconnect the cable from the vehicle battery’s After connection, when you start up the reverse negative (-) terminal. gear, the unit will receive the picture from car You never want electricity running while you rear view camera. -
Page 4: Wiring
Wiring Wiring Diagram White Audio-out FL Green Subwoofer Yellow Video-out 1 Yellow Video-out 2 Blue Bluetooth Antenna FM/AM antenna input V-OUT1 V-OUT2 F-CAM R-CAM Yellow Rear Camera... -
Page 5: Panel Description
Panel description Remote control SD slot • Micro SD slot for audio/video playback. AUX jack for AUX playback. • Remote control 1 Microphone Built-in Microphone. • 2 Disc slot Insert or eject the disc. • 3 Reset • If the unit or the connected unit fails to operate properly, the unit returns to factory settings when this button is pressed. - Page 6 2 .Mounting Bracket 3 . Screws 4 .Power Cable 5 .Wrranty Card 7 .Remote Control 6 .User Manual Bracket Owner’s Manual 2 DIN 6.2'' Monitor 2-Din DVD Headunit Touch screen DVD/CD/MP3/MP4/USB/SD AM/FM Radio Support Android Phone Link Support Bluetooth VR-64HBL...
- Page 7 Remote control (Bluetooth Music) , press repeatedly to shift previous track. (Phone) , press to reject an incoming call; Hang-up the conversation call. (AM/FM) , press repeatedly to select the (Video) , press and hold to display the contents desired radio band for broadcasting. of the playback details on screen.
- Page 8 Remote control CLR /SYSTEM NUMBERS In Bluetooth mode, press to delete the digit input [1-6] (AM/FM) , press any one of the number key 1-6 by error. to select a station that had been stored in the preset memory number key 1-6 for broadcasting. (Phone) , press to answer an incoming call;...
-
Page 9: Operation
Operation MAIN MENU OPERATION 13. Touch repeatedly to select brightness of screen or turn off the screen. When the screen is off, touch any portion of the screen to turn it on again. Below preset brightness modes can be selected. At this mode, brightness of screen is set by the user. -
Page 10: Settings Menu
Operation LOUDNESS 1. Touch to shift to Display control . 2. Touch to select the desired setting mode: Brightness.Contrast,Hue, Saturation, Sharpness. 1. Touch to shift to Loudness control . 3. Hold & Slide to adjust the level. 2. Touch to switch On or Off. At MAIN MENU, touch on screen and shift to Audio Control SETTINGS MENU for various setup selection... - Page 11 Operation SYSTEM SETUP AUDIO SETUP 1. Touch to shift to MAIN MENU for operation mode selection. 2. Touch to back to previous setting menu. 3. Touch to access to EQ MENU. 4. Touch to access to FIELD MENU for sound output 1.
- Page 12 Operation VISUAL SETUP 1. Touch to shift to MAIN MENU for operation mode selection. 1. Touch to shift to MAIN MENU for operation 2. Touch to back to previous setting menu. mode selection. 3. Hold & slide to show hidden setting items. 2.
- Page 13 Operation 9. Touch to turn on or off of automatic Note: loading record of incoming calls / 1. During DVD plauback, new setting on “Audio dial out/missing calls of the mobile Language”, “Subtitle Language”,”Menu Language”, phone to the car unit. can not be activated.
- Page 14 Operation 4. Touch to select illumination mode: 1. Touch to shift to MAIN MENU for operation AUTO or PRIMARY. mode selection. 5. Touch to select backlight color. 2. Touch to back to previous setting menu. 6. Hold & slide to set brightness of screen when 3.
-
Page 15: Radio Operation
Operation TOUCH FOR CALIBRATION 6. Touch to turn the radio frequency upward or downward and stop for broadcasting when a station received. Press & hold shortly to activate manual tuning mode. At this mode, press repeatedly to fine tune the radio frequency upward or downward. - Page 16 Operation 1. Hold and slide to show the hidden operation icons for operation. 2. DVD Mode Touch to display on screen the menu of the disc & playback will resume after a while. Video / Music / Photo Mode Touch to shift to FOLDER / PLAYLIST MENU for playback selection.
-
Page 17: Bluetooth Operation
Operation LINK UP WITH MOBILE PHONE LINK UP WITH MOBILE PHONE 12. At video playback mode, touch repeatedly to select 12. At video playback mode, touch repeatedly to select To linkup Bluetooth connection with the mobile To linkup Bluetooth connection with the mobile different speeds of slow motion playback. - Page 18 Operation APPLICATION TO CONTROL THE UNIT APPLICATION TO CONTROL THE UNIT 1. Touch to shift to BT DEVICE MENU to show the VIA BLUETOOTH OF MOBILE PHONE VIA BLUETOOTH OF MOBILE PHONE current status on connection. (Android support only) (Android support only) 2.
-
Page 19: Aux In Operation
Operation AUX IN OPERATION AUX IN OPERATION WALLPAPER OPERATION WALLPAPER OPERATION At MAIN MENU, touch on screen to shift At MAIN MENU, touch to select the to AUX IN MENU for audio input operation desired wallpaper of the headunit. (provided an AV device had been connected). During AUX input operation, touch any portion on screen to activate AUX IN operation. - Page 20 Operation FLOATING DOCK FLOATING DOCK 2. Touch to connect with the mobile phone. 2. Touch to connect with the mobile phone. 3. Touch to shift to USB DEBUG MENU and follow 3. Touch to shift to USB DEBUG MENU and follow the information to have USB debug on the the information to have USB debug on the mobile phone before connecting again.
- Page 21 the main menu of the the main menu of the reen. When the screen reen. When the screen ortion of the screen to ortion of the screen to...
- Page 22 Specification GENERAL GENERAL Power Requirement: Power Requirement: DC 12 Volts, negative ground DC 12 Volts, negative ground Load Impedance: Load Impedance: 4 Ohms 4 Ohms Maximum Power Output: Maximum Power Output: 80 watts x 4 80 watts x 4 AM RADIO SECTION AM RADIO SECTION Frequency Range Frequency Range...
-
Page 23: Trouble Shooting
SIMPLE TROUBLE SHOOTING PROBLEMS, CAUSES & SOLUTIONS No power - Check and make sure the connecting wires are connected correctly - Check whether the fuse is blown. Replace with the proper value fuse if necessary. No sound - Check and make sure the speaker wires are connected correctly. No picture - Check whether the video wire is connected to the video device.
Need help?
Do you have a question about the VR-64HBL and is the answer not in the manual?
Questions and answers