
Related Manuals for Ecube Labs CleanFLEX CAM

Summary of Contents for Ecube Labs CleanFLEX CAM
- Page 1 CleanFLEX(CAM) User Manual English v1.0.2 January 31, 2021 Copyright © 2020 Ecube Labs Co., Ltd. All Rights Reserved - Proprietary and Confidential.
- Page 2 Notice This user manual is provided for informational purposes only. All information included herein is subject to change without notice. Ecube Labs makes no warranty of any kind with regard to this user manual, either expressed or implied, except as provided herein, including without limitation, thereof, warranties as to marketability, merchantability, fitness for a particular purpose of use or against infringement of any patent.
-
Page 3: Table Of Contents
Table of Contents 1. Introduction to CleanFLEX ................4 1.1 CleanFLEX contents ....................4 1.1.1 Included in CleanFLEX box ..............4 1.1.2 Optional ......................5 1.2 Features........................5 2. Installing CleanFLEX ..................6 2.1 Installation prerequisites ..................6 2.2 Installing CleanFLEX ..................... 7 3. -
Page 4: Introduction To Cleanflex
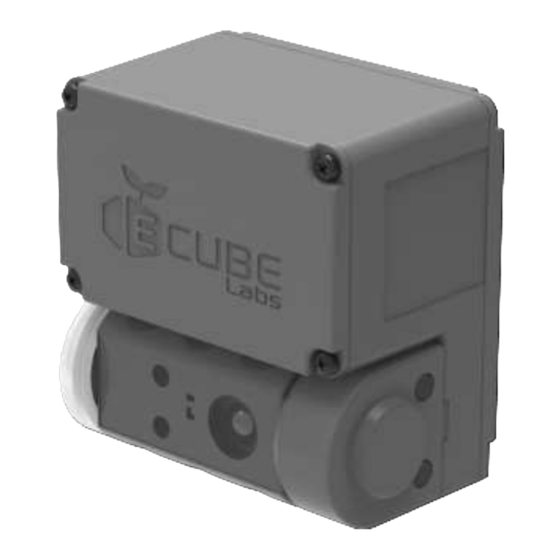
1. Introduction to CleanFLEX CleanFLEX(CAM) is a smart fill-level sensor that can be easily installed on any type of container. It uses robust ToF VCSEL (Time of Flight, Vertical Cavity Surface Emitting Laser) technology, allowing it to monitor any type of non-transparent solid substance. In addition, CleanFlex can take pictures of the inside of the trash bin using the built-in camera, and the photographed photos are transmitted to Clean City Networks wirelessly along with the collected bin fill-level and trash bin status information. -
Page 5: Optional
Before ordering these items, you must provide information about height, width, volume, and material of your waste container. Based on the information provided, Ecube Labs will calculate the exact height for installing CleanFLEX and will provide the appropriate bracket and kit. -
Page 6: Installing Cleanflex
2. Installing CleanFLEX CleanFLEX can be installed inside of waste containers or under its lid. If the installation is for a waste container with a lid, CleanFLEX should be mounted under the lid. If the installation is for a waste container without a lid, CleanFLEX should be mounted on the inside of the waste container. -
Page 7: Installing Cleanflex
2.2 Installing CleanFLEX Fill-level accuracy depends on how well it is mounted and configured. Depending on the container type, it may be necessary to seek advice on appropriate installation location and method of installation. Ensure you have the following items before beginning the installation: Stencil pen, marker ˙... - Page 8 CleanFLEX(CAM) User Manual - 8 -...
-
Page 9: Activating Cleanflex
3. Activating CleanFLEX After installing CleanFLEX, activate the device and check its operation. If you contact Ecube Labs or your point of purchase, you will be provided with more accurate activation confirmation. 3.1 Checking CleanFLEX ON or OFF status Perform the following to check the ON or OFF status of CleanFLEX. - Page 10 For CleanFLEX installed underground, it is highly recommended to perform “Set Manual Location” as CleanFLEX installed underground does not obtain accurate GPS location coordinates. Take the following steps to turn CleanFLEX on. 1. Place the magnet on the indent located on the side of CleanFLEX and hold it there for 5 to 10 seconds and then remove it.
-
Page 11: Turning Cleanflex Off
3.3 Turning CleanFLEX OFF Take the following steps to turn CleanFLEX off. 1. Place the magnet on the indent located on the side of CleanFLEX and hold it there for 5 to 10 seconds and then remove it. 2. The LED light will blink green and then eventually turn red. Please note that removing the magnet too soon (<5 seconds) or too late (>10 seconds) will fail to turn the unit off. -
Page 12: Bin Profile
4. Bin profile For accurate fill-level measurements, the user must create a bin profile for each unique bin CleanFLEX is mounted on. The dimensions mentioned in the diagram below are essential in creating the bin profile on CCN. If you fail to create an accurate bin profile using these dimensions, then CleanFLEX is set to a default bin profile which may lead CleanCityNetworks User’s Manual”... -
Page 13: Placing Liner Bag Inside The Waste Bin
4.1 Placing liner bag inside the waste bin If using bin liners, please ensure the following steps are followed. Failure to follow the instructions may result in inaccurate fill-level readings. 1. Fill the bin liner with air before inserting it into the bin. 2. -
Page 14: Troubleshooting
Check whether the sensor is damaged ˙ If there is any foreign matter or condensation, please remove it. Also check whether the sensor is physically damaged. In case of damage, contact Ecube Labs or point of purchase. 5.3 Telecommunication and Battery issues Occasionally the network provider may experience temporary outages and CCN will highlight a particular CleanFLEX unit with a red icon. -
Page 15: Regulatory Notices
6. Regulatory Notices User notification This device has been tested for compliance with the intended use in a commercial environment. If the device is used in a domestic environment, it may cause radio interference. FCC Part 15.19 This device complies with part 15 of the FCC Rules. Operation is subject to the following two conditions: (1) This device may not cause harmful interference, and (2) this device must accept any interference received, including interference that may cause undesired operation. - Page 16 Le présent appareil est conforme aux CNR d'Industrie Canada applicables aux appareils radio exempts de licence. L'exploitation est autorisée aux deux conditions suivantes : (1) l'appareil ne doit pas produire de brouillage, et (2) l'utilisateur de l'appareil doit accepter tout brouillage radioélectrique subi, mêmesi le brouillage est susceptible d'en compromettre le fonctionnement.
Need help?
Do you have a question about the CleanFLEX CAM and is the answer not in the manual?
Questions and answers