Table of Contents
Advertisement
Quick Links
Advertisement
Table of Contents

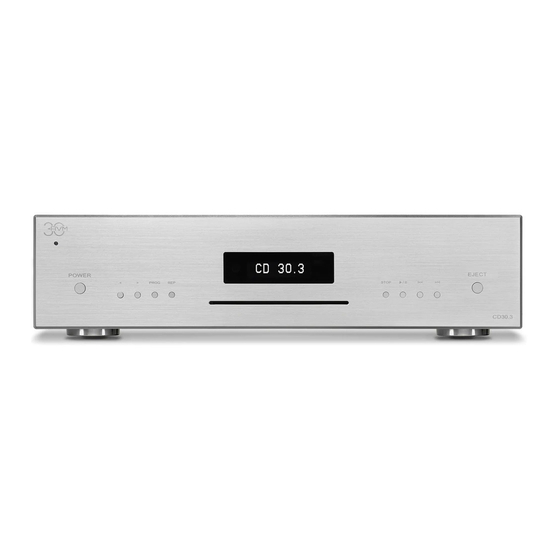
Summary of Contents for AVM CD 30.3
- Page 1 Operating Instructions CD 30.3...
- Page 3 Declaration of conformity (for EC only) We herewith confirm, that the unit to which this manual belongs fulfils the EC rules necessary to obtain the sign the necessary measurements were taken with positive results. AVM Audio Video Manufaktur GmbH Daimlerstraße 8 D-76316 Malsch Germany www.avm.audio...
- Page 4 In the following, we would like to explain the use of your CD 30.3 in a comprehensive way and therefore ask you to take a little time to study this manual in detail.
-
Page 5: Table Of Contents
Table of contents Getting started ........................6 What’s in the box? ......................6 Control and operating elements ................... 6 Pin assignments ......................7 Installation and cooling ....................7 Power connection ......................8 Connecting a preamplifier or integrated amplifier ............8 Connecting digital sources and recording devices ............ -
Page 6: Getting Started
1 Getting started 1.1 What’s in the box? • CD 30.3 CD Player • Power cable • RC 3 remote control NOTE: After unpacking, please check the scope of delivery to ensure that all parts have been supplied and are undamaged. In case the original packing has already been opened, please contact your local dealer. -
Page 7: Pin Assignments
3) NEG (-) 1.4 Installation and cooling The CD 30.3 generates almost no heat during normal operation. Therefore, it can be installed in a rack without any problems. If you place the unit in a cabinet, please ensure sufficient air circulation. -
Page 8: Power Connection
(dig in coax, dig in opt. etc.). 1.8 RC 3 remote control The RC 3 remote control included in the scope of delivery allows you to control your CD 30.3 comfortably. Optionally, the RC 8 remote control is also available from us. This remote control with its numeric keys allows you to control the CD player more comfortably. - Page 9 Personal Setup Menu (see also section 3.1 ), the volume of the analog outputs of your CD 30.3 can be adjusted using the VOLUME keys on the RC 3 or RC 8 remote control. NOTE: When using the RC 8 remote control (available as an accessory), sampling rate and filter can also be switched (<...
-
Page 10: Operation
(7). VOL indicates a variable output level, so you can adjust the volume of the analog outputs of your CD 30.3 using the VOLUME keys on the RC 3 or RC 8 remote control or by pressing the INPUT keys (2, 3) for a long time. FIX, on the other hand, indicates the selection of a fixed output level at the same place. -
Page 11: Display In Cd Player Mode
2.7 Input selection In addition to the integrated CD drive, the CD 30.3 has a large number of digital inputs that can be selected using the two INPUT keys (2, 3). If no signal or an invalid signal is present at a selected digital input, the display shows the message NO DIG SIGNAL on the right side. -
Page 12: Compatible Cd Formats
2.10 Inserting / Ejecting the CD Insert The CD 30.3 has a slot (8) instead of the usual drawer, through which the CD is inserted. Slide the CD into the slot with the (silver reflective layer facing down). It will now be pulled in automatically. -
Page 13: Function Of The Skip Keys
AUTO-PLAY function If the CD player is not selected as source, the CD 30.3 automatically switches to CD mode when a CD is inserted and reads the CD. If this autoplay function is activated (see section 3.1.2) the playback process will start automatically afterwards. - Page 14 By pressing the PROG key (4) again, a random playback sequence (RANDOM) is automatically programmed. Press the PLAY/PAUSE key (10) to enter the title programming: On the left side of the display (7) the title number (TRCK) of the new title to be programmed is shown.
-
Page 15: Advanced Settings
Press the STOP keys (9) to exit the Personal Setup menu (EXIT). Then the CD 30.3 must be switched off completely using the power switch on the back of the unit (26) and switched on again after a short waiting period. The settings made are permanently stored, but can be adjusted at any time by calling up the Personal Setup again. - Page 16 You can choose to reset all settings (ALL) or only the input names (NAMES). To call up the RESET menu, switch off the CD 30.3 completely using the power switch (23) on the back of the unit. Now press and hold both REPEAT keys (5) and STOP (9) simultaneously and switch the unit on again with the power switch (23).
-
Page 17: Appendix
4 Appendix 4.1 Care of the housing The surface and the printing on the housing are largely scratch-resistant. The CD 30.3 can be cleaned with mild soapy water or a gentle glass cleaner and a soft duster. ATTENTION: During cleaning, liquid must never be allowed to enter the interior of the housing. -
Page 18: Conditions Of Warranty (Ec Only)
4.3 Conditions of warranty (EC only) If despite expectations a defect occurs that cannot be repaired by yourself or your dealer, we undertake the repair of your unit free of charge for up to three years from date of purchase. The warranty covers the costs of material and working time, transport costs are to be borne by the owner. -
Page 19: Specifications
4.4 Specifications 4.4.1 Digital inputs Input impedance Coax / XLR 75 Ohm / 110 Ohm Input format Coax / XLR S/P-DIF, 32 kHz - 192 kHz / 16 - 24 Bit Input format Optical S/P-DIF, 32 kHz - 96 kHz / 16 - 24 Bit Sampling frequency Native, 32 kHz - 192 kHz / 16 - 24 bit up/downsampling, switchable 44.1 kHz - 192 kHz / 24 bit...
Need help?
Do you have a question about the CD 30.3 and is the answer not in the manual?
Questions and answers