
Related Manuals for Anztec QC-7610Q

Summary of Contents for Anztec QC-7610Q
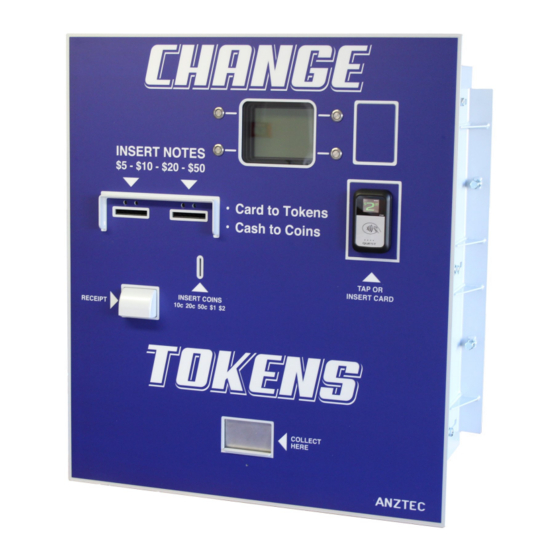
- Page 1 QC-7610Q Instruction Manual Anztec Limited, 7C Birmingham Drive, Christchurch, New Zealand Phone +64 3 338 3139, www.anztec.com email:sales@anztec.com Serial # Key # Software Ver.
- Page 2 While every effort has been made to ensure that the information contained in this literature is accurate, Anztec reserves the right to amend the size and specifications of this machine in line with its policy of continuing improvement and development QC-7610Q Rev 1.0...
-
Page 3: Table Of Contents
Ecommerce Status ..........................29 Alerts ..............................30 User ..............................31 Password............................. 31 Installing Printer Paper ......................32 Loading paper – Auto Load........................ 32 Unloading paper ..........................34 Mounting Guide ........................35 Recommended Wall Cutout........................ 36 QC-7610Q Rev 1.0 Page 3... -
Page 4: Security
Limit and monitor access to cabinet keys to reduce the chance of theft or tampering. Monitor third parties who access the machine for any reason. The fitting of machine components not directly supplied by Anztec may result in security being compromised. Anztec accepts no responsibility if this situation occurs. QC-7610Q Rev 1.0... -
Page 5: Warning
Configuration The QC-7610Q is configured to customer or distributor specifications prior to leaving Anztec’s production facility. Configuration includes items such as the designation of hoppers as coin or token, the value of those coins or tokens, and additional bonus payout features. -
Page 6: Installation
Unpack and install the equipment supplied. Open the Main Door of the machine. Plug the QC-7610Q power cord into the internal three pin socket. Plug the other end into a mains supply outlet. Use the P-clip supplied to strain relief the power cord. -
Page 7: Attendant Menu Management
Manage Refills Clear Short Term Meters Entering The Attendant Menu To enter the Attendant Menu on the QC-7610Q, unlock and open the main door, and then press the # key. ATTENDANT MENU Press # to enter attendant mode Once this is done the Attendant Menu will appear on the attendant LCD inside the machine. -
Page 8: Refills
Hopper 1: $X.XX Add xxx coins (X) #=ok *Cancel Repeat steps 5 to 7 to refill the other hopper denominations. To exit this menu and return to the Attendant Menu, press the * button. QC-7610Q Rev 1.0 Page 8... -
Page 9: Print Accountancy
Print Accountancy The QC-7610Q has the ability to print meter information while in the Attendant Menu. The following information will be printed: Current Hopper Levels Hopper Refills Cash Clearances Coins Accepted Notes Accepted Purchases ... -
Page 10: Clear Short Term Meters
Clear Short Term Meters The QC-7610Q has Short Term Meters which you can clear while in the Attendant Menu. Press button 7 to enter Clear Short Meters Menu. RAM CLEAR Enter PIN #= Clear *Cancel Enter the PIN and press the # button clear the Short Term Meters. -
Page 11: Hopper Count
Hopper Count The QC-7610Q has a Hopper Count function which is accessible while in the Attendant Menu. This allows the hoppers to run and count the remaining coins as they are ejected. Press button 5 while in the Attendant Menu to enter the Hopper Count Menu. -
Page 12: Status
Status The QC-7610Q has a Status menu which you can view while in the Attendant Menu. Press button 0 while in the Attendant Menu. SYSTEM STATUS QC7611 Ser:0000000000000000 ---------------------- The initial screen shows the machine type and serial number. Use the A and B buttons to scroll up and down through this menu to show the status of: ... -
Page 13: Web Interface
Note that when using this configuration, it is a good idea to make the IP address of the QC-7610Q static. This will ensure that the DHCP server does not assign a different IP address to the QC-7610Q and prevent login from an external location. For instructions on how to make the IP static, see the network configuration section of this manual. -
Page 14: Login Screen
Interface’. Once connected, the initial login screen will be displayed as shown below. Enter your user name and password and click on the Login button. Once logged in you will be presented with a range of options accessible through the menu sidebar. QC-7610Q Rev 1.0 Page 14... -
Page 15: Configuration
The following options are available: Configure Network Configure Card Values Configure Clock Configure System Configure Site Configure Pushover Configure Reports Configure Receipts Configure Ecommerce Configure Hardware QC-7610Q Rev 1.0 Page 15... -
Page 16: Configure Network
Configure Network The Configure Network page contains all network related settings. QC-7610Q Rev 1.0 Page 16... - Page 17 System Updates The System Update Server Address determines the location that the QC-6711P will query in order to download online software updates. This is preset by Anztec but can be changed by the user if the server address changes. Email If email reports or alerts are enabled, details of a valid SMTP mail server must be entered into this section.
-
Page 18: Configure Card Values
Change any settings and then hit the Apply Changes button. The changes will be reflected in the Card Transaction Value table. The set transaction value is the value required to purchase the tokens exclusive of any credit card surcharge that may be applied. QC-7610Q Rev 1.0 Page 18... -
Page 19: Configure Clock
Configure Clock The current date and time can be set by completing the relevant fields on this page. Time is represented in 24-hour format. Click on the Apply Changes button to implement the changes. QC-7610Q Rev 1.0 Page 19... -
Page 20: Configure System
Progress can be followed on the internal LCD display. Care should be taken not to interrupt the power prior to the completion of reprogramming. QC-7610Q Rev 1.0 Page 20... -
Page 21: Configure Site
Configure Site Use the text boxes provided to details of the host site. Click on the Apply Changes button to store the changes. QC-7610Q Rev 1.0 Page 21... -
Page 22: Configure Pushover
Update button to save the changes. The check boxes adjoining the recipient address determine which report(s) the recipient will receive. The Enabled checkbox can be used to temporarily disable transmission of all reports to the respective recipient address. QC-7610Q Rev 1.0 Page 22... -
Page 23: Configure Receipt
After entering the details press the Apply Changes button to save any new or altered details. Receipt details can be confirmed by printing a test receipt. Press the Print Test Receipt button and a receipt will be printed by the QW entry system. QC-7610Q Rev 1.0 Page 23... - Page 24 Below is an example of a test print of a receipt. QC-7610Q Rev 1.0 Page 24...
-
Page 25: Configure Ecommerce
Comms Logging is not intended to be enabled permanently but rather used as an analysis tool when it becomes necessary. QC-7610Q Rev 1.0 Page 25... -
Page 26: Configure Hardware
Use this menu to configure any alternative hardware devices that the machine may be configured for. In the case below, the only configurable machine option is the printer type. Once all options are set correctly, click on the Apply Changes button to store the changes. QC-7610Q Rev 1.0 Page 26... -
Page 27: Meters
Long Term Cash Clearances Long Term Coins In Long Term Notes In Long Term Purchases Long Term Hopper Payouts Long Term Totals Historical Turnover Meters Currently, Historical Turnover Meters are not enabled QC-7610Q Rev 1.0 Page 27... - Page 28 Press the Download button to download and save the log file in .TXT format. This type of file is best viewed with Microsoft Word Pad or similar text file viewing software. To view the log without downloading press the View button and use the previous and next page button to scroll through the log. QC-7610Q Rev 1.0 Page 28...
-
Page 29: Ecommerce Status
The status information displayed is generated by the installed Quest card reader. The information in the Ecommerce Status section is updated in real time (every 3 seconds) but the Extended Ecommerce Status is only refreshed at power-up. QC-7610Q Rev 1.0 Page 29... -
Page 30: Alerts
Click the Apply Changes button at the bottom of the page to store the new configuration. Alerts can be selected from the following categories: Alert Notification Settings Hopper Alerts Coin Mech Alerts Note Validator Alerts System Alerts Purchase Alerts Ecommerce Alerts QC-7610Q Rev 1.0 Page 30... -
Page 31: User
Using this menu option, the currently logged in user is able to change their password. To do this, enter the current and new password, repeat the new password to confirm and press the change password button. QC-7610Q Rev 1.0 Page 31... -
Page 32: Installing Printer Paper
Installing Printer Paper Loading paper – Auto Load The printer in the QC-7610Q has an auto loading system for the paper, to begin turn the machine power off. Remove the locking screw in the base of the printer and slide the printer frame back. - Page 33 Once the paper is feed a small section of receipt should come out the front of the printer and be partially cut, remove this piece before pushing the printer back into its normal position. Slide the printer frame back into its normal position and secure with the locking screw. QC-7610Q Rev 1.0 Page 33...
-
Page 34: Unloading Paper
Align the slot on the paper retainer with one of the four retaining fins on the paper roll shaft. Press the fins together and pull off the paper retainer. Remove the paper roll and replace as per Auto Load instructions. QC-7610Q Rev 1.0 Page 34... -
Page 35: Mounting Guide
The forward facing bolts on the clamping brackets can be adjusted for extra tension. Plug power cord into power supply, switch on and the unit is installed. Locking Bolts Front Panel Rear door Clamping Bracket Wall thickness 100mm – 200mm QC-7610Q Rev 1.0 Page 35... -
Page 36: Recommended Wall Cutout
Recommended Wall Cutout 705mm 810mm 860mm Recommended Wall Cutout and Mounting Height QC-7610Q Rev 1.0 Page 36...
Need help?
Do you have a question about the QC-7610Q and is the answer not in the manual?
Questions and answers