Table of Contents
Advertisement
Quick Links
Owners' Guide
B10S
DM Mid-Series Slender Sub
Dee Moz Mid-Series Slender Subs
analog filters to deliver deep, balanced and powerful, professional quality
bass. For space-limited studios and theaters, these elegant designs can
hide stunning power in plain sight.
B12S
use custom Class D amps and classic
™
Dee Moz
Professional Theater Audio
B15S
™
Advertisement
Table of Contents

Related Manuals for Dee Moz DM Mid Slender Sub Series

Summary of Contents for Dee Moz DM Mid Slender Sub Series
- Page 1 Dee Moz Professional Theater Audio Owners’ Guide B10S B15S B12S DM Mid-Series Slender Sub ™ Dee Moz Mid-Series Slender Subs use custom Class D amps and classic ™ analog filters to deliver deep, balanced and powerful, professional quality bass. For space-limited studios and theaters, these elegant designs can hide stunning power in plain sight.
-
Page 3: Important Safety Guidelines
Important Safety Guidelines 1. Read these instrucGons. 2. Keep these instrucGons. 3. Heed all warnings 4. Follow all instrucGons. 5. Do NOT use this apparatus near water. 6. Clean only with dry cloth. 7. Do NOT block any venGlaGon openings. Install in accordance with the manufacturer’s instrucGons. 8. Do not install near any heat sources such as radiators, heat registers, stoves, or other apparatus. (including amplifiers) which produce heat. 9. Only use aYachments/accessories specified by the manufacturer. 10. Only use with a cart, stand, tripod, bracket, or fi[ngs specified by the manufacturer, or sold with the speakers. When a cart is used, use cauGon when moving the cart/ apparatus combinaGon to avoid injury from Gp-over. 11. Do NOT expose this apparatus to dripping or splashing and ensure that no objects filled with liquids, such as vases, are placed on the apparatus. The graphical exclamaGon point below right, within an equilateral triangle, is intended to alert the user to the presence of important operaGng and maintenance (servicing) instrucGons in the literature accompanying the product. The lightning flash with arrowhead symbol within an equilateral triangle, below le`, is intended to alert the user to the presence of “dangerous voltages” which are of sufficient magnitude to consGtute a risk of electrical shock to humans. WARNINGS: - To reduce the risk of fire or electrical shock, do not expose this apparatus to rain or moisture. - No naked flame sources ( such as candles) should ever be placed on the product. -
Page 4: Carton Contents
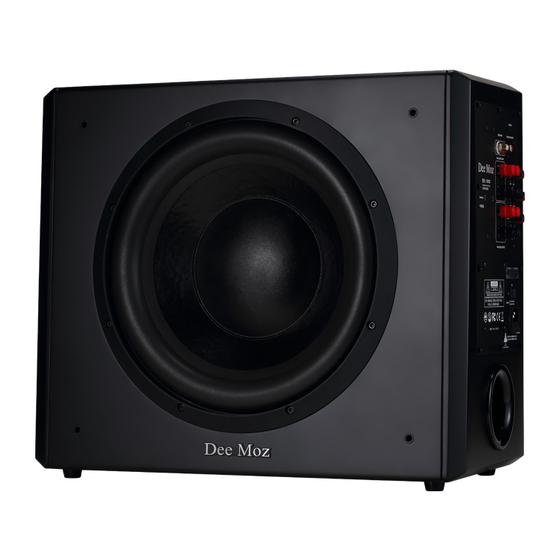
Dee Moz Owner Experience Subwoofers are a specialty at DM Audio. Deep, flat and powerful bass that’s also low distorGon is a vital part of a pro-grade theater experience. Large subs are efficient performers. We’re certainly fans. But rarely do the biggest fit our smaller homes and apartments. Our Slender Subs were built for the Gghtest rooms, and they pump up music games and movies like few others their size. FantasGc as these new subwoofers are, there’s no other speaker in your system which demands such care in setup. Rest assured, the effort to opGmize your subwoofers will be rewarded with theater sound realism that draws you in. Carton Contents 1 Dee Moz Slender Sub™ 4 Adhesive rubber feet 1 Pair of gloves 1 Owner’s manual Control Features 1 Discreet two color Power LED provides a so` glow to allow adjustment in low light. Red indicates subwoofer is in sleep mode. LED shi`s to blue light when input signal is detected. 2 Stereo RCA inputs allow all DM Slim Subs to capture deep bass from virtually any audio system with low level two channel output. Our built-in crossover 3 Balanced XLR (B15S) or RCA (B10S and B12S) Low Frequency Effects (LFE) inputs for a clear path to your custom Class-D amps. Used when your AVR or processor offers built-in digital bass management. 4 Volume: Analog rubberized knob allows simple changes during bass level calibraGon. No confusing display,... - Page 5 Dee Moz Owner Experience 5 & 6 Speaker level inputs – O`en deleted to save costs in today’s subs, this feature (and the associated low-pass crossover knob here) integrates seamless bass with any classic stereo system. 7 Phase control. A vital tool which can enhance the Gming and overall frequency response of your room’s bass. B15S gets conGnuously variable control, the B12S and B10S subs use a basic “flip” switch. 8 “Auto” Power Mode: When “ON” this switch allows the sub to automaGcally “sleep” when not in use, yet quickly “wake” when a movie or music start. This can save you significantly in electricity. When “OFF” this feature is inacGve, and the sub will remain engaged. 9 System voltage selector – Take this subwoofer virtually anywhere thanks to a simple voltage selector. SGll the most effecGve way to ensure your sub can tap your local power. 10 “Mains” power switch: This heavy-duty rocker switch cuts power to your sub’s amp while changing input cables, or moving its locaGon. 11 Grounded power socket with integrated fuse holder: A dedicated in-line power fuse is a safety standard, and we include a spare fuse for rare occasions where a power surge may blow the fuse while protecGng your subwoofer’s amp. Safety first. Generally it’s best pracGce to leave the subwoofer unplugged at its power socket unGl your system is ready for speaker level calibraGon and room correcGon rouGnes to be run. Likewise leave it switched off while connecGng the recommended LFE input to your AVR (or alternaGvely to your stereo system via the Right (R) and Le` (L) RCA or speaker-level inputs to your stereo ) Your hookup method will dictate where best to set key controls. Most modern surround-sound systems featuring an AV Receiver, may use a single hookup cable, running from to your subwoofer model’s LFE jack (RCA or XLR format jacks depending on model). This is both the most simple connecGon, and provides the easiest and best sounding connecGon. Other se_ngs: Keep Phase set to 0 degrees and set Volume no more than ½ to ¾’s way to it’s maximum se[ng (full clockwise). The built-in Crossover knob will not affect your subwoofer sound when the recommended LFE input is used.
-
Page 6: Subwoofer Placement
Dee Moz Owner Experience Subwoofer Placement Locadon, locadon, locadon. More so than any other speaker in your system, subwoofers demand aYenGon to finding the best locaGon in your room. Many good opGons exist for large or small rooms with our Slender Subs. Of course the proximity of neighbors or family to your movie, music or gaming room may affect how loud you might play. The next pages will touch on the advantages of corner placement, twin subs (or more than two!), plus what we call “near-field” listening opGons … that’s where the sub sits right next to your seats! Safe handling during installadon. Our subwoofers are heavy, which speaks to quality and design. Use care when picking up and moving, two-persons li`ing together is best! Professional installers recommend so`-touch gloves for beYer grip without marring your black saGn finish. The supplied grills can help prevent damage to your sub’s woofer. Plan for your subwoofer’s “level calibradon” and room correcdon. Adding high- performance subwoofers to your audio system can add many benefits, but the final adjustments can make major improvements in your results. Simple sound pressure level (SPL) meters make it easy to get basic integraGon done right. Since every brand is different, your AVR operaGng manual is the best source on setup details Why bother? Room correcdon sohware is among audio’s most significant advances in home audio. DIRAC, Audyssey XT and many other AVR brands’ dedicated “Auto-EQ” rouGnes o`en make startling improvements achieving smooth, powerful and balanced response. Insist your installer use these tools before you start playing your favorite movies and music, they are vital to exploiGng the full potenGal of your DM audio system, subwoofers in parGcular. Subwoofer dps for the ages: Big room? Big subs. Or more than one. Small room, small sub! • Very few home theater systems have “too much” bass power. Having one subwoofer turned up too much is a common error however. Of course adding a second, third or even a fourth sub to a large theater space can be done one step at a Gme. • Bass is non-direcdonal, your ears can’t “locate” them. And bass loses power if placed too far away from your prime listening seats. • Corner locadons tend to provide the most balanced (flat) response, and deliver the most power. • Children or family nearby??? Consider placing your subwoofer directly next to your main seats! This allows for a deep, powerful theater or concert-like sound yet with lower volume. This type setup is less likely to disturb those not watching the show. - Page 7 Dee Moz Owner Experience • Doing a basic “level match” with built in AVR test tones and a simple “SPL meter” before running room-correcGon (auto-EQ) tools gives the best results in this criGcal setup task. Some smart phone SPL meter “apps” are quite good! • Take dme to vary subwoofer locadons during your break-in period. Each room has a unique sound, including yours. Subs can sound vastly different simply moving them a meter or less! Note: Re-run your system calibraGon a`er any relocaGon of your sub. Even moving a sub a meter or less can result in profoundly different sound at your seats. Quick Start Use these steps to get rolling with bass in minutes 1. While the power cord is sGll unaYached, place your sub either in a corner near your front speakers or video display 2. Set Volume to ½ level, Phase to “0”. Use a single RCA or XLR cable (depending on DM Slender Sub ™ model) to connect your AVR’s “Sub Out” jack to the sub’s “LFE Input” (Crossover knob se[ng has no effect in this mode). 3. Check your AVR’s speaker setup mode. Ensure your room’s speakers size and locaGon match the AVR’s se[ngs. Set all speakers to “Small” with 80hz filters to start. Use an SPL meter to measure your playback levels using built in AVR test tones. 4. Run your AVR’s auto-calibraGon rouGne. “Auto-EQ” can go by many names, but typically uses dedicated microphone which is moved to several locaGons near your listening locaGon while it listens to your room’s sound and adjusts frequency response and other parameters to enhance performance. Bass and 5.1 or 7.1 surround subwoofer configuradon (See Figure 1) • 0ne to four subs for large 5.1 and 7.1 channel theaters is typical. Room size and your playback level goals will dictate the best path. • Corners on near your front main speakers (Sub 1 above) o`en provide the best combinaGon of power and flat frequency response. • Wiring must be factored in the subs locaGon. Each subwoofer requires electrical power and a signal cable be routed from your AVR..
- Page 8 Dee Moz Owner Experience • If subwoofers are hidden behind decoraGve fabric, front grills should sGll be used. Ensure nothing touches speaker drivers or vents. • A`er final placement ensure your AVR room correcGon rouGne, and level calibraGon se[ngs are made and saved for future use. Fig.1 Sub 1 Corner (1) and Near-field (2 and 3) placement for sub in typical theater layout Display CTR W=X=Y Sub Sub 2 Sub 3 Some words of wisdom about bass and subwoofer(s). • One to four subs?!? Having mulGple subwoofers might seem a bit crazy at first, but for true theater levels of audio, it’s anything but crazy, really. Subs 2 and 3 (Fig. 1 above) in our basic theater setup can be run half as hard as a single sub, giving huge improvements in dynamic range, lower distorGon and sheer power and impact o`en impossible with a single sub. At DM we say “space eats bass”. • If your neighbors are close, place your subwoofers closer! As shown above, placing a smaller subwoofer (Sub 3) directly next to your seats can be one of the most effecGve...
- Page 9 Dee Moz Owner Experience sounding systems. This can provide more feel your games and movies but with lower subwoofer output without disturbing others. • Note to customers using small front and/or surround speakers: Another reason for front wall corners for your subs (Sub 1). If you are able to play your subs a bit louder, using corners up front, near your main speakers and flanking your TV or projecGon screen, allows a more aggressive, higher frequency, bass management se[ngs in your AVR. This gives your more bass to work with and less stress on main speakers. Regardless, a 100Hz (or higher) AVR bass crossover se[ng requires subwoofer up front, keeping high bass tones forward. • Consider a “building-block” approach your theater or game/music room design. Running two subs below full output is far beYer than one sub being pushed to the maximum. But cost and space might dictate you add more bass “headroom”, one upgrade at a Gme. Nearly no audio upgrade gives as much improvement as mulGple subwoofers, your DM installer will ensure any upgrades are properly planned and integrated. Caudon! Turn off your AVR and/or separate amplifiers before making any speaker connecdons. Subwoofer connecdon pointers: Your DM subwoofer is equipped with two types of posiGve (Red) and negaGve (Black) connecGon terminals on the rear of the cabinet. These correspond to the posiGve and negaGve terminals on your AVR. References to speaker “phase” regard this vital setup requirement (keeping polarity “ +/- “ matching from AVR to sub and speakers). Note: Only ONE connecdon mode to your DM Audio subwoofer should be used! 1. A single LFE cable (either XLR or RCA format) is the latest, most simple and best sounding mode of connecdng your sub to a modern surround sound receiver (AVR). (see center panel 1 below, orange RCA cable). This connecGon bypasses subwoofer “Crossover se[ng”, in favor of the Dolby and DTS specified digital bass management in your AVR. 2. If your AV receiver has Right and Leh Channel “Pre-Outs” (low level signal output jacks) but NOT a receiver-controlled LFE “Subwoofer out” … use a two wire RCA “patch- cord” to connect Right and Le` main channel AVR OUTPUT jacks to matching Right and Le` INPUT jacks on your DM sub. This connecGon should be used if you desire to change the DM sub amp bass filter as with a two channel stereo system. 3. If your AVR or Stereo Receiver has NO low-level “pre-outs”, nor LFE / Subwoofer...
- Page 10 Dee Moz Owner Experience Output Jack: Use the provided “speaker-level” (also called “high-power or high-level) jacks and run a +/- speaker wire lead from your receiver to the Right and Le` speaker input jacks of your DM sub (Note: Not shown below, one of each speaker-level wire must also go to your main speakers too). Speaker wire thickness or “gauge” should be greater if you require long runs, but keep consistent throughout your system. Most theaters can benefit from using 12 - 16 gauge oxygen free well insulated copper wire level connecGons. Do’s and Don’t of speaker se_ngs and “bass management” All DM Mid-Series main speakers are designed as pro-grade studio/theater monitors with impeccable sound quality, power and depth designed to integrate perfectly with subwoofers. Your AVR’s speaker size selecGons, plus subwoofer and bass management se[ngs are paramount to achieving theater-quality audio. • Don’t burden main and surround speakers with bass from main channels that’s best le` to your subwoofers! Configure all DM Mid-Series speakers to “Small” se[ngs with bass management set to 60 -100Hz depending on room size, speaker type and your subwoofer setup. • A`er connecGng, perform a basic speaker “level matching” rouGne using a sound pressure level (SPL) meter and your AVR/Processor’s built-in test tones. Adjust AVR’s subwoofer level and the sub’s Volume knob in combinaGon to achieve 75dB (C-Weighted) level from each speaker and sub. • Determine what type/brand of acGve room correcGon rouGne your AVR or processor features, and ensure it’s used. System names such as DIRAC, Audyssey, MCACC, YPAO, are among so`ware addressing the vital funcGon of “listening” to your room (with their dedicated microphones) and making both big and small adjustments, customizing the sound for your room.
-
Page 11: Specifications
SPECIFICATIONS Model B10S Subwoofer 1 x 10" High-excursion OperaGng bandwidth limit -6dB 25 - 240 Hz Quasi-anechoic Amplifier RMS 250W, Peak 375W Crossover adjustment 40 - 200 Hz Variable Phase Adjustment 0°-180° Phase switch Auto Power - On / Off Yes, signal detect Inputs: Stereo Signal Level + LFE RCA Stereo Speaker Level Five-way binding Post Dimensions (H x W x D) 370x450x240 mm Net weight 15.1 kg Model B12S Subwoofer 1 x 12" High-excursion OperaGng bandwidth limit -6dB 22 - 200 Hz Quasi-anechoic Amplifier RMS 350W, Peak 525W Crossover adjustment 40 - 200 Hz Variable Phase Adjustment 0°-180° Phase switch Auto Power - On / Off Yes Inputs: Stereo Signal Level + LFE RCA Stereo Speaker Level Five-way binding Post Dimensions (H x W x D) 410x557x249 mm...
Need help?
Do you have a question about the DM Mid Slender Sub Series and is the answer not in the manual?
Questions and answers