Advertisement
Quick Links
Quick Start Guide
enLink Air
Wireless Air Quality Monitor
•
LoRaWAN long range wireless.
•
Built in sensors for:
•
•
•
•
•
•
*Optional Sensors
Temperature
Humidity
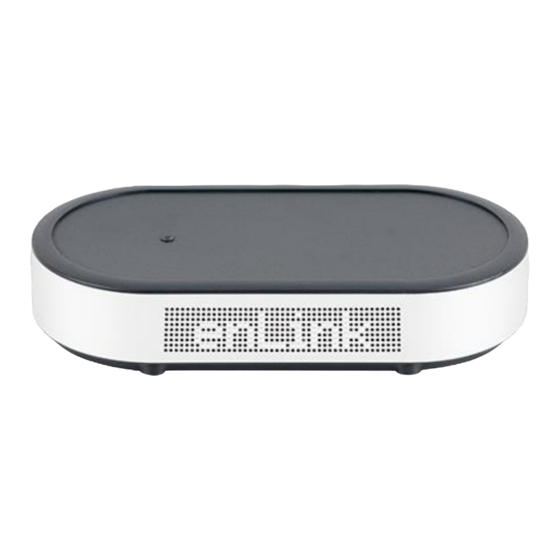
The enLink Air wireless Air Quality Monitor is a
precision instrument which accurately measures up to
14 key environmental parameters including
Temperature, Humidity, Light Level, VOC's, Carbon
Dioxide, Particulate Matter (PM1, 2.5, 4 & PM10),
Oxygen, Sound Level, Barometric Pressure, plus up to 4
plug-in calibrated gas sensors from a range of over 200
gases / sensitivities.
Readings are transmitted to the cloud using long range
LoRa wireless, where the data can be displayed and
analysed.
A built in USB port allows all parameters including air
quality data, wireless signal strength and wireless
network configuration to be viewed and set using
simple menus via any USB enabled host such as a PC or
Mac.
Temperature (°C)
Carbon Dioxide (CO
)
2
Barometric Pressure (Pa)
Particles PM 1, 2.5, 4 and 10
Sound (dB)*
Plus, up to 4 plug-in gas sensors *
O
, CO, NO
, SO
CH
O etc.
3
2
2,
2
Light level
VOC's
Pressure
•
Humidity (%RH)
•
Oxygen (O
•
Light level (lux)
•
Volatile Organic Compounds (VOC's)
CO
O
Sound
2
2
Features
• Multiple sensor options*
• LoRa long range wireless
• Frequency Range 863-870MHz*
• Frequency Range 902-928MHz*
• Up to +18dBm Tx Power
• Built in USB port for configuration
• Externally powered
• CE compliant
• RoHS compliant
• Made in the UK
)
2
x4
Particles
Plus 4 Gases
Advertisement

Summary of Contents for Synetica enLink Air
- Page 1 Light level VOC’s Pressure Sound Particles Plus 4 Gases The enLink Air wireless Air Quality Monitor is a Features precision instrument which accurately measures up to 14 key environmental parameters including • Multiple sensor options* Temperature, Humidity, Light Level, VOC’s, Carbon Dioxide, Particulate Matter (PM1, 2.5, 4 &...
- Page 2 For many applications Synetica can supply enLink Air with the AppEUI and AppKey pre-configured, so providing the LoRa gateway has the matching values, the join process will happen automatically once the enLink Air unit is in wireless range and switched on.
- Page 3 Made in the UK enLink Air Unit Label To power the device ON, apply power (12V-24V DC) to the unit as detailed in the enLink Air Installation Guide. For setup purposes, the unit can also be powered from the USB connection.
- Page 4 2. Setting / changing the enLink LoRaWAN keys For many applications, Synetica can supply enLink units with the LoRaWAN AppEUI and AppKey parameters pre-configured to your requirements, whereby if the LoRa gateway has matching keys the join process will happen automatically once the unit is in wireless range and switched on.
- Page 5 Do not include spaces or any other characters. Pressing S will enter the default AppKey which you can then edit. R will set a random AppKey. Press Enter when the key is correctly entered to return to the Quick Start Settings Menu. Synetica enLink Air - Quick Start Guide Rev 2.0 Page | 5...
- Page 6 Transmit Interval settings Select a fixed transmit interval from the menu options. Press Enter when the interval is correctly set to return to the Quick Start Settings Menu. Synetica enLink Air - Quick Start Guide Rev 2.0 Page | 6...
-
Page 7: Configuration Menu
4. Configuration Menu The enLink Air configuration menu allows you to view current sensor readings and also to change various functions of their behaviour such as calibration data. To enter the Configure Device menu press c from the main menu. A screen similar to the one below will show. - Page 8 6. Live Menu enLink Air incorporates a live data screen which shows all readings and device status for easy data validation. To enter the Live status screen, from the Main Menu enter c for Configure Device followed by d for Live readings display. A screen similar to the one below will show.
- Page 9 Live readings display Synetica enLink Air - Quick Start Guide Rev 2.0 Page | 9...
- Page 10 Set the Mode to Network Server, then set the Channel Plan required and set the Mask to 00FF as shown below. Next, select the Key Management menu and set the AppEUI and AppKey. Ensure that these match the enLink devices you want to join the LoRa network. Synetica enLink Air - Quick Start Guide Rev 2.0 Page | 10...
- Page 11 This screen shows details of devices which have joined the network, when they joined and when the last message was received from them. As you add devices to the network, this is where they will appear. Synetica enLink Air - Quick Start Guide Rev 2.0 Page | 11...
-
Page 12: Technical Support
ChirpStack, please refer to the providers documentation. 8. Technical Support For technical assistance, please visit the downloads section of our web site at www.synetica.net or email us at support@synetica.net Synetica enLink Air - Quick Start Guide Rev 2.0 Page | 12...
Need help?
Do you have a question about the enLink Air and is the answer not in the manual?
Questions and answers