
Related Manuals for BURK Technology LX-1


Summary of Contents for BURK Technology LX-1
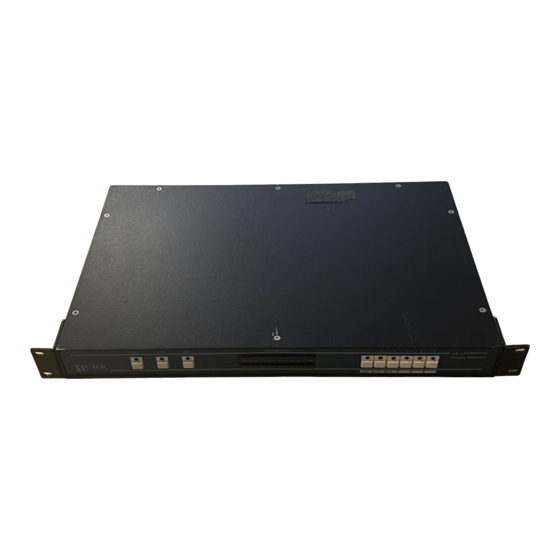
- Page 1 LX-1 Stereo Selector INSTRUCTION MANUAL 7 Beaver Brook Road Littleton, MA 01460 (978) 486-0086 FAX (978) 486-0081 Copyright 1992-1997 by Burk Technology, Inc. REV A...
-
Page 3: Table Of Contents
Contents Section One Features.............. INTRODUCTION Matching Standard Levels........Controls.............. Warranty............. Section Two General............... INSTALLATION Memory.............. Connectors............Audio Wiring............Recommended Practices........Connecting Unbalanced Sources......10 Setting Audio Levels..........Setting Alternate Jumpers........Audio Outputs............Audio Output Connectors........Deriving L+R............Control Connector Wiring........Remote Control Connections....... - Page 4 Mode............Bar Graph Display..........Section Four Audio Board............TECHNICAL DESCRIPTION Display Board............Logic Board............Section Five Table of Contents..........DOCUMENTATION Schematics............Parts Location............Printed Circuit Board X-Ray Views..... 38 Parts List...............
- Page 6 LX-1 can serve a number of station needs. Designed to be the final “gateway” for broadcast systems, the LX-1 can serve as the hub of a multi-studio complex, or as the switching center for satellite, network and studio feeds. As a master control switcher, it can be controlled from a central point, by remote control, or from each studio it serves.
- Page 7 Switching Quality With the coming of the LX-1 it is time to do away with outmoded patch cords and relays. The Burk LX-1 provides versatile and foolproof operation and a cleaner audio path. The LX-1 sets new standards for switcher audio performance. It uses noiseless “soft” switching to give clean program transitions.
- Page 8 • Display board Warranty Burk Technology warrants the LX-1 to be free of defects in materials and workmanship for a period of 24 months from the date of purchase. Equipment will be repaired or replaced at the option of Burk Technology and returned freight prepaid to the customer. Damage due to abuse or improper operation or installation of the equipment or caused by fire or flood or harsh environment is not to be covered by this warranty.
-
Page 9: General
The best practice is to leave the unit powered continuously If power is off too long, the LX-1 will reset all functions to off and default to “safe.”... - Page 10 Figure: 1 Input connectors We recommend labeling each plug connected to the LX-1 . A “Sharpie” marking pen is ideal for this purpose. The top row of 6-pin rear panel connectors are for channel control. They provide Ready tally, channel ON indication, start and stop pulses and permit channel selection. The two 12-pin connectors on the top row permit full remote control.
-
Page 11: Recommended Practices
It will be observed in practice that the 100dB plus CMR of the LX-1 will tend to make grounding and shielding less critical. This, however, is no license to violate good engineering practices. It is possible, for example, that input lines will have unequal noise voltages induced on the signal legs. -
Page 12: Setting Audio Levels
For example, a line-level network, news or satellite feed should not be padded down to mic level so that it can be fed into a console mic channel. The LX-1 offers a better solution. Using it to select from among several high level sources will give cleaner sound, simplify program switching and it may even free up a console. - Page 13 Figure 5: Output Jumpers The next step is selecting the nominal program output level of the LX-1 This can be either +4 or +8 dBu. The output level jumpers are located to the left of the main buss jumpers near cable connector J 1.
-
Page 14: Audio Outputs
Note: When replacing the top cover, be sure to place the short screw in the front center hole. Audio Outputs The LX-1 has outputs for left and right MAIN, SUB and LOOP functions. The MAIN and SUB outputs are identical feeds driven by separate amplifiers that deliver either +4 or +8 dBu at meter “0.”... -
Page 15: Audio Output Connectors
There are times when a monophonic feed is needed for an AM transmitter. There is a simple way to achieve this with the LX-1 An L+R feed can be derived by making a simple resistive combiner using four 300O resistors. See figure 10. -
Page 16: Deriving L+R
Deriving L+R Figure 10 The balanced left and right LX-1 outputs are combined to form an L+R feed. The combining pad loss is less than 4 dB when driving a 6000 loads. This circuit can be attached to either program output (MAIN or SUB) or the LOOP output. - Page 17 Figure 11: channel control Wiring Each of the six control connectors provide start and stop pulses for controlling external devices. When a channel is switched on, an open collector output on pin 5 will pulse low. When a channel is switched off, pin 4 will pulse low. The start and stop pulses are approximately one second long.
-
Page 18: Remote Control Connections
Remote Control Connections A full remote control interface adds to the flexibility of the LX-1 . Control is possible from either the channel control connectors or from the remote control connectors. This flexibility allows the LX-1 to be controlled from external control panels or the station’s remote control system, or both. -
Page 19: Logic Output Connection To External Devices
Logic Output Connections to External Devices Figure 15: Logic Output Connections to External Devices Methods of interfacing the open-collector outputs of the LX-1 to external lamps, status indicators and machine start and stop circuits. -
Page 20: Ready Mode
When the LX-1 Stereo Selector is first powered up, and has lost memory, it defaults to the SAFE mode. All lights, all channels, LOOP and MIX will be off In this mode the LX-1 will only respond to a command to enter the READY mode. -
Page 21: Mix Mode
The LX-1 uses two 12-segment color coded bar graphs to display program levels from -20 to +8. The LX-1 is calibrated at the factory to indicate o dB at +4 dBu output. The actual output level will depend upon the setting of the output level jumpers. See page 7 on how to set the jumpers. -
Page 22: Section Four
Section Four TECHNICAL DESCRIPTION Audio Board The audio circuitry of the LX-1 is contained on the main, or lower, circuit board. The circuit blocks are the power supply, input conditioning and switching, the mixing and output stages and the loop circuitry. - Page 23 Attenuating the input signal prior to summing cancels out the 6dB gain that normally occurs in summing. In this way the input capability of the LX-1 is increased by 6dB over normal designs. This, combined with operating at +/-1 8 volts increases the input range of the LX-1 without compromising common-mode rejection.
-
Page 24: Display Board
LOOP Circuitry The left and right LOOP inputs are processed directly by differential amplifiers Al and A2 The output of Al and A2 feed analog switch Al 4. The outputs of analog switches Al 5 (controlling mix feed to the output) and A14 (controlling LOOP feed to the output) are paralleled and coupled to Al 3 the selectable gain program amplifier. -
Page 25: Logic Board
When the LX-1 is powered up, U29 tests the voltage across C13 and C14. If this voltage is low enough that memory is not reliable, U29 executes a power on clear (POC) that will clear all logic states to off and set the LX-1 to the safe mode. - Page 26 Switch Logic The six selection switch lines (channels 1-6) from front, rear panel and remote control inputs, are debounced by RC networks and Schmitt trigger U13. Nand gates, which monitor the READY line, serve to invert the switch logic and to inhibit control when the READY is not true. The six switch lines feed Ul 5, a priority encoder.
- Page 27 USER NOTES:...
-
Page 28: Section Five
Section Five DOCUMENTATION Schematic Audio Input Section.... Schematic Audio Output and Loop..31 Schematic Logic........Schematic Logic Input Conditioning... Schematic Logic Mode Functions..34 Schematic Logic Latches and Drivers.. 35 Schematic Display Board..... 36 Schematic Power Supply...... Layout Audio Board....... 38 Layout Logic Board......
Need help?
Do you have a question about the LX-1 and is the answer not in the manual?
Questions and answers