
Summary of Contents for Magnum XP-Vac
- Page 1 User Manual INFO: To ensure that your cleaning equipment can continue to operate reliably and smoothly, please change the O-rings approx. every 6 months. See: Service/Maintenance Section 3...
- Page 2 Read carefully these instructions before using the machine.
- Page 3 Full power for a greater clean. Kind to the environment. The Magnum XP-Vac is kinder to the environment than almost any other cleaning system. It is only filled with clear water and minimizes water consumption thanks to the steam pressure. There is no need for any harmful or aggressive chemicals.
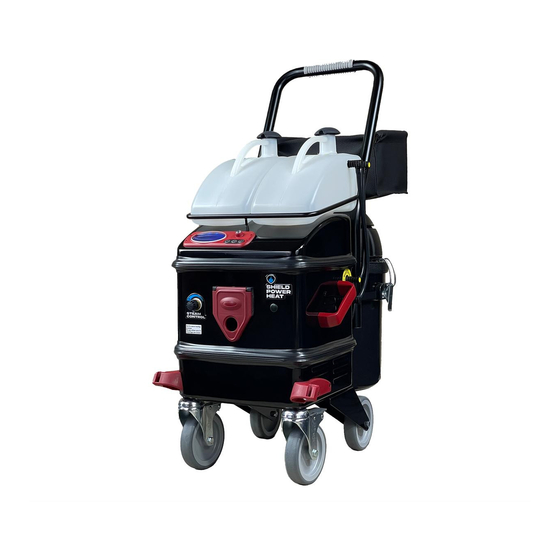
- Page 4 Description of equipment ➊ Boiler ON/OFF button Handle ➋ Suction ON/OFF button Tank tubes ➌ Washing-extraction ON/OFF button Handle locking screws ➍ Display Suction function display ➎ Suction tube port - steam Service indicator - probe ➏ Suction tube support - steam Lack of water indicator ➐...
-
Page 5: Important Advice For Users
2. Purpose of use NOTE: The Magnum XP-Vac can be used for thorough cleaning of surfaces and In Canada, the use of a temporary adaptor is not permitted by the Cana- ob-jects and to clear unpleasant odours from the air indoors. -
Page 6: Assembly / Preparation
Assembly / preparation Assembling the handle and tank support basket Take the handle, position it and fix with the 4 screws provi- Take the two metal hooks and position them. fig. 1 fig. 2 ➊ ➊ ➊ ➊ Fix completely using the two screws. Take the tank support basket and position it. - Page 7 Fix the two tanks in place, water on the left and detergent on the right (as shown in fig. 7). fig. 7 SCREW M6x43 C/TESTA FISS. SCREW M6x16 TE/FL ZIGR.INOX SCREW M5x16 TCEI INOX...
-
Page 8: Fill The Reservoir
Assembly / preparation Connection of water loading and deter- Fill the reservoir gent/hot water tank tubes Fill the hot water module Connect the tubes as shown in figures 8 and 9 • Open the cap and fill the water tank with normal tap water using the funnel. - Page 9 Assembly / preparation Insert the steam-suction tube • Insert the connector of the steam-suction tube into the port until you hear the safety hook click into place. • To remove the tube from the machine, press the release button and pull the connector Wet vacuum function only IMPORTANT: To use the device as a wet vacuum, the polyester filter...
- Page 10 Start-up steam Steam function Hold down steam leve r on the handle to emit steam. Insert the plug into an earthed socket. The display turns on and there is power. The display goes to OFF. (Standby) Press button. on the display. The appliance switches on and begins to heat.
- Page 11 Start Steam with Washing-Extraction Start Suction The wet effect, and therefore cleaning performance, can be increased for hard-to-remove dirt, by selecting the washing- Suction extraction function. Press button on the display to activate the suction func- tion (with display in standby mode). INFO: The LED light for suction turns red.
- Page 12 Standard accessories and use Extension pipe Extension pipe Steam suction hose Upholstery, mattresses NO ATTACHMENT and carpet cleaning. Glass surfaces, windows (display windows), mirrors Extraction nozzle Rubber lip with brush attachment 238 mm/9,37 in Hard floors, e.g.: tiles, granite, marble, wood, PVC, laminate, etc.
- Page 13 Standard accessories and use Hard floors, e.g.: tiles, granite, catering and industrial floors, marble, wood, PVC, laminate, etc. Liquid suction accessory Floor nozzle Pre-cleaning of heavily soiled surfaces, rubber or synthetic doormats, etc. Accessory for carpets Improves cleaning on stubborn dirt. Warning! Do not use on sensitive surfaces or glass! Professional small lance...
-
Page 14: Error Code Display
Indications Lack of water in the tank A lack of water in the tank is indicated by the symbol flashing on the display and by an acoustic signal at the same time. To resume operation, fill the tank as described in section , "Filling the tank”. -
Page 15: Shutting Down
Shutting down To ensure the function, cleanliness and hygiene of the ap- INFO: pliance, follow the procedure below after completing the cleaning operations: Repeat the rinse process with clean water if there is still foam. 1) Remove the tank, empty the dirty water and replace the tank. -
Page 16: Technical Data
Technical data Magnum XP-Vac Electrical connection Nominal voltage 120 V 60 Hz Total output 1800 W Boiler nominal consumption 1000 W + 700 W (Boiler made from stainless steel INOX Aisi 304) Automatic refill system Yes, 3,8 litres / 1 gal Steam temperature max. -
Page 17: Troubleshooting
Troubleshooting ERROR CAUSE REMEDY The tank is not positioned correctly. Check the tank and reposition it ca- refully. Suction is not working. Not switched on on the display. Press briefly on button (B) on the display; suction can then be swit- ched on using button (T3) on the handle. - Page 18 Entkalkungsanleitung B Use this table to document service and maintenance work performed, in order to improve overview Use this table to document service and maintenance work performed, in order to improve overview and control. and control. Service/Maintenance Date Comment Performed by: Hot water module descaling Boiler descaling Additional work...
- Page 19 Entkalkungsanleitung B Use this table to document service and maintenance work performed, in order to improve overview Use this table to document service and maintenance work performed, in order to improve overview and control. and control. Service/Maintenance Date Comment Performed by: Hot water module descaling Boiler descaling Additional work...
- Page 20 Service/Maintenance Part 1 Hot water module descaling...
- Page 21 Use of the hot water module causes lime scale to form over time depending on the hardness of the water used. To prevent a fault caused by lime scale in the steam hose we recommend that you descale regularly. INFO : Error, cause remedy …...
- Page 22 Descaling Module Washing Extraction 2. Descaling Cap (P) Completely empty the contents of the Washing module extraction tank. Mix 0,1 gal of vinegar and 0,16 gal of tap water in a dosing bottle. Open the washing-extraction cap (P) and pour the vinegar mixture.
- Page 23 3. Rinsing Pour 0,26 gal of tap water into the tank washing Mescolare 0,2 litri di essenza di aceto e 0,3 litri extraction. Connect the appliance to the mains di acqua di rubinetto in una caraffa dosatrice. and press button (C) on the display. Aprire il tappo per il Lavaggio-Estrazione "Hot The unit will turn on and the display will show Water Extraction"...
- Page 24 Service/Maintenance Part 2 Boiler descaling...
- Page 25 Entkalkungsanleitung B Descaling instructions boiler / introduction Descaling instructions boiler / introduction The boiler must be descaled, at the latest, when the probe symbol appears on the display with the word “CLEAN”. Because the hardness of the water varies significantly depending You must perform descaling at the latest when the “Probe cap with Clean”...
- Page 26 Boiler descaling / step 1 1. Preparation Warning: Before starting, disconnect from the main power by pulling out oft he plug. Identify the boiler draining cap (C) positioned under the appliance (wrench CH20). Put a basin in place and open the draining cap by turning it anti-clockwise.
- Page 27 Boiler descaling / step 2 2. Descaling Cap (O) Remove the cap (O) of the water tank and pour in 0,1 gal of descaling solution and about 0,26 gal of tap water. Connect the appliance to the mains and press button (A) on the display.
- Page 28 3. Rinsing Completely fill the water tank (O) with about 0,79 gal of tap water. INFO: Shake the appliance gently from side to side to help remove the loose limescale residue. Connect the appliance to the mains and press the (A) key on the control panel. The pump will work for approx.
- Page 29 4. Restart Fill the “Water Only” tank up comple- tely, following the instructions on page 6 “Filling the tank” and “Washing-Extrac- tion Module”. Connect the appliance to the mains and press button (A) on the display. The pump will work for approx. 50 se- conds.
- Page 30 Service/Maintenance Part 3 Accessories and O-ring...
- Page 31 Cleaning, care and maintenance of accessories Care of accessories Care of accessories It is essential to clean accessory parts after use to maintain the performance and functio- It is essential to clean accessory parts after use to maintain the performance and functionality of the nality of the appliance.
-
Page 32: Information For Users
Information for users According to Directives 2011/65/EU and 2012/19/EU on the reduced use of hazardous substances in elec- trical and electronic equipment, and their disposal, the barred bin symbol means that at the end of its useful life the product must be disposed of separately from ordinary waste. The user must therefore take such equipment to proper collection centres for electrical and electronic was- te, or take it back to the dealer when he buys some equivalent equipment, in the ratio of 1:1. - Page 33 NOTE...
- Page 34 NOTE...
- Page 35 NOTE...
Need help?
Do you have a question about the XP-Vac and is the answer not in the manual?
Questions and answers