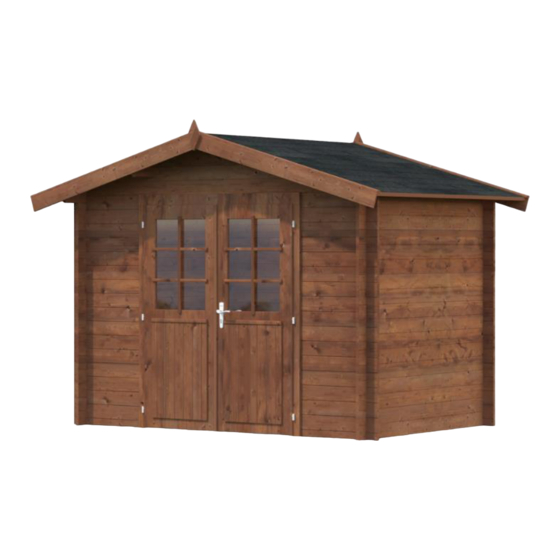
Lemeks Palmako Valentine FR28-3020 Assembly, Installation And Maintenance Manual
Log cabin
Hide thumbs
Also See for Palmako Valentine FR28-3020:
- Assembly, installation and maintenance manual (153 pages) ,
- Assembly, installation and maintenance manual (153 pages)
Advertisement
Available languages
Available languages
Quick Links
Assembly, installation and maintenance manual
Montage-, Aufbau- und Wartungsanleitung ● Assemblage, manuel de montage et d'entretien ● Montaje, instalación
y mantenimiento ● Manuale di montaggio, installazione e manutenzione ● Monterings- og vedlikeholdsmanual ●
Monterings-, installations- och underhållsmanual ● Kokoamis-, asennus- ja huolto-ohje ● Vejledning for montering
og vedligehold ● Handleiding voor montage, installatie en onderhoud ● Manual de montagem, instalação e
manutenção ● Návod k montáži, instalaci a údržbě ● Instrukcja montażu, instalacji i konserwacji ● Surinkimo,
montavimo ir priežiūros vadovas ● Montāžas, uzstādīšanas un apkopes rokasgrāmata ● Руководство по сборке
и обслуживанию ● Montaaži-, paigaldus- ja säilitamise juhend
Treatment options, Item code
●Behandlungsoptionen, Artikel-Code ● Traitement options, code de
l'article ● Opciones de tratamiento, código del artículo ● Opzioni di
trattamento, codice articolo ● Behandlingsalternativer, artikkelnummer
● Behandlingsalternativ, varukod ● Käsittelyvaihtoehdot, yksikön koodi
● Behandlingsmuligheder, artikel nummer ● Behandelingsopties,
artikelnummer ● Opções de tratamento, código do artigo ● Povrchové
úpravy, kód položky ● Możliwości leczenia, kod produktu ● Apdorojimo
variantai, prekės kodas ● Apstrādes iespējas, artikula kods ● Варианты
обработки, код изделия ● Töötlusvõimalused, tootekood
Factory inspection by ● Werkskontrolle durch ●
Contrôle à partir de l'usine par ● Inspector de fábrica ●
Collaudato
da
●
Fabrikkkontroll
Fabriksbesiktigat av ● Tehtaan tarkastaja ● Fabriks
Kontrol udført af ● Fabriekscontrole door ● Inspeção de
fábrica, por: ● Zkontrolováno ve výrobním závodě ●
Kontrola fabryczna do ● Apžiūrą gamykloje atliko ●
Rūpnīcas pārbaudi veicis ● Заводской контроль ●
Tehase kontroll teostatud:
.........................................................................................
Palmako AS | Näituse 25 | 50409 Tartu | Estonia | Ph: +372 7 355 530 | Fax: +372 7 355 544 | contact@palmako.ee | www.palmako.ee
FR28-3020
Log cabin
utført
av
BNDIP 109452
Date ● Datum ● Date ● Fecha ● Data ● Dato ● Datum ●
Päiväys ● Dato ● Datum ● Data ● Datum ● Data ● Datums
● Data ● Дата ● Kuupäev:
●
Pack number ● Pack Nr. ● Packet n° ● Bulto N
● Serienr ● Produktionsnummer ● Pakettinro ● Pakke nr. ●
Pak nr. ● Número de embalagem ● Číslo balení ● Numer
opakowania ● Pakuotės numeris ● Iepakojuma numurs ●
Упаковочный номер ● Pakinumber:
● Pacco N.
o
Advertisement

Related Manuals for Lemeks Palmako Valentine FR28-3020


Summary of Contents for Lemeks Palmako Valentine FR28-3020
- Page 1 Assembly, installation and maintenance manual Montage-, Aufbau- und Wartungsanleitung ● Assemblage, manuel de montage et d’entretien ● Montaje, instalación y mantenimiento ● Manuale di montaggio, installazione e manutenzione ● Monterings- og vedlikeholdsmanual ● Monterings-, installations- och underhållsmanual ● Kokoamis-, asennus- ja huolto-ohje ● Vejledning for montering og vedligehold ●...
- Page 2 Inspection Certificate Kontrollschein ● Bulletin de contrôle ● Certificado de control ● Certificato di controllo ● Kontrollskjema ● Besiktningsprotokoll ● Tarkastustodistus ● Kontrol Certifikat ● Control Certificaat ● Certificado de Inspeção ● Kontrolní certifikát ● Certyfikat kontrolny ● Apžiūros pažyma ● Pārbaudes akts ● Акт осмотра...
- Page 3 Dansk: Det købte produkt fremstillet i overensstemmelse med de høje kvalitets krav. Produktet er blevet omhyggeligt inspiceret og pakket. For at undgå eventuelle problemer i løbet af monteringen udført af dig selv eller håndværker af dit eget valg, anbefaler vi, at du undersøger leverancen for fuldstændighed i overensstemmelse med listen over dele før samling.
- Page 4 To be completed by buyer! (Please use block letters) ● Vom Käufer auszufüllen! (Bitte in Druckschrift) ● A remplir par l’acheteur! (en lettres d’imprimerie, s’il vous plaît) ● ¡Completa el cliente! (en mayúsculas) ● Da compilare dall’acquirente! (in stampatello) ● Fylles ut av kjøper! (Vær vennlig å...
- Page 5 Page Object name FR28-3020...
- Page 6 Page Object name FR28-3020...
- Page 7 Page Object name FR28-3020...
-
Page 15: General Information
Installation manual – English 1 General information Dear client, We are glad that you have decided in favour of our garden house! Please read the assembly manual carefully before proceeding with the house installation! You will thus avoid problems and will not waste time. Recommendations: ➢... -
Page 16: Preparation For Assembly
Installation manual – English Garden house painting and maintenance Wood is a natural material, growing and adapting depending on weather conditions. Large and small cracks, colour tone differences and changes, as well as a changing structure of wood are not errors, but a result of wood growing and a peculiarity of wood as a natural material. - Page 17 Installation manual – English Preparation of components: Sort the components based on the wall plans (see Technical specifications) and place them at the four sides of the house in the installation sequence. ATTENTION: Never place the components directly on grass or a muddy surface because it will be very difficult or even impossible to clean them up later!
- Page 18 Installation manual – English Base frame (Foundation joists) The base frame of the house must be completely flat and level to ensure that the installation proceeds without problems. ATTENTION: different house can have different foundation placements – see the appended base frame drawing (in Technical specifications)! Place the impregnated foundation joists on the prepared foundation in accordance with the drawing at equal intervals.
-
Page 19: Door And Window
Installation manual – English Continue the installation of the walls by strongly forcing the wall logs into one another. If necessary, use the hitting block and hammer. At the same time, do not forget to begin the installation of the door and windows. - Page 20 Installation manual – English Apex In most cases, the apex is supplied in one piece (attention: in some house options, the apex can comprise several parts! In this case, these parts will have to be screwed together prior to other actions).
- Page 21 Installation manual – English Having installed the roof boards, the roof felt and roof Installation of roof slats: slats must be attached. The table of components shows whether the roof cover material and slats are included with this house option! First of all, screw the roof edge reinforcements and eave edgings under the roof board ends.
-
Page 22: General Advice
Installation manual – English this case, the floor boards should not be attached very densely to avoid likely bulging. Leave some space (1-2 mm) between the floor boards to allow for swelling. But if your climate is warm and dry, you can install the boards densely because they will become drier and spaces may appear between them. -
Page 23: Sehr Geehrter Kunde
Aufbauanleitung – Deutsch 1 Generelles Sehr geehrter Kunde, es freut uns, dass Sie sich für unser Gartenhaus entschieden haben! Es ist wichtig, diese Aufbauanleitung vollständig durchzulesen, bevor Sie mit dem Aufbau Ihres Blockhauses beginnen! So vermeiden Sie Probleme und unnötigen Zeitverlust. Tipps: ➢... - Page 24 Aufbauanleitung – Deutsch Anstrich und Pflege Holz ist ein Naturprodukt und arbeitet unterschiedlich. Merkmale wie grobe und feine Maserungen, Farbschattierungen und Veränderungen sowie Verwachsungen haben Ihren Ursprung im Wuchs des Baumes. Sie sind bei Hölzern, die in der freien Natur wachsen, normal und deshalb nicht als Fehler, sondern vielmehr als Eigentümlichkeit des Naturwerkstoffes Holz anzusehen.
- Page 25 Aufbauanleitung – Deutsch Vorbereitung der Details: Sortieren Sie das Material und legen es an den vier Seiten des Hauses entsprechend Reihenfolge des Aufbauens bereit. WICHTIG: Legen Sie die Hölzer nie direkt auf die Rasenfläche oder in den Schmutz, da sich die Hölzer später nur schwer oder gar nicht säubern lassen! Fundament...
- Page 26 Aufbauanleitung – Deutsch Legen Sie die imprägnierten Lagerhölzer in etwa gleichem Abstand zueinander auf das vorbereitete Fundament (siehe Fundamentplan in Technischen Daten). Achten Sie darauf, dass die Lagerhölzer in Waage sind und im rechten Winkel liegen, bevor sie zusammengeschraubt werden. HINWEIS: Es ist empfehlenswert, zwischen die Lagerhölzer und das Fundament eine Feuchtigkeitssperre zu legen, die vor Nässe und Fäulnis schützt.
- Page 27 Aufbauanleitung – Deutsch Fahren Sie fort indem Sie die nächsten Bohlen fest ineinander stecken. Beim Bedarf verwenden Sie das Schlagholz und den Hammer. Vergessen Sie aber auch nicht, mit der Montage der Fenster und Tür zu beginnen. Den Einbau der Tür sollten Sie unbedingt schon nach der 5.-6. Bohlenschicht vornehmen. Tür und Fenster Türrahmen: Montage der Türrahmen (Nur bei Doppeltür nötig!):...
- Page 28 Aufbauanleitung – Deutsch WICHTIG: Es ist nicht nötig, die Tür und Fenster an die Wandbohlen zu befestigen. Wenn sie es wünschen, dann befestigen Sie diese mit ein oder zwei Schrauben nur im unteren Bereich der Rahmen, damit die Wandbohlen sich beim Trocknen setzen können. Das endgültige Einstellen der Tür kann erst in ca.
- Page 29 Aufbauanleitung – Deutsch Wenn die Dachbretter verlegt sind, müssen Dachpappe Montage der Dachleisten: und Dachabschlussleisten angebracht werden. Dacheindeckung -abschlussleisten Lieferumfang gehören, finden Sie in der Stückliste. Zuerst schrauben Sie die Dachrandverstärkungen und Dachrandleisten unter die Enden der Dachbretter (Falls im Lieferumfang). Danach verlegen Sie die Dachpappe. Dachpappe (Falls im Lieferumfang) Schneiden Sie für die Dacheindeckung die Bahnen entsprechend der Dachlänge von der mitgelieferten Dachpappe ab.
- Page 30 Aufbauanleitung – Deutsch feucht, nehmen sie leicht Feuchtigkeit auf. Deswegen ist es ratsam, die Bretter nicht zu dicht nebeneinander zu befestigen, dadurch können Sie eventuelle Aufwölbungen vermeiden. Lassen Sie ca. 1-2 mm Abstand zwischen den einzelnen Brettern, damit das Holz arbeiten kann. Wenn das Klima aber heiss und trocken ist, können Sie die Bretter dicht nebeneinander legen, denn sie trocknen noch mehr aus und es entstehen Spalten zwischen den Brettern.
Need help?
Do you have a question about the Palmako Valentine FR28-3020 and is the answer not in the manual?
Questions and answers