Table of Contents
Advertisement
Quick Links
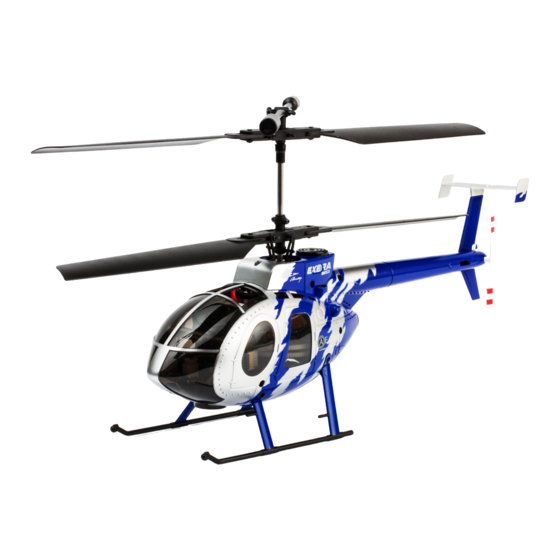
Specifications
Length:
Height:
Main Rotor Diameter:
Weight with Battery:
Main Motor:
Battery:
Charger:
Transmitter:
On-Board Electronics:
Instruction Manual
9.6 in (245mm)
6.3 in (160mm)
10.5 in (265mm)
4.8 oz (135g)
N40 (2 installed)
700mAh 1S 3.7V LiPo (included)
1S 3.7V LiPo AC (included)
4-channel 2.4GHz (included)
Receiver, 4-in-1 control unit with 2 ESC's/mixer/
gyro, 2 servos, Altitude Assist Technology module
and sensors (installed)
Advertisement
Table of Contents

Related Manuals for Ares Advantage EXERA 130CX

Summary of Contents for Ares Advantage EXERA 130CX
-
Page 1: Specifications
Instruction Manual Specifications Length: 9.6 in (245mm) Height: 6.3 in (160mm) Main Rotor Diameter: 10.5 in (265mm) Weight with Battery: 4.8 oz (135g) Main Motor: N40 (2 installed) Battery: 700mAh 1S 3.7V LiPo (included) Charger: 1S 3.7V LiPo AC (included) Transmitter: 4-channel 2.4GHz (included) On-Board Electronics:... -
Page 2: Table Of Contents
Table of Contents Specifications ............................1 Introduction ............................. 3 Safety Precautions and Warnings ......................3 FCC Information ............................4 Exera 130 CX Contents..........................4 Flight Checklist ............................5 LiPo Battery Warnings and Usage Guidelines ..................5 Charging the LiPo Flight Battery ...................... -
Page 3: Introduction
Introduction The Ares Advantage Exera 130 CX is the most advanced and easiest to fly 4-channel CX heli ever! Like other CX helis on the market it features an ultra-stable coaxial, counter-rotating blade design that helps make flying easy. However, what sets the Exera 130 CX apart is that it includes innovative Aegis Altitude Assist Technology (AAT). -
Page 4: Fcc Information
FCC Information This device complies with part 15 of the FCC rules. Operation is subject to the following two conditions: (1) This device may not cause harmful interference, and (2) this device must accept any interference received, including interference that may cause undesired operation. Caution: Changes or modifications not expressly approved by the party responsible for compliance could void the user’s authority to operate the equipment. -
Page 5: Flight Checklist
Flight Checklist PLEASE NOTE: This checklist is NOT intended to replace the content included in this instruction man- ual. Although it can be used as a quick start guide, we strongly suggest reading through this manual completely before proceeding. • Always turn the transmitter ON first •... -
Page 6: Charging The Lipo Flight Battery
Store the battery at room temperature, approximately 68–77° Fahrenheit (F), and in a dry area for best results. When transporting or temporarily storing the battery, the temperature range should be from approximately 40–100°F. Do not store the battery or model in a hot garage, car or direct sunlight whenever possible. -
Page 7: Transmitter Details
Transmitter Details Antenna Position/Orientation The RF output signals transmit best/strongest from the shaft of the antenna rather than from the tip. As a result you should never point the tip of the antenna directly at the model. Also, the transmitter anten- na can be rotated up to 180°... -
Page 8: Flight Controls And Trimming
Flight Controls and Trimming In the event you are not familiar with the controls of the Exera 130 CX please take the time to familiar- ize yourself. Increases and decreases power to the motors Throttle trim buttons. It is not necessary to change causing the helicopter to ascend or descend. -
Page 9: Installing And Removing The Lipo Flight Battery
With the nose of the helicopter facing away Used to help keep the helicopter from drift- from you, pushing the stick forward will ing forward or backward when hovering. For cause the helicopter to move forward. Pull- example, if the helicopter drifts forward, press ing the stick backward will cause the heli- the rear trim button several times until the copter to move backward... -
Page 10: Control Unit Initialization And Arming
Control Unit Initialization and Arming The Exera 130 CX is equipped with a compact and advanced 4-in-1 control unit. The control unit is a lightweight combination of two electronic speed controls (ESCs), a mixer and gyro. This checklist includes the steps you must follow to ensure proper initialization, arming and operation of the control unit: •... -
Page 11: Altitude Assist Technology (Aat)
Altitude Assist Technology (AAT) IMPORTANT NOTE: Although the AAT module is ready to use right out of the box, please take the time to read through this section of the manual completely for information on function and perfor- mance, before proceeding with your first flight. Please also visit our web site at www.ares-rc.com to watch video of the Exera 130 CX and AAT in action. -
Page 12: Flying In Aat Mode 1
Flying in Mode 1 Calibration In Mode 1, the upward and downward sensors are active to enable altitude control while avoiding ceilings and other obstacles above the helicopter. In Mode 1, the pilot is only required to make very basic inputs on the throttle stick. With the helicopter resting on a flat, hard surface, the pilot can move the throttle stick from zero to full to initiate take-off. -
Page 13: Flying In Aat Mode 2
Flying in Mode 2 Calibration In Mode 2 only the upward sensor is active, enabling Ceiling Avoidance, which automatically re- duces throttle so that the Exera 130 CX avoids running into the ceiling In Mode 2, the pilot has more control over throttle and the AAT module performs two functions. First, it constantly calculates the range to the ceiling and reduces throttle as necessary to avoid possible collisions. -
Page 14: Flying In Aat Mode 3
Flying in Mode 3 Calibration In Mode 3, the ultrasonic sensors are not active and the pilot has full control of throttle. Recommended Flying Progression First time and low time pilots should use the default setting of Mode 1. This allows the pilot to learn the basic controls of moving the helicopter forwards/backwards, left/right, and rotating left/right with- out needing to control the altitude. -
Page 15: Notes On Ultrasonic Ranging
Note: Once in calibration mode the helicopter will fly as if it is in Mode 3 with no AAT Function, even though the tail switch indicates Mode 1. This is normal and indicates that you have successfully en- tered the calibration mode. To perform calibration, hover the helicopter in place for 4 minutes. -
Page 16: Flying Tips
Flying Tips Calibration Now that you’ve selected a suitable flying area you’re ready to fly! And when making your first flights we suggest following these steps: • Slowly raise the throttle stick to increase the speed of the main rotor blades until the model begins to lift off. -
Page 17: Exploded View
Exploded View Replacement Parts List Reference # Item Number Description Not Shown AZSZ2000 Exera 130 CX Ultra-Micro RTF, MD 500E AZSB7001S25J 700mAh 1-Cell/1S 3.7V 25C LiPo Battery, JST Connector: Not Shown AZSZ2004 1-Cell/1S 3.7V LiPo, 1.0A 100-240V AC Charger, JST: AZSZ2006 4-in-1 Control Unit, Rx/ESCs/Mixer/Gyro: Exera 130 CX AZSZ2007... - Page 18 Reference # Item Number Description AZSZ2010 Altitude Assist Technology (AAT) Module/Unit Not Shown AZSZ2011 Altitude Assist Technology (AAT) Wire Lead/Cable AZSZ2012 Altitude Assist Technology (AAT) Mode Selection Switch AZSZ2013 Altitude Assist Technology (AAT) Sensor and Mount Set Not Shown AZSZ2014 Altitude Assist Technology (AAT) Sensor Mounts AZSZ2015 Motor with Shallow Pinion Gear (Front): Exera 130 CX...
-
Page 19: Warranty, Support And Service
Warranty, Support and Service 30-Day Limited Warranty Term Period: We warranty that the Product(s) purchased (the “Product”) will be free from defects in materials and work- manship when the product is new (before being used) for the limited warranty term period, 30 days, from the date of purchase by the Purchaser. - Page 20 www.Ares-RC.com © 2013...
Need help?
Do you have a question about the EXERA 130CX and is the answer not in the manual?
Questions and answers