Advertisement
Advertisement

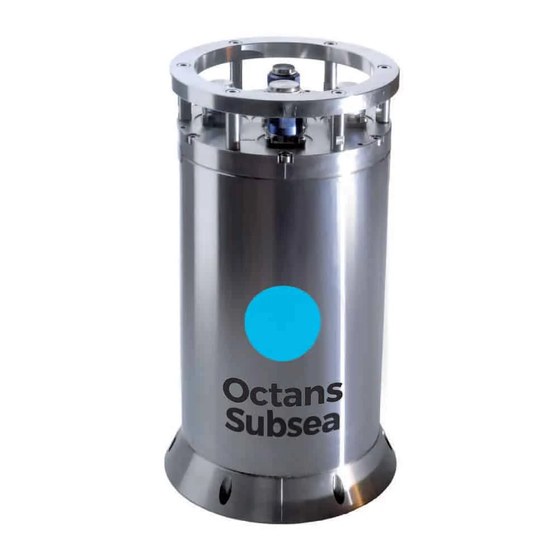
Summary of Contents for IXSEA Octans 3000
- Page 1 Quick Start Quick Guide Octans 3000 subsea gyrocompass and motion sensor...
-
Page 2: Table Of Contents
OCTans 3000 qUiCk sTarT GUidE Objective This guide describes how to install the OCTANS 3000, and the basic configurations required before beginning the positioning Contents OBJECTIVE......................................01 CONTENTS......................................01 CONVENTIONS.....................................02 OCTANS 3000 SYSTEM OVERVIEW..............................03 VERIFICATION OF PACK CONTENTS ..............................03 STEP 1 - OCTANS 3000 GUIDED TOUR..............................04 STEP 2 - ONBOARD INSTALLATION..............................18... -
Page 3: Conventions
However, we recommend that you check the contents of the pack and the equipment immediately on receipt of your OCTANS 3000 unit. Specifically, you should check that all the items referred to above are present on delivery and that none has sustained damage. -
Page 4: Step 1 - Octans 3000 Guided Tour
5 minutes long alignment phase. Heave initialization occurs at each OCTANS 3000 powering on or soft restart. It is performed in parallel with the OCTANS 3000 alignment phase, but it is time set to 5 addi- tional minutes. - Page 5 The Control Pages opens: During the first seconds the IXSEA logo is flashing grey-blue indicating that the Web-based User Interface is loading the internal configuration of OCTANS 3000. Then the logo turns blue, the alignment sequence of OCTANS 3000 begins. Compass area 2010-06/MU/OCT 3kG4 /001 / Ed.
- Page 6 IXSEA logo handling showing immediately which equipment has raised the problem. A click on the IXSEA logo opens the detailed status pop-up window and the compass disappears. This window summed- Table 1 – Color code definition up the status of: The input ports •...
- Page 7 Each command page contains the same buttons, they appear as soon as a modification or a selection has been made in the command page: To validate the new configuration and store it in the OCTANS 3000 PROM. To return to the previous entered values.
- Page 8 (PPP op- Find hereafter all the menus and options of the WEB-based User Interface and their uses tion) or through Ethernet one (DHCP client mode activation, OCTANS 3000 IP address Menu /options Used to …...
- Page 9 OCTANS 3000 PROM and re-start the unit. • Update the system: firmware, loader, This procedure allows for the OCTANS 3000 to enter the correct latitude value as an input in the North finder algorithm as and/or WEB-Based User Interface versions soon as computation starts.
- Page 10 Click on Restart button to restart the OCTANS 3000 unit Step 2: Enter the correct value in the Latitude field Step 3: Click OK button to save the modification into OCTANS 3000 PROM 2010-06/MU/OCT 3kG4 /001 / Ed. B 2010-06/MU/OCT 3kG4 /001 / Ed. B...
-
Page 11: Step 2 - Onboard Installation
• Figure 3 - Ethernet connector The dimensions of the OCTANS 3000 housing are ((l x Ø) in mm ):374 x 213. There must be enough place for the wire • way on the connector side of OCTANS 3000. - Page 12 Configuring the Inputs/Outputs OCTANS 3000 has to know the latitude of its location in order to find geographical North rapidly. Accuracy required on the latitude input depends on the current latitude: 3 degrees accuracy on latitude at 45 degrees latitude, and 1 degree Up to five inputs/outputs are available: A, B, C, D and E.
- Page 13 Procedure for Configuring the Inputs Procedure for Configuring the Outputs Step Action Step Action Select INPUTS option under INSTALLATION menu. Select OUTPUTS option under INSTALLATION menu. The Input Settings page displays: The Output Settings page displays: Select the input port to configure (Input A, Input B, Input C, Input D or Input E) by clicking on the correspon- ding text label.
-
Page 14: Step 3 - More
OCTANS 3000 Reference Frame and Vessel Frame Not Aligned OCTANS 3000 measures heading and attitude with respect to its reference frame defined by the 3 axes X1, X2 and X3 (see Figure 2). OCTANS 3000 reference frame may not be parallel to the vessel reference frame. In such case, heading and attitude outputs can be compensated for angular misalignments of OCTANS 3000 relative to the vessel reference frame so that OCTANS 3000 outputs heading and attitude of the vessel. - Page 15 (LV1, LV2, LV3) defining the position of external monitoring point M with respect to OCTANS 3000 center of measurement P (defined in Figure 2) in the vessel reference frame (XV1, XV2, XV3) - see Figure 5.
-
Page 16: Customer Support
IXSEA BV +31 (0)23 750 5110 +31 (0)23 750 5111 The Netherlands To contact customer support for any IXSEA products, a general mail box is available with the following address: IXSEA GmbH +49 (0)511 123 59575 +49 (0)511 123 59576 Germany support@ixsea.com... - Page 17 PERSONAL NOTES PERSONAL NOTES 2010-06/MU/OCT 3kG4 /001 / Ed. B 2010-06/MU/OCT 3kG4 /001 / Ed. B...
- Page 18 PERSONAL NOTES 2010-06/MU/OCT 3kG4 /001 / Ed. B...
Need help?
Do you have a question about the Octans 3000 and is the answer not in the manual?
Questions and answers