Advertisement
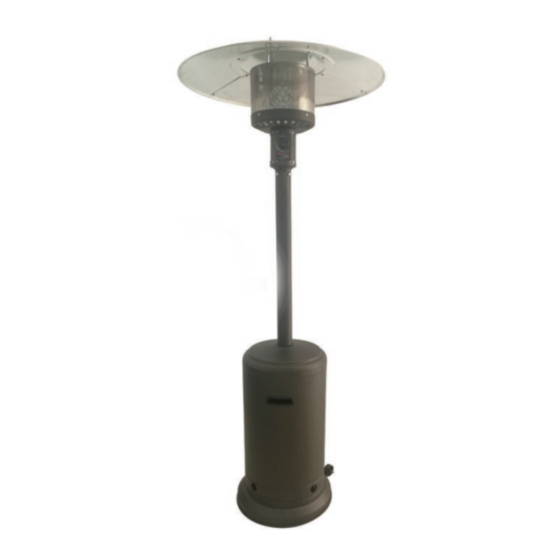
Outdoor Patio Heater
SKU: 259-5091
Mfg. Item #: 62922
Questions, problems, missing parts?
Before returning to your retailer, our exceptional customer service is available Monday – Friday,
9 a.m. – 6 p.m., EST.
Email us at cservice@welltraveled.net.
WARNING
FOR OUTDOOR USE ONLY!
DANGER
FOR YOUR SAFETY:
If you smell gas:
1. Shut off gas to the appliance.
3. If odor continues, keep away from the
appliance and immediately call your gas
DANGER
DANGER indicates an imminently
hazardous situation which, if not avoided,
will result in death or serious injury.
DANGER
Failure to comply with the precautions and
instructions provided with this heater can
result in death, serious bodily injury and
property loss or damage from hazards of fire,
explosion, burn, asphyxiation, and/or carbon
monoxide poisoning. Only persons who can
understand and follow the instructions
should use or service this heater.
WARNING
This product can expose you to chemicals
including Carbon Monoxide, Lead,
Chromium (hexavalent compounds), Di(2-
ethylhexyl) phthalate (DEHP) and Diisononyl
phthalate (DINP), which are known to the
State of California to cause cancer and birth
defects or other reproductive harm. For
more information, go to
www.P65Warnings.ca.gov.
WARNING
Do not store or use gasoline or other
vicinity of this or any other appliance.
An LP-cylinder not connected for use
shall not be stored in the vicinity of this
or any other appliance.
WARNING
Improper installation, adjustment,
alteration, service or maintenance can
cause property damage, injury or death.
Read the installation, operation and
maintenance instructions thoroughly
before installing or servicing this
equipment.
ATTACH YOUR
RECEIPT
Keep a copy of your proof of
purchase or order confirmation
which will be needed if you
need to contact us about
warranty coverage.
Purchase Date:
Manual updated Feb 2019 - CL
Advertisement

Related Manuals for Backyard Creations 259-5091

Summary of Contents for Backyard Creations 259-5091
- Page 1 Outdoor Patio Heater SKU: 259-5091 Mfg. Item #: 62922 WARNING WARNING Do not store or use gasoline or other FOR OUTDOOR USE ONLY! vicinity of this or any other appliance. An LP-cylinder not connected for use DANGER shall not be stored in the vicinity of this or any other appliance.
-
Page 2: Table Of Contents
TABLE OF CONTENTS TABLE OF CONTENTS Table of Contents Page 2 Before You Begin Page 2 Page 2-3 Safety Information Package Contents Page 4 Assembly Pages 5-8 Operating Instructions Page 9-11 Care and Maintenance Page 12 Troubleshooting Page 13 Warranty Information Page 14 BEFORE YOU BEGIN Please read and understand this entire manual before attempting to assemble, operate or install this... -
Page 3: Safety Information
SAFETY INFORMATION DANGER DANGER CAUTION EXPLOSION—FIRE HAZARD CARBON MONOXIDE HAZARD SERVICE SAFETY • Keep solid combustibles, such as • This heater is a combustion appliance. • Keep all connections and fittings clean. building materials, paper, or cardboard All combustion appliances produce carbon Ensure propane cylinder valve outlet is clean. -
Page 4: Package Contents
PACKAGE CONTENTS PART DESCRIPTION Reflector Panel Reflector Plate Reflector Stud Head Assembly Cylinder Housing Post Support Bracket Gas Hose Regulator Base Pre-Assembled with Sand Box Wheel Assembly HARDWARE CONTENTS DESCRIPTION USED IN STEP(S) Medium Bolt 1 & 2 Large Bolt Small Flange Nut Large Flat Washer 5 &... -
Page 5: Assembly Pages
ASSEMBLY PREPARATION Before beginning assembly of this appliance, make sure all parts are present. Compare all parts with package contents list and hardware as listed on page 4 of this manual. If any part is missing or damaged, do not attempt to assemble this product. - Page 6 ASSEMBLY Place Cylinder Housing onto Post. Slide Cylinder Housing down over Support Brackets and Post and rest on Base. Attach Reflector Studs to Screen Cover. Insert 3 Reflector Studs through Washers and into holes on screen cover. Tighten Studs securely. Hardware Used: 3 - Reflector Studs 3 - Large Flat Washers Remove 4 Small Bolts with Lock Washers that are pre-assembled in...
- Page 7 ASSEMBLY Assemble Reflector. NOTE: REMOVE PROTECTIVE PLASTIC COVER ON REFLECTOR PIECES PRIOR TO ASSEMBLY! Assembly Tip: If necessary for proper alignment of reflector sections, loosen each screw prior to further assembly and retighten after sections are aligned. Slide two Reflector Panels together. Insert one Small Screw. Screw on Cap Nut loosely.
- Page 8 ASSEMBLY Connect the Hose and Regulator to the LP cylinder. The LP cylinder is sold separately. Use a standard 20 lb. propane cylinder only. Lift the Cylinder Housing and rest it on the top of the assembled Support Brackets. Attach Regulator to valve on LP cylinder and hand tighten securely. Place LP tank onto base of heater and lower Cylinder Housing.
-
Page 9: Operating Instructions
OPERATING INSTRUCTIONS LEAK TEST WARNING 1. Make 2-3 oz. of leak test solution (one-part liquid dishwashing detergent to three parts water). • Perform all leak tests outdoors. • Extinguish all open flames. 2. Apply several drops of solution where hose attaches to regulator. •... - Page 10 OPERATING INSTRUCTIONS LIGHTING: TO TURN ON THE HEATER 1. Turn the control knob to the “OFF” position. 2. Fully open the LP cylinder valve. 3. Press and turn the control knob to “HI” position (counterclockwise 90°). Press down the control knob and hold for 3-5 seconds.
- Page 11 OPERATING INSTRUCTIONS OPERATION CHECKLIST: WARNING For a safe and pleasant heating experience, perform this check before each use: FOR YOUR SAFETY Heater will be hot after use. Handle with extreme care. Reflector is hot to the touch. BEFORE OPERATING: I am familiar with entire owner’s manual and understand all precautions noted.
-
Page 12: Care And Maintenance
CARE & MAINTENANCE To enjoy years of outstanding performance from your heater, make sure you perform WARNING the following maintenance activities on a regular basis: Keep exterior surfaces clean. FOR YOUR SAFETY 1. Use soapy water for cleaning. Never use flammable or corrosive cleaning agents. •... -
Page 13: Troubleshooting
TROUBLESHOOTING PROBLEM POSSIBLE CAUSE CORRECTIVE ACTION Gas valve may be off Turn gas valve on Fuel Tank may be empty Refill LPG tank Purge air from lines. Open gas lines and Air in supply system depress control knob for 2-3 minutes Main burner will not light Loose connection Check all fittings... -
Page 14: Warranty Information
• THERE ARE NO EXPRESS WARRANTIES 1 YEAR LIMITED WARRANTY EXCEPT AS LISTED ABOVE Customers in the Contiguous US • PURCHASER ASSUMES ALL RISKS IN THE All components are warranted for a period of 1 year after date of purchase by ASSEMBLY AND OPERATION OF THIS UNIT the original owner against defects in materials and workmanship under normal •...
Need help?
Do you have a question about the 259-5091 and is the answer not in the manual?
Questions and answers