
Related Manuals for FRAM FWM-V814T2D+++

Summary of Contents for FRAM FWM-V814T2D+++
- Page 1 MAŞINĂ DE SPALAT AUTOMATĂ FWM-V814T2D+++ / FWM-V814T2SD+++ Capacitate: 8 kg 1400 rpm Clasa energetică: D...
-
Page 2: Conținutul Pachetului
Vă mulţumim pentru achiziţionarea acestui produs F R A M ! INTRODUCERE Înainte de a utiliza acest aparat, citiți cu atenție manualul de instrucțiuni și păstrați-l pentru consultări ulterioare. Acest manual este conceput pentru a vă oferi toate instrucţiunile necesare referitoare la instalarea, utilizarea şi întreţinerea aparatului. - Page 3 17. Nu uitaţi că ambalajele maşinii de spălat pot fi periculoase pentru copii. Păstraţi ambalajele într-un loc unde nu pot ajunge copiii sau aruncaţi-le în locuri adecvate. Menţineţi materialele de ambalare în locuri unde copii nu pot ajunge sau eliminaţi-le corespunzător. 18.
- Page 4 PERICOL DE INCENDIU! 1. Nu menţineţi lichide inflamabile lângă maşina. 2. Conţinutul sulfuros al diluanţilor poate cauza coroziunea. Din acest motiv, nu utilizaţi materiale de eliminare a vopselei în maşina. 3. Nu utilizaţi niciodată produse care conţin material solvent (cum ar fi gaz de spălare) în maşină. 4.
-
Page 5: Descrierea Produsului
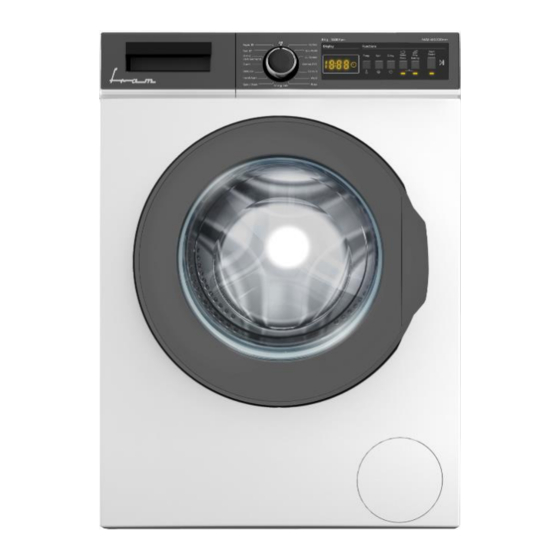
4. DESCRIEREA PRODUSULUI Afişaj electronic Buton programe Parte superioară Sertar de detergent Tambur Capac filtru pompă Valvă admisie apă Cablu de alimentare Furtun de evacuare Șuruburi de transport INSTALARE SCOATEREA ŞURUBURILOR DE TRANSPORT 1. Înainte de utilizarea maşinii de spălat, scoateţi cele 4 şuruburi de transport şi despărţitoarele de cauciuc din spatele maşinii. -
Page 6: Ajustarea Picioarelor
NOTĂ: Îndepărtaţi neapărat şuruburile de transport ale maşinii de spălat, înainte de prima utilizare. Avariile maşinilor ce au funcţionat cu şuruburile înăuntru nu fac obiectul garanţiei. AJUSTAREA PICIOARELOR Nu plasaţi produsul pe carpetă sau pardoselii care pot preveni ventilarea produsului. Pentru asigurarea unei funcţionări silenţioase şi fără... - Page 7 CONEXIUNEA ELECTRICA • Maşina de spălat este setată la 220-240V şi 50Hz. • Cablul principal al maşinii de spălat este echipat cu un ştecher împământat specific. Acest ştecher trebuie să fie întotdeauna introdus într-o priză cu împământare de 10 amperi. •...
-
Page 8: Evacuarea Apei
Notă: Utilizaţi doar furtunul nou de alimentare cu apă ce este livrat odată cu maşina în timp ce faceţi conexiunile de admisie ale maşinii. Nu utilizaţi niciodată furtunuri de admisie a apei vechi, utilizate sau deteriorate. EVACUAREA APEI • Capătul furtunului de evacuare a apei poate fi montat pe un aparat direct ataşat la furtunul de evacuare a apei sau îmbinarea exterioară... - Page 9 Sertarul pentru detergent Atunci când doriţi să spălaţi rufele cu detergent lichid, puteţi utiliza cupa de determinare a nivelului de lichid. Puteţi utiliza detergenţi lichid în toate programele fără prespălare. Plasaţi aparatura detergentului lichid în al doi- lea compartiment (ce este disponibil în interiorul maşinii) în sertarul de detergent şi setaţi cantitatea de detergent.
- Page 10 Compartiment detergent pentru prespălare: Acest compartiment trebuie să fie utilizat în momentul când caracteristica de prespălare este selectată. Functia de prespălare este recomandată pentru rufe cu grad mărit de murdărire. BUTONUL DE PROGRAM Puteţi selecta programul pe care doriţi să-l utilizaţi pentru a vă spăla lenjeria cu ajutorul butonului de program. Puteţi seta funcţionarea selectării programului prin rotirea în ambele părţi a butonului de program.
- Page 11 AFIŞAJ ELECTRONIC Afişaj electronic Afişaj digital Buton de reglare temperatură apă Buton de reglare viteză turaţie Funcţie suplimentară de pornire întârziată Buton 1 funcţii auxiliare Buton 2 funcţii auxiliare Buton Pornire/Pauză Lampă buton Pornire/Pauză Panoul afişajului indică cronometrul de întârziere de spălare (dacă este setat), selectarea temperaturii, viteza de centrifugare, orice funcţii auxiliare selectate.
- Page 12 AVERTISMENT: Erorile care survin din cauza intrării substanţelor străine în maşina de spălat nu fac obiectul garanţiei. • Trageţi fermoarul şi încheiaţi nasturii hainelor. • Scoateţi inelele de prindere din metal sau din plastic ale perdelelor din tul sau draperiilor sau plasaţi-le într-o pungă...
- Page 13 • Introduceţi fiecare articol separat. • Asiguraţi-vă rufele nu se lipesc între protecţie şi garnitura inferioară în momentul când închideţi uşa. • Împingeţi uşa maşinii până când auziţi un zgomot de blocare pentru a o închide. • Închideţi corespunzător uşa maşinii, în caz contrar maşina nu va porni operaţiunea de spălare. ADĂUGAREA DETERGENTULUI ÎN MAŞINĂ...
-
Page 14: Selectarea Programului
SELECTAREA PROGRAMULUI Selectaţi programele corespunzătoare pentru rufele dvs din tabelul de program. FUNCŢII AUXILIARE 1. Înainte de pornirea programului, puteţi selecta o funcţie auxiliară. 2. Apăsaţi butonul funcţiei auxiliare pe care o doriţi să selectaţi. 3. Dacă simbolul funcţiei auxiliare de pe afişajul electronic clipeşte în mod continuu, funcţia auxiliară pe care aţi selectat-o va fi activată. - Page 15 3. FUNCTIE START INTARZIAT Puteţi utiliza această funcţie auxiliară pentru a întârzia ora de pornire a ciclului de spălare cu 1 până la 23 de ore . Pentru a utiliza funcţia de întârziere: Apăsaţi o dată tasta de întârziere. Mesajul „01h”. va fi afişat pe afişajul electronic.
-
Page 16: Anularea Programului
6. BUTON START / PAUZA Prin apăsarea butonului Pornire/Pauză, puteţi porni programul pe care l-aţi selectat sau suspenda programul care funcţionează. Dacă comutaţi maşina în modul standby, ledul Start/Standby de pe afişajul electronic va clipi. 7.SISTEM DE BLOCARE PENTRU COPII Blocarea pentru copii este disponibila pentru a nu afecta programul atunci cand butoanele sunt apăsate sau butonul programului este pornit în momentul efectuării operaţiunii de spălare. - Page 17 FINALIZAREA PROGRAMULUI Maşina se va opri atât timp cât programul pe care l-aţi selectat se finalizează. Led-ul de finalizare va clipi pe panoul de afişaj. • Puteţi deschide uşa maşinii şi scoate rufele. • Lăsaţi uşa maşinii deschisă pentru a permite componentelor interne ale maşinii să se usuce după scoaterea rufelor.
- Page 18 COTTON 20° Temperatura de spalare --, 20° Capacitate maxima de rufe uscate Compartiment pentru detergent Durata program (Min) Textile mai puţin murdare din bumbac şi din pânză de in. (Lenjerie Tip de rufe / Descriere intimă, lenjerie de pat, faţă de masă, prosop (max. 2,0 kg), pijamale etc.) COLOURS Temperatura de spalare...
- Page 19 SPIN/DRAIN Temperatura de spalare Capacitate maxima de rufe uscate Compartiment pentru detergent Durata program (Min) Puteţi utiliza acest program pentru orice tip de rufe, dacă doriţi o etapă suplimentară de centrifugare după ciclul de spălare./Puteţi utiliza programul de uscare pentru a usca apa acumulată în interiorul maşinii (adăugând sau îndepărtând rufe).
- Page 20 FAST 60 min (*) Temperatura de spalare --, 30°, 40°, 50°, 60° Capacitate maxima de rufe uscate Compartiment pentru detergent Durata program (Min) Textile murdare, din bumbac, colorate şi lenjerii de pat spălate la Tip de rufe / Descriere 60 °C în 60 de minute. RAPID 15 min (**) Temperatura de spalare --, 30°...
- Page 21 • Puteţi accesa baza de date de produse, unde sunt stocate informaţiile referitoare la model, citind codul QR de pe eticheta de energie. Consum de Conținutul de Temperatura Consum de energie Durata programului umiditate reziduală apă max. (kWh/ciclu) Ore : Minute litri/ciclu °C 1400 rpm...
- Page 22 FILTRELE DE ADMISIE A APEI Filtrele pentru evitarea murdăriilor şi substanţelor străine din apă de la penetrarea în maşină sunt disponibile ambele pe partea robinetului şi la capele valvelor de apă împreună cu furtunul de admisie a apei. Dacă maşina nu poate lua o cantitate suficientă...
- Page 23 Reţineţi: Va trebui să goliţi vasul de colectare a apei de mai multe ori datorită cantităţii de apă din maşină. • Curăţaţi materialele străine din filtru cu ajutorul unei perii. • După curăţarea filtrului, montaţi protecţia acestuia şi strângeţi prin rotirea acesteia în direcţia acelor de ceasornic.
- Page 24 - Curăţaţi-l cu ajutorul unei perii. - Colectaţi reziduurile în carcasa sertarului pentru detergent fără a le scăpa în maşină. - Ansamblaţi sertarul după uscarea acestuia cu un prosop sau material textil uscat. Nu spălaţi sertarul pentru detergent în maşina de spălat vase. COMPARTIMENTUL DETERGENTULUI LICHID Demontaţi în scopul curăţării şi întreţinerii aparatura detergentului lichid după...
- Page 25 13. PROBLEME DE FUNCTIONARE Toate operaţiunile de reparaţie necesare pentru maşină dumneavoastră trebuie să fie efectuate de către service-ul nostru autorizat. Dacă maşina are nevoie de o reparaţie sau dacă nu puteţi elimina defecta cu ajutorul informaţiilor furnizate după cum urmează: •...
- Page 26 CAUZE POSIBILE DEPANARE DEFECTIUNE Apăsaţi butonul Pornire/Pauză Pentru a elimina formarea de spumă, amestecaţi o lingură de balsam cu jumătate de litru de apă, Cantitate excesivă de şi turnaţi amestecul în sertarul detergent folosită. pentru detergent. După 5-10 Spumă excesivă este formată în sertarul minute, apăsaţi din nou butonul pentru detergent.
- Page 27 14. PRECAUTII SI AVERTISMENTE Maşina dumneavoastră este dotată cu sisteme ce sunt capabile de a lua precauţiile şi avertismentele necesare în cazul unei defecţiuni prin intermediul unei verificări în mod continuu în timpul operaţiunilor de spălare. COD DE DEFECT POSIBIL CE TREBUIE FĂCUT DEFECȚIUNE Închideţi uşa corespunzător, până...
-
Page 28: Date Tehnice
Pete de vaselină şi ulei: Mai întâi cântăriţi reziduurile. Frecaţi pata cu detergent şi spălaţi cu apă caldă cu săpun. Muştar: Aplicaţi glicerină pe zona pătată. Frecaţi cu detergent şi spălaţi. Dacă pata nu a ieşit, ştergeţi cu alcool. (Pentru materiale sintetice şi colorate, un amestec de o cantitate de alcool la două cantităţi de apă trebuie să fie utilizat) Fructe: Întindeţi zona pătată... - Page 29 F R A M este marcă înregistrată a companiei Network One Distribution SRL. Celelalte branduri şi denumirile produselor sunt mărci de comerţ sau mărci de comerţ înregistrate ale respectivilor deţinători. Nicio parte a specificaţiilor nu poate fi reprodusă sub nicio formă şi prin niciun mijloc, nici utilizată pentru obţinerea unor derivate precum traduceri, transformări sau adaptări, fără...
- Page 30 AUTOMATIC WASHING MACHINE FWM-V814T2D+++ / FWM-V814T2SD+++ Loading capacity: 8 kg Spin capacity: 1400 rpm Energy class: D...
-
Page 31: Safety Information
Thank you for choosing this Fram product! INTRODUCTION Before using the appliance, please read carefully this instruction manual and keep it for future reference. This instruction manual is designed to provide you with all required instructions related to the installation, use and maintenance of the appliance. - Page 32 13. It is recommended to perform the first washing operation in 90˚ Cotton programme and without laundry by inserting ½ scale of detergent in 2nd compartment of the detergent drawer. 14. As detergent or softener exposed to air for a long time may cause residues, put your detergent or softener in the detergent drawer at the beginning of every washing.
-
Page 33: Flooding Risk
FLOODING RISK! 1. Check whether the water runs fast or not before placing the discharge hose on the sink. 2. Take necessary measures to prevent the slipping of your hose. 3. The backfiring force of a hose that is not placed appropriately can displace the hose. Prevent the stopper inside your sink from blocking the sink hole. -
Page 34: Product Description
The amount of laundry you put in your washing machine should not exceed the maximum amount indicated. By this way, your machine shall run in saving mode. Not using the pre-wash feature for little and normal-dirty laundry shall save electricity and water. PRODUCT DESCRIPTION 1. - Page 35 NOTE: You should absolutely remove the transportation screws of your machine before the first usage. Faults occurring in the machines operated with transportation screw fitted shall be out of scope of warranty. ADJUSTMENT Do not install your machine on a carpet or such grounds that would prevent the ventilation of its base. To ensure silent and vibration-free operation of your machine, it should be deployed on a non-sliding and firm ground.
-
Page 36: Electrical Connection
ELECTRICAL CONNECTION • Your washing machine is set to 220-240V and 50Hz. • The mains cord of your washing machine is equipped with a specific earthed plug. This plug should always be inserted to a earthed socket of 10 amps. •... -
Page 37: Water Discharge Connection
Note: Use only the new water inlet hose coming with your machine while making water inlet connections of your machine. Never use old, used or damaged water inlet hoses. WATER DISCHARGE CONNECTION • The end of water discharge hose can be fitted to a specific apparatus directly attached to dirty water discharge hole or outlet joint of the basin elbow. - Page 38 1. Liquid Detergent Attachments 2. Main Wash Detergent Compartment 3. Softener Compartment 4. Pre-Wash Detergent Compartment 5. Powder Detergent Levels 6. Powder Detergent Scoop Main wash detergent compartment: In this compartment, only materials like detergent (liquid or powder), lime preventer and such can be used. Fabric conditioner, starch, detergent compartment: You can use softener for your laundry (recommended amount and type by the producer is recommended).
-
Page 39: Electronic Display
CONTROL PANEL You can select the program you want to wash your laundry in through program knob. You may set the program selection operation by rotating the program knob in both directions. Ensure that the program knob is exactly on the program you want to select. ELECTRONIC DISPLAY... -
Page 40: Using Your Appliance
1. Electronic Display 2. Digital Display 3. Water Temperature Adjustment Button 4. RPM Speed Adjustment Button 5. Delayed Start Additional Function 6. Additional Function Button 1 7. Additional Function Button 2 8. Start/Pause Button 9. Start/Pause Button Lamp The display panel shows the washing delay timer (if set), temperature selection, spin speed, any additional functions selected. -
Page 41: Putting Laundries In The Machine
PUTTING LAUNDRIES IN THE MACHINE • Open the door of your machine. • Spread your laundries in your machine. NOTE: Maximum loading capacity may vary based on the laundry type you will wash, degree of contamination and the program you have chosen. Do not exceed maximum dry loading capacity indicated in the program table for washing programs. -
Page 42: Adding Detergent Into Machine
• Put each item of laundry separately. • Ensure that no laundry is stuck between the cover and bellow seal when closing the door of your machine. • Push the door of your machine until hearing the locking sound to close it. •... -
Page 43: Temperature Selection
HALF-LOAD DETECTION SYSTEM Your machine features a half-load detection system. In case you put approximately half or less amount of laundries of maximum laundry capacity in your machine, your machine will run so as to save washing time, water consumption and energy in some programs. -
Page 44: Delay Timer
button. If you have skipped the spinning revolution you want to set, you can re-switch to the revolution by keeping the revolution setting button pressed. 3. DELAY TIMER You can use this auxiliary function to delay the start time of the washing cycle for 1 to 23 hours. To use the delay function: Press the delay key once. -
Page 45: Start/Pause Button
6. START/PAUSE BUTTON By pressing on the Start/Pause button, you may start the program you have selected or suspend a running program. If you switch your machine to the standby mode, the Start/Pause led on the electronic display will blink. 7. -
Page 46: Program Table
You can open the machine’s door and remove the laundry. • Leave the door of your machine open to allow the inner part of your machine to dry after removing your laundries. • Switch the program knob to CANCEL position. •... - Page 47 COLOURS Washing temperature (°C) --, 30°, 40° Maximum dry laundry amount (kg) Detergent compartment Program duration (Min.) Less dirty, cotton and linen textiles. (Underwear, bedsheet, Laundry type / Descriptions tablecloth, towel (max. 2,0 kg) bed cloth, etc.) WOOL Washing temperature (°C) --, 30°...
- Page 48 OUTDOOR Washing temperature (°C) --, 30°, 40° Maximum dry laundry amount (kg) Detergent compartment Program duration (Min.) Very dirty or synthetic-mixed textiles. (Nylon socks, shirts, Laundry type / Descriptions blouses, synthetic-including trousers etc. ) DUVET Washing temperature (°C) --, 30°, 40° Maximum dry laundry amount (kg) Detergent compartment Program duration (Min.)
- Page 49 NOTE: PROGRAMME DURATION MAY CHANGE ACCORDING TO THE AMOUNT OF LAUNDRY, TAP WATER, AMBIENT TEMPERATURE AND SELECTED ADDITIONAL FUNCTIONS. (*) If your machine includes the rapid washing additional function and you put 2 kg or less of laundry into your machine, your machine will automatically wash the laundry for 30 minutes. (**) Due to the short washing time of this program, we recommend that less detergent is used.
-
Page 50: Cleaning And Maintenance
Remaining Moisture Content max. Energy Water Program Duration Temperature Consumption Consumption % 1400 °C Hours: Minutes kWh/cycle Liters/Cycle 2,38 03:07 1,08 03:20 1,15 0,65 0,32 03:30 02:45 02:40 0,56 01:50 1,02 01:00 0,21 01:36 11. CLEANING AND MAINTENANCE WARNING! Unplug your machine before starting the maintenance and cleaning of your machine. Turn the tap water off before starting the maintenance cand cleaning of your machine. -
Page 51: Pump Filter
If your machine cannot intake enough water despite water faucet being open, these filters should be cleaned. (It is recommended that you clean you pump filter one in 2 months) • Unscrew the water inlet hose(s) from the Washing Machine. •... -
Page 52: Detergent Drawer
• Clean the foreign materials in the filter with a brush. • After cleaning the filter, fit the cover and tighten it by rotating it in clockwise direction. • While closing the pump cover, ensure that the parts on the inner side of the cover to match the holes on the front panel side. -
Page 53: Liquid Detergent Apparatus
- Flush it using a brush. - Collect residues in the housing of the detergent drawer without dropping them inside the machine - Assemble the detergent drawer after drying it using a towel or dry cloth Do not wash your detergent drawer in dishwasher. LIQUID DETERGENT APPARATUS Take out the liquid detergent level apparatus for cleaning and maintenance purposes as shown in the picture and clean well detergent residues. -
Page 54: Troubleshooting
2. Drum Do not leave metallic objects such as needles, paper clips, coins etc. in your machine. This objects lead to formation of rust stains in the drum. To clean such rust stains, use a non-chlorine cleaning agent and follow the instructions of manufacturers of the cleaning agent. - Page 55 FAULT POSSIBLE CAUSE TROUBLESHOOTING The feet have not been adjusted. Adjust the feet. (**) Transit bolts fitted for transportation Remove the transit bolts from the have not been removed. machine. (**) This will not prevent operation of Small load in the drum. Your machine vibrates.
-
Page 56: Automatic Fault Warnings And What To Be Done
14. AUTOMATIC FAULT WARNINGS AND WHAT TO BE DONE Your machine is equipped with the systems which are capable of both taking necessary precautions and warning you in case of any breakdown by means of continuous self-check-ing during washing operations. TROUBLE CODE POSSIBLE FAULT WHAT TO DO... - Page 57 Grease and oil stains: Firstly, the residues. Scrub the spot with detergent and wash it with warm soapy water. Mustard: Apply glycerin on spotted area. Scrub with detergent and wash. If the spot cannot be removed, wipe with alcohol. (For synthetic and color fabrics, a mixture of 1 scale of alcohol and 2 scales of water should be used.
-
Page 58: Customer Care And Service
CUSTOMER CARE AND SERVICE Always use original spare parts. When contacting our Authorized Service Centre, ensure that you have the following data available: Model and Serial Number. The information can be found on the rating plate. Subject to change without notice. TECHNICAL DATA The technical information is situated in the rating plate on the internal side of the appliance and on the energy label. - Page 59 FRAM is a registered trademark of Network One Distribution SRL. Other brands and product names are trademarks or registered trademarks of their respective holders. No part of the specifications may be reproduced in any form or by any means or used to make any derivative such as translation, transformation, or adaptation without permission from NETWORK ONE DISTRIBUTION.
Need help?
Do you have a question about the FWM-V814T2D+++ and is the answer not in the manual?
Questions and answers