Table of Contents
Advertisement
Quick Links
Advertisement
Table of Contents

Related Manuals for Eye Vac EVPRO


Summary of Contents for Eye Vac EVPRO
- Page 1 User Manual USER MANUAL...
-
Page 2: Important Safety Instructions
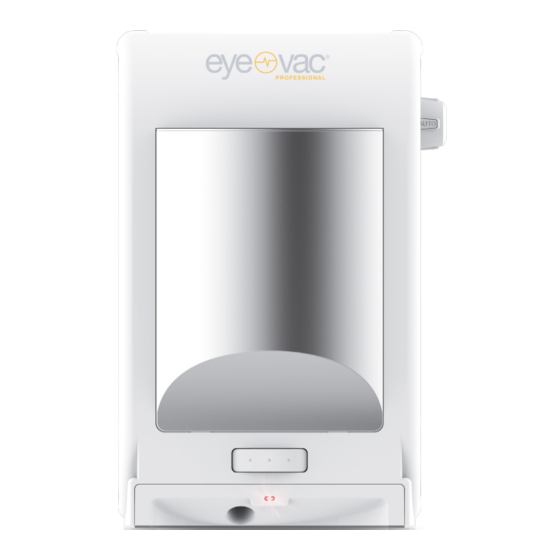
ENGLISH IMPORTANT SAFETY INSTRUCTIONS This electrical appliance must always be used according to the following safety instructions. Save these instructions as this manual contains important safety and operating information. A copy of the User Manual can also be found on our website at https://eyevac.com/faq/#manuals. - Page 3 DESCRIPTION OF EYEVAC PRO Save These instructions 1. Canister Lid 10. Canister Tabs 2. Inlet 11. Canister 3. Sensors 12. Pre-Motor Filter (and screen) 4. Control Dial (located on side of unit) 13. Exhaust Filter 5. Auto Mode 14. Vent Filter 6.
-
Page 4: Before Using For The First Time
BEFORE USING FOR THE FIRST TIME 1. Remove EyeVac Professional from packaging and set upright on any non-carpeted flooring. Remove packing tape from Exhaust Filter on the side of the unit. 2. Plug unit into any standard 120V(US) AC electrical outlet. NOTE: EYEVAC PROFESSIONAL CANNOT BE USED WITH A CONVERTER OR ADAPTER 3. - Page 5 OPERATING THE VACUUM: INSTRUCTIONS NOTE: EYEVAC PROFESSIONAL cannot operate when the Control Dial is in the Off position. Open the Canister and ensure the Plug in your EyeVac Pro in the desired Pre-Motor Filter is aligned properly locked location. into place and flush with the Canister Lid. Then close the Canister.
-
Page 6: User Maintenance Instructions
USER MAINTENANCE INSTRUCTIONS 1. To empty the EyeVac Professional Canister, turn the Control Dial to the Off position and unplug the unit. 2. Pull the Canister outward from the front of the Bin Cavity. Grasp the Canister Grip firmly and lift it out and away from the EyeVac Professional Main Unit. -
Page 7: Cleaning The Exhaust Filter
CLEANING THE EXHAUST FILTER 1. The Exhaust Filter slides up and out of its housing on the side of the unit. 2. Gently pull the Filter out of the Filter Holder. 3. Tap Filter gently against trash container to free and eliminate excess dirt and debris. 4. -
Page 8: Troubleshooting
TROUBLESHOOTING Problem Possible Cause Possible Solution 1. Not firmly plugged in EyeVac Pro will not turn on/no 1. Plug in firmly 2. Control Dial is in Off position power 2. Turn Control Dial to Manual or Auto position 3. Pre-Motor Filter is not in the 3. -
Page 9: Limited Warranty
LIMITED WARRANTY One-Year Limited Warranty. What is covered: JPaul Jones, LP warrants to the first retail purchaser of this EyeVac Professional that should this product or any part be proved defective in materials or workmanship from the date of proof of purchase for a period of one (1) year, then it will be subject to the terms of this one-year limited warranty.
Need help?
Do you have a question about the EVPRO and is the answer not in the manual?
Questions and answers