
Related Manuals for Haier HWM120-1678ES5


Summary of Contents for Haier HWM120-1678ES5
- Page 1 TOP LOAD FULLY AUTOMATIC WASHING MACHINE USER MANUAL MODEL HWM120-1678ES5 Please read this manual carefully before 0030517750 operating your washing machine and retain it for future reference.
-
Page 2: Table Of Contents
CONTENTS Product overview Safety precautions Description of symbols Safety warning Warning Forbidden Installation & adjustment Balance washing machine Install the bottom plate Position the drain hose Inlet pipe connection Before washing Laundry Guidelines Operation Loading the appliance Adding Detergent Control Panel Explanation of buttons Explanation of program Delay... -
Page 3: Product Overview
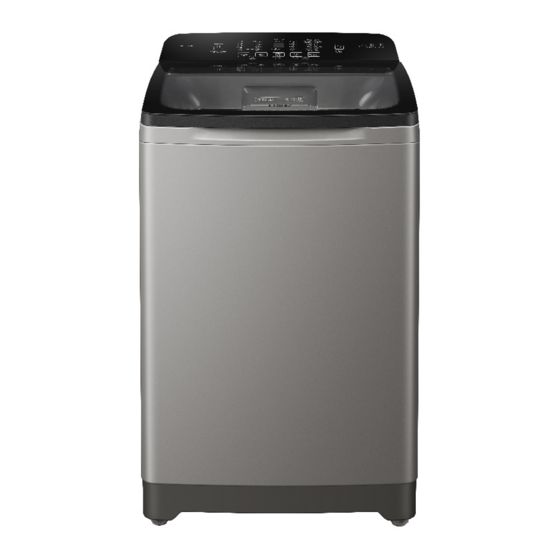
Product overview Top lid component Control panel Detergent drawer Inner tub Control panel seat Lint filter (2 pieces) Pulsator Cabinet Adjustable foot Base frame (2 pieces) Water inlet valve Hook Handle Back cover (2 pieces) Drain hose Power cord Fixed foot (2 pieces) Please understand the shapes of the washing machine and accessories may be different from the sketch figures in this manual due to product improvement. -
Page 4: Safety Precautions
Safety precautions Description of symbols Contents marked with this symbol are related to the safety Warning sign information of the products. Please operate in accordance to the contents of this manual, to prevent personal injury or property damage. Contents marked with this symbol indicate operations or actions Forbidden sign that should not be undertaken by the user. -
Page 5: Forbidden
Safety precautions Forbidden Do not install this appliance in a Do not contact to damp or wet environment. Do not water exceed 50°C leave wet laundry on the Control in temperature. Panel or spray water directly on to this appliance as this may cause the washer to malfunction or cause an electrical fault. - Page 6 Safety precautions You may open the lid when the water is filling in the tub. The new water inlet hose supplied with the appliance is to be used and the old water inlet hose should not be reused. Please remove item such as coins, Check that water faucets are open button, sand and other solid materials after connection to machine, prior...
-
Page 7: Installation & Adjustment
Installation & Adjustment Please install and position the machine according to the directions in this manual. It is very important to follow these directions for the safe operation of the machine, and to ensure your machine operates correctly. Balance washing machine Do not install the machine on a tilted floor. -
Page 8: Position The Drain Hose
Installation & Adjustment Position the drain hose 1.Do not let the drain hose run over 4.If extra drain hose is needed, please doorsills that protrude 10cm from the make separate purchase.The inner floor. diameter of the extra hose shall not less than 30mm,and the length shall not exceed 1.5m. - Page 9 Installation & Adjustment Connection between the water inlet hose jointer and the water faucet 1.Press the lower end of the locking lever and push down the slider. Remove the water inlet hose jointer from the water inlet hose component. See Figure 1. 2.Remove the nameplate.
- Page 10 Installation & Adjustment Connection between the jointer of the water inlet hose and the water inlet hose 1.Push down the slider. Insert the water inlet hose into the jointer. the jointer of the 2.Connect the locking lever to the jointer. Release water inlet hose the slider with a clicking sound.
-
Page 11: Before Washing
Before washing Preparation before washing 1.Connect the jointer of the water inlet hose to the water faucet.Turn on the water faucet. 2.The washing machine must be properly grounded. Then plug in the power cord to the power socket. Do not ground the washing machine to a gas pipe, water pipe or telephone line. -
Page 12: Operation
Operation Loading the appliance The washing capacity refers to the maximum dry weight of laundry that could be loaded into the appliance. The thickness, size and type of fabrics will influence the actual capacity. For laundries less than 2.0kg, kindly select the water level at 4 or below only. -
Page 13: Control Panel
Control Panel Explanation of buttons Display On:Indicates the program is about to run and the selected cycle and options. Flashing:Indicates the program is running and the selected cycle and options. Child Lock function This function is designed to prevent accidents happening on children and allows you to lock the buttons on the panel so that the wash cycle you’ve chosen can’t be changed by the children while he/she is playing with it. - Page 14 Control Panel A "Start/Pause" button After the power is switched on, press it to start the machine. When operation in progress, press the button if you want to pause. Press the button again if you want to resume the operation. B "Wash"...
-
Page 15: Explanation Of Program
Control Panel Explanation of program Program and Application Use this cycle for normally soiled cottons and mixed fabric Normal laundries. Use this cycle to wash small, lightly soiled laundries that are Quick needed in a hurry. Use this cycle to wash lightly soiled, dark or highly dyed Cotton natural fabrics, such as cotton that may be easily discolored. -
Page 16: Delay
Control Panel Delay How to activate Delay function: How to activate Delay function: Press the button “Water level” for 3 seconds, the display will shows “00” and the rest of the indicator lights will off. Select the program that you required and choose a delay of between 1 to 24hours (in 1 hour increments) to complete the wash . -
Page 17: Cleaning And Maintenance
Cleaning and Maintenance Maintenance Remove the power plug before carrying out any cleaning and maintenance. Clean the lint filter(s) and detergent drawer after each wash,otherwise it may influence your next use. The lint filter must be used during washing. Clean the detergent drawer and install back to the original position. -
Page 18: Troubleshooting
Troubleshooting Many occurring problems could be solved by yourself without specific expertise. Please check all the shown possibilities and the solution below before contact the customer care team. Please switch off the machine and remove the power plug before troubleshooting. Problem Cause Action... -
Page 19: Common Occurrence
Troubleshooting Problem Cause Action - Is the water inlet hose loose? - Make sure all hose Leaks Water connections are tight. - Indicates water reached a - Please contact Customer The display shows F2. critical level. Care. Common occurrence Problem Cause - Spread the laundry evenly and close the - Stop spinning before complete the cycle. -
Page 20: Packing List
Inside the document bag Screw Inside accessory bag Components of the water inlet hose faucet Specification Type Fully Automatic Washing Machine Model HWM120-1678ES5 Rated voltage/frequency 220V-240V~/50Hz Rated washing power 500W Rated spinning power 360W Net weight 48kg 55kg Gross weight...
Need help?
Do you have a question about the HWM120-1678ES5 and is the answer not in the manual?
Questions and answers