Table of Contents
Advertisement
Quick Links
Advertisement
Table of Contents

Related Manuals for NUTRICHEF PKBRKTL200

Summary of Contents for NUTRICHEF PKBRKTL200
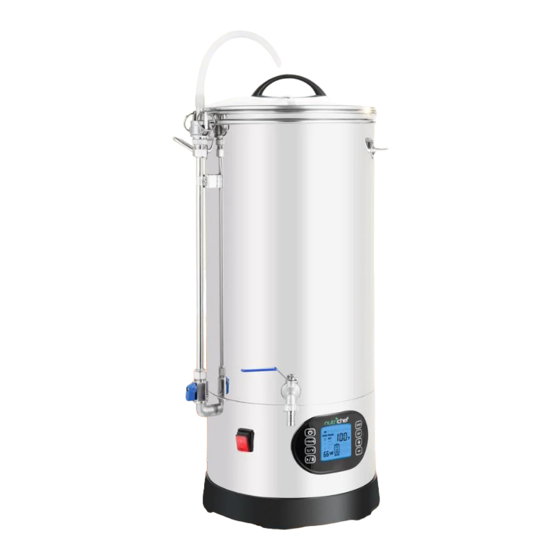
- Page 1 PKBRKTL200 Home Beer Brewing Machine with Inner Malt Pipe and Filter Screen...
-
Page 2: Safety Instructions
Mashing – Lautering – Boling in one kettle. Can hold up to 8 Kgs of malt. SAFETY INSTRUCTIONS · Read this user manual before using the PKBRKTL200 Home Beer Brewing Machine. · Only connect to a wall outlet available for the electric load of the equipment. -
Page 3: All Parts Explained
THE EQUIPMENT #1: Brew kettle #2: Malt basket #3: Lifting handle (for the malt basket) #4: Filter screen in the malt basket ALL PARTS EXPLAINED: Brew kettle with built in pump, riser pipe with CamLock tting, a mini ball valve, and a tap: The brew kettle is used during all phases of the brewing process, from heating the water (for mashing), mashing, lautering, boiling and cooling the wort that goes into the fermenting vessel. - Page 4 Male and female CamLock ttings CamLock closing procedure. Reverse to release. CamLock levers. CamLock ttings. Plastic Bottom The plastic bottom are attached underneath the brew kettle, covering the electronic components and the pump. This bottom can be removed by unscrewing the screws. This will give you access to the pump for maintenance and cleaning.
-
Page 5: Getting Started
Malt basket, handle and lter screen bottom When you choose to use malt basket, at rst you will use PROG III, all phase will be completed in this program without suspend. Malt basket placed on the top bracket GETTING STARTED Before your rst brew: Close the tap and riser pipe valve. - Page 6 Switch the brew program selector to “II” and press “RUN” button on the brew controller. The display light will now illuminate. This will initiate heating of the water to 100°C or 212°F. Wait until the water is boiling. Then open the riser pipe valve before switching on the pump. Let the pump run for about 10 minutes in order to clean the equipment pipes and pump.
-
Page 7: The Brew Controller Display Explained
The brew controller parameter can be changed, allowing you to set di erent values of your choice, and according to the recipe. How to change the parameters is described later in this user manual. If you want a protein rest at around 45°C/113°F, it is possible for you to set. Starch conversion in the mash occurs between 55°C/131°F and 71°C/159.8°F. - Page 8 7. Program selector: Select the program I, II and III when the equipment is paused. Keeping press this key for 5 seconds, the program set and run will be recovered to default value. PROG I include the rst three phase: HEAT, MASH and LAUTER. PROG II include the last phase: BOIL.
- Page 9 OPERATION GUIDE 1. Power ON After the machine is plugged in, the buzzer will ring, the display screen and the blue backlight will be on for 2 seconds, and the machine will be in standby mode. 2. Press "ON/OFF" to start up "ON/OFF"...
- Page 10 When you select program I, the machine will run all steps as the order of S - L, also can choose any step from S - L by press STEP key then the machine will start to run from this step. 1.
- Page 11 C. The operation of the selection program III (PROG display III only) When you select program I, the machine will run all steps as the order of S - B3, also can choose any step from S - L by pressing STEP key then the machine will start to run from this step. 1.
- Page 12 5. Step Selection When the machine in standby or pause state, every time when pressing "STEP" button, the selected STEP symbol will be blink in order on the screen, thus the power (wattage), temperature and timing corresponding to the selected STEP can be set. You can also press the "RUN/PAUSE" key to RUN the program backwards from the selected step.
-
Page 13: Cleaning And Maintenance
11. Automatic memory saving function When the program is nished and the machine is shut down after running every time, the running program and settings will be saved automatically. When the machine is started up again next time, the running program and settings of last time will be retrieved from the memory automatically and run again. - Page 14 Remove the screws holding the bottom cover plate, using a Phillips screwdriver. Disconnect the power cord quick connector (#1). Loosen the two hose clamps (#2 and #3) and remove the hoses from the pump. Unscrew the screw attaching the 2 ground cables (#4), and nally, loosen the screw attaching the pump. You can now remove the pump.
-
Page 15: What's In The Box
FEATURES: • Mashup to 17lb of Malt • Maximum Capacity of 9 Gallons • Single Wall, Stainless Steel Construction • External Stainless Steel 1/2in Valve • Plugs Into Standard Wall Outlet • Easy to Assemble - Easy to Fill - Easy to Clean •... - Page 16 Questions? Issues? We are here to help! Phone: (1) 718-535-1800 Email: support@pyleusa.com...
Need help?
Do you have a question about the PKBRKTL200 and is the answer not in the manual?
Questions and answers