Table of Contents
Advertisement
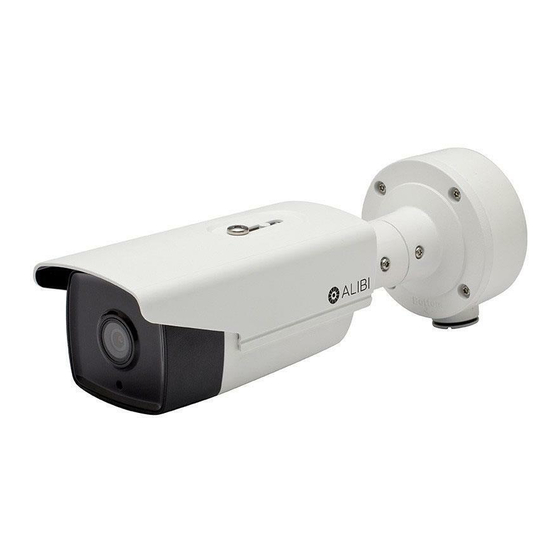
ALI-NP3022ANPR 2 MP IP Bullet
License Plate Recognition Camera
Quick Installation Guide
This document guides you through the basic steps to install and configure the ALI-NP3022ANPR camera.
This camera uses optical character recognition on images to read vehicle license plates and create vehicle
data. The camera features:
2.0 MP high resolution sensor, 1920 × 1080 @ 60 fps
•
8 - 32 mm motorized vari-focal lens
•
Smart IR LED array with illumination up to 165 feet
•
3D-DNR noise reduction, 120dB Wide Dynamic Range (WDR)
•
Dual power capable - Power over Ethernet (PoE) or 12 Vdc
•
Weatherproof - IP67 rated
•
Internal microSD card storage up to 128GB (card not provided)
•
2-way Audio I/O, Alarm I/O
•
For more information about the software features of this camera, please refer to the ALIBI IP Camera V3
Software User Manual, available from your retailer.
Articulated
mounting
bracket
Camera body
12 Vdc,power
and ground
terminations
www.observint.com
1
Junction box assembly
(see detail below)
Camera mounting base
Sun Shield
Safety cable
Alarm In/Out
terminals
LAN (RJ-45)
connector
Audio In/Out
connectors
CVBS Out
microSD card slot and reset button inside.
Camera base
locator pins
Top (up)
Bottom (down)
Conduit port (2)
What's in the box
Your camera includes the following items:
Drill template
•
Waterproof RJ-45 LAN coupling
•
Junction Box
•
Gang box adapter plate (not shown)
•
Security wrench
•
Mounting hardware
•
•
Step 1.
Determine the camera mounting location
This License Plate Recognition camera will produce the best results when positioned and aimed correctly.
Lens
Use the information in this step, and then carefully plan for the installation following the guidelines shown
here and the instructions later in this document.
General Guidelines
Environment: The camera should not be blocked from its surveillance targets by vegetation,
•
structures, or other obstructions.
Sunlight: Direct sunlight can distort the image detected by the camera.
•
Installation angle: The vertical and horizontal angles should not exceed 30º. See the diagrams
•
below.
H
X
Y
For computational purposes, the recognition distance (minimum to maximum) is a combination of the vertical
NOTE
height (H) of the camera and the horizontal offset (Y) of the camera from the motion vector of the vehicle.
Lens specification: 8 mm to 32 mm, F1.6, horizontal field of view: 42° to 13.5°.
Junction box detail
Waterproof LAN coupling
30º
30º
Hook for safety
cable
Mounting screw
hole (4)
Hole for camera
mounting screw (4)
Cable access
through mounting
surface
ALI-NP3013RH_CQ
181128
Advertisement
Table of Contents

Related Manuals for ALIBI ALI-NP3022ANPR


Summary of Contents for ALIBI ALI-NP3022ANPR
- Page 1 2-way Audio I/O, Alarm I/O • Junction Box • For more information about the software features of this camera, please refer to the ALIBI IP Camera V3 Gang box adapter plate (not shown) • Software User Manual, available from your retailer.
-
Page 2: Application Guidelines
Lens and Recognition Distance: The ALI-NS3022ANPR camera includes an 8 ~ 32 mm Application Guidelines • vari-focal lens, which can be used for surveillance of both Gate Entrances and roadways. For Two common camera applications are discussed here: Gate Entrance and Road Traffic. For other determining the optimal distance range for recognizing license plates, use the diagram shown applications, follow the models guidelines above to determine the best location for installing the camera. - Page 3 To mount the camera onto a surface without the junction box For this mounting option, the drop cables can be routed through the mounting surface, or through the cable channel in the mounting base. Mounting surface The figures below show an application for two lanes of traffic with the camera mounted in the middle of a crossbar.
-
Page 4: Step 4. Modify Network Parameters
NVR firmware for more information. When an Alibi device is first installed, or reset to its factory configuration, it must be “Activated” before it You can change the network parameters of devices that are active. can be used. In the Alibi Configuration Tool, “Inactive” devices have a Security status of Inactive, and In the list of devices discovered, click on the device you want to change the network settings for, and an IPv4 address of 192.168.1.64. -
Page 5: Logout Button
Setting MS Internet Explorer to run as an Administrator Window 7: To run IE as an Administrator: Find or create an IE icon on your computer desktop. Hold down the shift key, and then right-click on the IE icon. Run as administrator MS Internet Click on the message to install the plugin. - Page 6 maintenance cable to the connector on the maintenance panel, and then attach it to CVBS monitor to see a Zoom In / Out Direction buttons live view video from the camera. Focus In / Out While observing live video from the camera, use the L-wrench to loosen the adjustment bracket lock Iris Open / Close screw on the back of the adjustment bracket until the camera is free to move and rotate.
-
Page 7: Step 9. License Plate Recognition
Step 9. License Plate Recognition You can use the client software and a web browser to compose a rule to capture pictures configure the camera to identify the license plant number. Gate traffic surveillance is used in the example shown here. Enable Vehicle Detection Log into the camera via web browser. - Page 8 When the lines are in the optimal position, click Save. Adjust the start and end time for the day, or drag the dots at each end of the line to set the arming period for that day. Time periods cannot overlap. Move the cursor to the end of the line, and then click the green icon that appears.
- Page 9 Step 10. LPR configuration setup To ensure the best performance of your camera for license plate recognition, follow the guidelines below: To reduce the effect of the car headlights, set the shutter speed to not less than 1/1000 s. To NOT •...
-
Page 10: Specifications
Specifications Audio Environment Noise Filtering Supported Camera Audio I/O Supported Image Sensor 1/1.8" Progressive Scan CMOS Audio Sampling Rate 16 kHz / 32 kHz / 44.1 kHz / 48 kHz Min. Illumination Color: 0.002 Lux @ (F1.2, AGC ON), 0.0027 Lux @ (F1.4, AGC ON), 0 Lux with IR General Shutter Speed 1 s to 1/100,000 s, supports slow shutter...
Need help?
Do you have a question about the ALI-NP3022ANPR and is the answer not in the manual?
Questions and answers