Table of Contents
Advertisement
PRODUCT DIAGRAM
1
2
3
1. Lid Release Button
2. Float Valve (external view)
3. Power Cord
4. Pressure Limiting Valve
5. Handle
6. Lid Rest Tab
7. Lid
8. 304 Stainless Steel
Inner Pot
Thank you for purchasing a Rosewill Pressure Cooker.
Please read the instruction manual before use and retain for future reference.
9. Condensation Cup
10. Outer Pot
11. Lid Rest (lid latches onto
either side of handle)
12. Main Body Handles
13. Upper Ring
14. Control Panel
15. Main Body
16. Heating Plate
1
4
5
6
7
8
9
10
11
12
13
14
15
16
17
18
17. Sensor
18. Bottom Ring
19. Filter
20. Silicone Gasket
21. Float Valve (internal view)
22. Float Valve Seal Ring
23. Measuring Cup
24. Serving Spatula
RHPC-19001
19
20
21
22
23
24
Advertisement
Table of Contents

Related Manuals for Rosewill RHPC-19001

Summary of Contents for Rosewill RHPC-19001
- Page 1 RHPC-19001 Thank you for purchasing a Rosewill Pressure Cooker. Please read the instruction manual before use and retain for future reference. PRODUCT DIAGRAM 1. Lid Release Button 9. Condensation Cup 17. Sensor 2. Float Valve (external view) 10. Outer Pot 18.
-
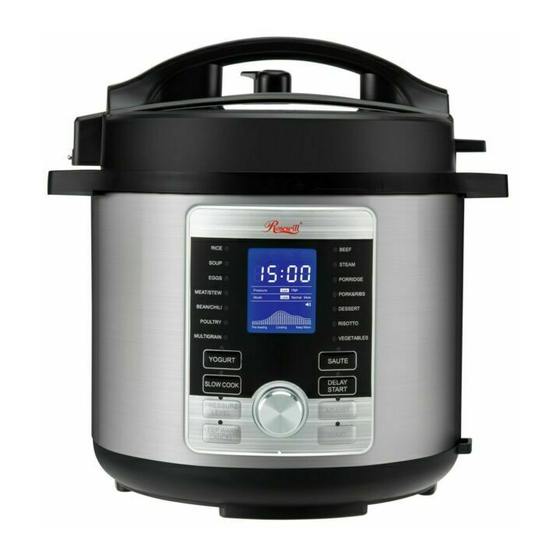
Page 2: Control Panel Description
CONTROL PANEL DESCRIPTION The LCD display uses icons, words and numbers to depict time, pressure levels, modes, cooking progress and messages. Delay Start Pre-Heating Pressurized Keep Warm Icon Icon Icon Icon Time & Message Display: Depicts cook time or messages Sound Indicator: Pressure Level Indicator: Sound ON/OFF... - Page 3 LCD Display Descriptions 1-17. Cooking Presets 21. Keep Warm/Cancel 18. Delay Start Function 22. Start Button 19. Pressure Level Button 23. Menu Knob (central dial for program selection and system settings) 20. Adjust Button...
- Page 4 FEATURES Multifunctional Pressure Cooker 1. Multiple functions for cooking, stewing, braising and simmering. 2. Cooking will be done automatically by selecting the different menu choices on the unit. 3. The pressure cooker also has its own memory. During interruptions such as a power failure, the unit will automatically resume the cooking cycle when power returns.
-
Page 5: Pressure Cooker Lid Markings
Pressure Cooker Lid Markings Please note the "Open" and "Close" markings on the rim of the pressure cooker body and the “ ” on the rim of the Lid. To properly close and secure the pressure cooker Lid, always line up the “... -
Page 6: Unpacking And Assembly
Caution: • If the rubber seal ring is damaged, do not use the pressure cooker. Contact Rosewill Tech Support to repair or replace. • To lock Lid in place, remove any food residue from the cooking pot’s Upper Ring to ensure a proper seal. -
Page 7: Water Test
sound can be heard. • To ensure you are properly closing the lid, line up the “Open” and “Close” markings on the Lid and pressure cooker body. Water Test To ensure correct assembly of the Silicone Gasket before the first use, it is recommended to read the following instructions and fill the Inner Pot with water to the 2/3 line and program to pressure cook for 30 minutes. -
Page 8: Operation And Functions
the Inner Pot into the pressure cooker. Adjust the pot left and right to ensure optimal contact between the Inner Pot and the Heating Plate. 3. “Close” and lock the lid. 4. Adjust the Pressure Limiting Valve to the “Sealing” position and ensure that the Float Valve sinks. - Page 9 FUNCTIONS DEFAULT COOK TIME COOK TIME RANGE Rice 12 Minutes 1-99 Minutes Soup 15 Minutes 1-99 Minutes Eggs 5 Minutes 1-99 Minutes Meat/Stew 35 Minutes 1-99 Minutes Bean/Chili 30 Minutes 1-99 Minutes Poultry 15 Minutes 1-99 Minutes Multigrain 40 Minutes 1-99 Minutes Beef 35 Minutes...
- Page 10 Auto KEEP WARM Feature When cooking has completed, the pressure cooker will beep and automatically switch to KKEEP WARM function, except after the YOGURT function. The KEEP WARM indicator light and KEEP WARM icon will illuminate and the display will show 00:00; it will display how long the pressure cooker has kept warm.
- Page 11 1. Remove Lid from unit. 2. Add oil or butter as directed in your recipe and then place food into the Inner Pot. 3. Select the SAUTE function. Press START button. 4. Stir or turn food as needed until desired color and consistency is reached. 5.
-
Page 12: Important Safety Precautions
3. Select YOGURT; default displays an 8-hour timer on the LCD screen. Press START button. 4. When cooking is complete, the pressure cooker beeps several times and the LCD screen displays “Yogt”. Transfer yogurt to containers and refrigerate as directed by your recipe. How To Use The DELAY START Function If you wish to program your pressure cooker to automatically cook prepared food at a later time, you can program the pressure cooker to delay cooking by up to 24-hours. - Page 13 • Do not fill the unit over 2/3 full. When cooking foods that expand during cooking, such as rice or dried vegetables, do not fill the unit over 1/2 full. Overfilling may increase the risk of clogging the vent pipe, resulting in excessive pressure inside the unit. Failure to follow these guidelines can result in injury to person(s) and/or damage to the unit.
-
Page 14: Safety Warning
Safety Warning There is a potential risk of fire, electric shock or injury to persons if the product is not used as instructed. Protection against electric shock is assured only if the main power cord is connected to a properly grounded 120V/60 Hz power receptacle. •... -
Page 15: How To Clean The Filter
TROUBLESHOOTING LED Error Indicator If any of the below error codes appear on the pressure cooker display, unplug the power cord and re-plug after 10 minutes. If the error code remains, contact Rosewill Tech Support. Indicator Code Problems/Causes Open Circuit of the Sensor... -
Page 16: Specifications
1 x Stainless Steel Egg 1 x Silicone Gasket Steam Rack 1 x Silicone Mitts 1 x Recipe Book Technical Support Information techsupport@rosewill.com 1-800-575-9885 Please register your product at www.rosewill.com for complete warranty information and support for your product. RHPC-19001_A...
Need help?
Do you have a question about the RHPC-19001 and is the answer not in the manual?
Questions and answers