Table of Contents
Advertisement
INSTRUCTION MANUAL
:
MODEL
MACHINE No.:
IMPORTANT
Read carefully and understand this INSTRUCTIONS before
operating your Strapack machine.
Keep this booklet in a convenient location for use at any time.
This machine is conformity with the requirement of the following EC Directive ,
2006/42/EC Machinery Directive
2014/30/EU EMC Directive
iQ-400
DO NOT DESTROY
ORIGINAL INSTRUCTION
800-821-2177
Service@MillerBevco.com or Parts@MillerBevco.com
www.MillerBevco.com
iQ400-1A-02001-00
(Mar 2018)
Advertisement
Table of Contents

Subscribe to Our Youtube Channel
Related Manuals for Strapack iQ400


Summary of Contents for Strapack iQ400
- Page 1 DO NOT DESTROY Read carefully and understand this INSTRUCTIONS before operating your Strapack machine. Keep this booklet in a convenient location for use at any time. This machine is conformity with the requirement of the following EC Directive , ...
-
Page 2: Table Of Contents
Index Chapter1 INTRODUCTION Operating Environment ·································································· 2 Strapack Group Contact Information ··············································· 3 Product Identification Plate Locations ············································· 3 Standard Specification······································································ 4 Dimensional Outline Drawing ·························································· 4 Chapter2 SAFETY INSTRUCTION General Cautions ·············································································· 5 ・Warning and Cautions on Power Cord ・Warning and Cautions on Strap... -
Page 3: Chapter1 Introduction
CHAPTER 1 INTRODUCTION Thank you very much for your purchase of a STRAPACK strapping machine. We are prepared to offer extensive after sales service for our products through our distribution network. To effectively use the strapping machine, daily maintenance and proper handling are important. -
Page 4: Strapack Group Contact Information
7F Ginza Strapack Building 8-16-6 Ginza Chuo-ku Fax: +81 3 6278 1807 Tokyo 1040061 JAPAN [ Asia, Oceania and General Inquiry about Strapack ] +1 800 821 2177 STRAPACK, INC. Phone: MillerBevco 6209 Richards Dr. Shawnee, KS 66216 +1 913 322 1729 U.S.A. -
Page 5: Standard Specification
800-821-2177/Fax 913-322-1729 Info@MillerBevco.com www.MillerBevco.com Standard Specification iQ-400 Outside North America North America Joint Heat Seal / polypropylene (Strap Weld) Dimensions : Width 780mm : Height 777 mm -5/8 : Table Height 752 mm -5/8 : Depth 540 mm -1/2 Machine Weight Approx. -
Page 6: Chapter2 Safety Instruction
CHAPTER2 SAFETY INSTRUCTION This section deals with safety for moving, installing, operating the machine and performing simple maintenance. So please fully understand it before use. Also, keep this manual near the machine so that you can check it immediately when you need it. Make sure that those who received some education should install, repair and adjust the machine. -
Page 7: Operation
Dispose of the replaced parts appropriately, according to local trash regulations. When the maintenance is complete, replace the tables and outer panels and turn the power back on. Use only parts provided or approved by STRAPACK. 800-821-2177 Service@MillerBevco.com or Parts@MillerBevco.com www.MillerBevco.com... -
Page 8: Safety Alert Labels
Safety Alert Labels Warning labels are seen where there is a potential risk of danger. Carefully read the instructions on the Safety Alert Labels and follow them. Replace missing or damaged safety labels with new safety labels immediately. ... -
Page 9: Chapter4 Machine Information
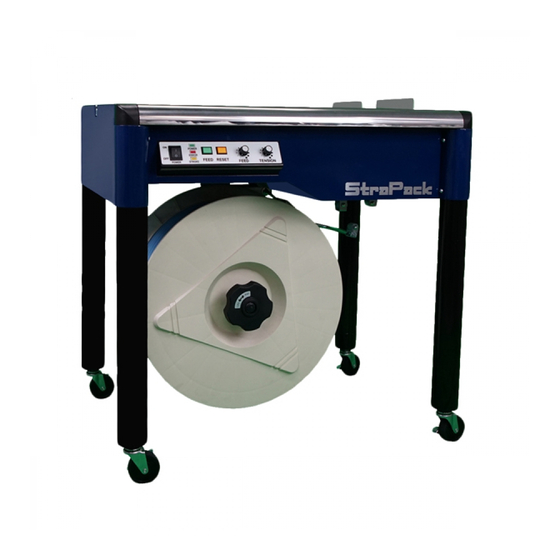
CHAPTER 4 MACHINE INFORMATION Operation Panel Power Select Switch This is the Power Supply Switch for the machine. Green Lamp⑥ by the switch will be lit when the switch is at ON position. This Lamp⑥ indicates the connection of power supply. The Green Lamp starts to blink when the Power Select Switch is turned on. -
Page 10: Switching Of Tension Mode (Torque/Stroke)
Switching of TENSION MODE (Torque/Stroke) This model is capable to select “Torque Tension System” or “Stroke Tension System”. Following is the explanation of tension system. Select appropriate Tension System according to package. When shipping from the factory, the torque system is selected, so the “STROKE lamp” is off. The “STROKE lamp”... -
Page 11: Inner Adjustment Dials And Fuse
Inner Adjustment Dials and Fuses Heater Dial, Seal Prolongation Dial and Fuse are equipped inside of Machine. 1.HEATER ●Heater Temperature Adjustment ・The Heater Temperature has been preset at the factory. However, please note that differing climates or ambient temperatures may require adjusting the temperature. ・The Heater Temperature Dial is located inside the machine. -
Page 12: Wiring Diagram
Wiring Diagram ●Electrical Wiring Diagram Index Number 100V SED-J53-J 110~120V SED-J53-A 220~240V SED-J53-E p. 11... -
Page 13: Chapter5 Operation
CHAPTER 5 OPERATION Loading the Strap Coil Load the strap coil onto the Reel Unit without cutting retaining bands ④ tied around the coil. Remove Reel Out Circular ② by rotating Reel Nut Handle ① clockwise. Mount the strap coil onto the Reel In Circular ③ so that the tip of the strap points in the counterclockwise direction. -
Page 14: Daily Care
800-821-2177 Service@MillerBevco.com or Parts@MillerBevco.com Daily Care www.MillerBevco.com Daily: ・Strap Seal・・・・・・・・・・・・ Check the seal for good bond & overlap. ・Abnormal Noise ・・・・・・・・・・ Check for any abnormal noise during machine operation ・Vibration ・・・・・・・・・・・・・・・・ Check for any abnormal vibration during machine operation. ・ Power ・・・・・・・・・・・・・・・・・・・Check for splits / breakage in power cord. -
Page 15: Adjustment Of Converting The Strap Width
800-821-2177 Service@MillerBevco.com or Adjustment for converting the strap width Parts@MillerBevco.com www.MillerBevco.com Adjustment of the band width is 3 places. 1. Remove the Right Bandway Adjuster. 2. Loosen the bolts with fix the Shooter Adjuster, and adjust the Shooter Adjuster according the strap width. - Page 16 : www.strapack.com 8-16-6 Ginza Chuo-ku Tokyo 104-0061 JAPAN E-mail : info@strapack.com Strapack Corporation International Department ☐ 7F Ginza Strapack Building 8-16-6 Ginza Chuo-ku Tokyo 104-0061 JAPAN Phone : +81 3 6278 1806 : +81 3 6278 1807 Strapack, Inc. ☐...
Need help?
Do you have a question about the iQ400 and is the answer not in the manual?
Questions and answers