Advertisement
Quick Links
Advertisement

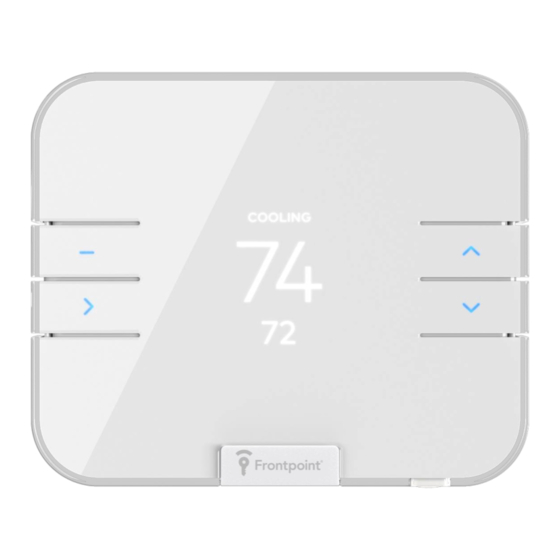
Summary of Contents for Frontpoint Smart Thermostat
- Page 1 Smart Thermostat Manual...
-
Page 2: Table Of Contents
Smart Thermostat Installation & Setup Please carefully read PART ONE of the manual to complete your installation and setup. For further information and troubleshooting, please refer to PART TWO. PART ONE: Installation…page 3 Setup…page 8 PART TWO: Operations…page 10 Terminal Descriptions…page 13 Troubleshooting…page 14... -
Page 3: Part One
PART ONE INSTALLATION This guide is intended to replace an existing thermostat. If you desire a new location for your thermostat, contact a local HVAC professional. If you have any questions, stop and call 1-877-602-5276 for help. - Page 4 Please follow these steps for a successful installation: Verify your thermostat can be replaced: Make sure your original thermostat is working properly: i. Increase heat, confirm heat comes on. ii. Increase A/C, confirm cooling comes on. CAUTION: Do not test the system by shorting electric terminals at the furnace or air conditioner. This may damage the thermostat.
- Page 5 Check for the presence of a jumper between R and RC or RH and RC. Although most systems do not have jumpers (shown below), if you see one, please be sure to remove it before proceeding. The Frontpoint Smart Thermostat has a digital jumper built in, so any physical jumper would cause issues.
- Page 6 **If there are both RC and RH wires, it is critical that each wire is inserted into its corresponding hole and the subsequent configuration is done correctly. In this scenario, Frontpoint highly recommends calling an HVAC professional to help with the installation.
- Page 7 15. Turn the power back on at the circuit breaker to finish your installation. 16. Proceed to the next section to setup your thermostat and use your Frontpoint App to learn in the thermostat. If you have any questions, stop and call 1-877-602-5276 for help.
-
Page 8: Setup
SETUP Reference the below diagram as you follow the next steps: 1. Following the LED prompt on the thermostat body, indicate your thermostat configuration- RC only, RH only, or RC and RH. It is CRITICAL that you make the correct selection; the damage potential is very high if you choose incorrectly. Although you should be able to assess this accurately by referring to your photo, if you feel uncomfortable, call an HVAC professional to help. - Page 9 • V: Ventilation (HRV, VRV, air baffle) The display will now ask “READY TO ADD TO NETWORK?”. To learn your thermostat into your Frontpoint system, press “START” and follow the below steps: Using your Frontpoint App, click on “Add device” in the left-hand navigation Select “Thermostat”, followed by “T-3000 Smart Thermostat”...
-
Page 10: Part Two
Select Add. The App will now prompt you to “Enter Authorization Key”, otherwise known as the DSK. The five-digit DSK should appear on the thermostat display or can be found on the box. Name your device as desired and follow the prompt until reaching a “Congratulations”. You have now completed your thermostat installation and setup! For more information on how to use your thermostat and troubleshoot issues, please refer to PART TWO. - Page 11 AUTO mode will automatically turn the fan on when your system is either heating or cooling. CIRCULATE will turn the fan on for 15 minutes every hour by default. The duration for CIRCULATE can be configured from the online account. Changing the humidity mode The thermostat can adjust the humidity level in your home by directly controlling an external humidifier or dehumidifier.
- Page 12 setpoints. Moving one of the setpoints within 20% of the other will force the other setpoint to move automatically to maintain the 20% deadband. Powering your thermostat This thermostat should only be powered by two AAA alkaline batteries or a listed Class 2 power supply at 24 VAC (C-Wire or wall transformer).
-
Page 13: Terminal Descriptions
TERMINAL DESCRIPTIONS If you have any questions, stop and call 1-877-602-5276 for help. -
Page 14: Troubleshooting
TROUBLESHOOTING Please use this section if you find any of the below issues happening to you: Thermostat reflects “No Wires Detected”. This message may be appearing because the power has not been turned back on at the circuit breaker. Make sure the power is turned back on to proceed. - Page 15 Thermostat displays "Isolation relay required" on the screen The HVAC system requires an isolation relay due to overcurrent on the W and Y terminals. Frontpoint recommends the Emerson 90 380 Fan Relay 24 Volt Coil, 1. Contact an HVAC technician to install.
- Page 16 Press the down button to lower the setpoint below room temperature. Wait five minutes for the system to turn on. After verifying the heating system is working, return the setpoint to the desired temp erature. For help, please check out our Knowledge Base at Support.Frontpoint.com If you have any questions, stop and call 1-877-602-5276 for help.
- Page 17 Notices This device complies with part 15 of the FCC Rules. Operation is subject to the following two conditions: This device may not cause harmful interference. –and– This device must accept any interference received, including Interference that may cause undesired operation. This equipment has been tested and found to comply with the limits for a Class B digital device, pursuant to part 15 of the FCC Rules.
Need help?
Do you have a question about the Smart Thermostat and is the answer not in the manual?
Questions and answers