Table of Contents
Advertisement
Safety Information ................................................... 2
Markings on the Product.......................................... 2
Environmental Information....................................... 3
Features .................................................................. 3
Accessories Included............................................... 4
Standby Mode Picture ............................................. 4
TV Control Button & Operation ................................ 4
Using Main TV Menu ............................................... 5
Inserting the Batteries into the Remote ................... 6
Power Connection ................................................... 6
Antenna Connection ................................................ 7
License Notification ................................................. 7
Disposal Information ................................................ 7
Specification ............................................................ 8
Remote Control ....................................................... 9
Connections........................................................... 10
Switching On/Off .................................................... 11
First Time Installation............................................. 11
Media Playback via USB Input .............................. 12
USB Recording ...................................................... 12
Media Browser....................................................... 14
CEC ....................................................................... 14
E-Manual ............................................................... 15
Settings Menu Content .......................................... 16
General TV Operation ........................................... 22
Using the Channel List .......................................... 22
Configuring Parental Settings ................................ 22
Electronic Programme Guide ................................ 22
Teletext Services ................................................... 23
Software Upgrade.................................................. 23
Troubleshooting & Tips .......................................... 23
AV and HDMI Signal Compatibility ........................ 24
Supported File Formats for USB Mode ................. 25
Video File Formats ................................................ 25
Picture File Formats .............................................. 25
Audio File Formats ................................................ 25
Subtitle File Formats.............................................. 26
Supported DVI Resolutions ................................... 26
Connectivity ........................................................... 27
Wired Connectivity................................................. 27
Wireless Connectivity ............................................ 27
Networked Standby Mode ..................................... 28
Wireless Display .................................................... 29
Connectivity Troubleshooting ................................ 29
Using Audio Video Sharing Network Service ......... 29
Apps ...................................................................... 30
Internet Browser .................................................... 30
HBBTV System...................................................... 31
Smart Center ......................................................... 31
DVB functionality information ................................ 33
English - 1 -
Advertisement
Table of Contents
Troubleshooting

Subscribe to Our Youtube Channel
Related Manuals for F&U FLS32227H


Summary of Contents for F&U FLS32227H
-
Page 1: Table Of Contents
Apps ..............30 Contents Internet Browser ............ 30 Safety Information ........... 2 HBBTV System............31 Markings on the Product.......... 2 Smart Center ............31 Environmental Information........3 DVB functionality information ........ 33 Features ..............3 Accessories Included..........4 Standby Mode Picture ..........4 TV Control Button &... -
Page 2: Safety Information
• Do not place any heat sources such as electric Safety Information heaters, radiators, etc. near the TV set. • Do not place the TV on the floor and inclined CAUTION surfaces. • To avoid danger of suffocation, keep plastic bags RISK OF ELECTRIC SHOCK out of the reach of the babies, children and domestic DO NOT OPEN... -
Page 3: Environmental Information
WARNING WALL MOUNTING WARNINGS Do not ingest the battery, Chemical Burn Hazard • Read the instructions before mounting your TV This product or the accessories supplied with the pro- on the wall. duct may contain a coin/button cell battery. If the coin/ • The wall mount kit is optional. -
Page 4: Accessories Included
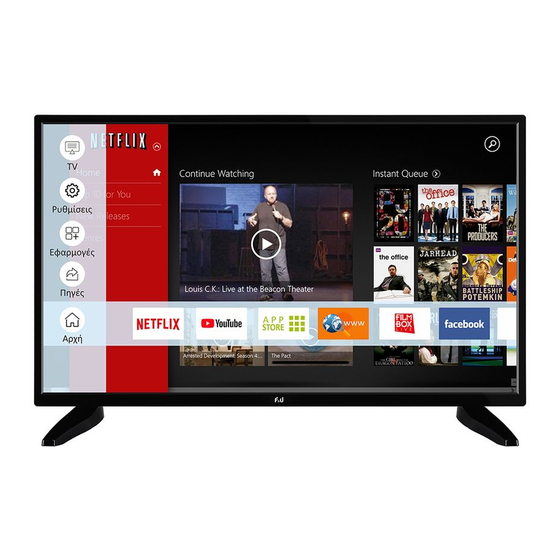
• OSD menu system • Create a separate folder named as standby_picture in the USB storage device's root directory and copy • Side AV input for external devices (such as DVD the files you want to use into that folder and then Players, PVR, video games, etc.) connect the USB storage device to your TV. -
Page 5: Using Main Tv Menu
Operating with the Control Button OK button to navigate and set. Press Return/Back or Menu button to quit a menu screen. • Press the control button to display the function Input Selection options menu. • Then press the button consecutively to move the Once you have connected external systems to your focus to the desired option if needed. -
Page 6: Inserting The Batteries Into The Remote
Highlight the desired result using the directional 3.7. Accessibility buttons and press OK to open. You can access the accessibility settings menu directly 3. TV using this option. 3.1. Guide 3.8. Privacy Settings You can access the electronic programme guide menu You can access the privacy settings menu directly using this option. -
Page 7: Antenna Connection
decline an upgrade, you will not be able to access Antenna Connection content that requires the upgrade. Connect the aerial or cable TV plug to the aerial input The “CI Plus” Logo is a trademark of CI Plus LLP. (ANT) socket or satellite plug to the satellite input (LNB) socket located on the rear side of the TV. -
Page 8: Specification
Wireless LAN Transmitter Specifications Note: The sign Pb below the symbol for batteries indicates that this battery contains lead. Frequency Ranges Max Output Power 2400 - 2483,5 MHz (CH1-CH13) < 100 mW 5150 - 5250 MHz (CH36 - CH48) < 200 mW 5250 - 5350 MHz (CH52 - CH64) <... -
Page 9: Remote Control
Remote Control Standby: Switches On / Off the TV Numeric buttons: Switches the channel, enters a number or a letter in the text box on the screen. Language: Switches among sound modes (an- alogue TV), displays and changes audio/subtitle language and turns subtitles on or off (digital TV, where available) Mute: Completely turns off the volume of the TV Volume +/-... -
Page 10: Connections
Connections Connector Type Cables Device When using the wall mounting kit (available from a third party HDMI in the market, if not supplied), Connection we recommend that you plug all (side&back) your cables into the back of the TV before mounting on the wall. SPDIF SPDIF Insert or remove the CI module... -
Page 11: Switching On/Off
your selection later using the Mode option in the Switching On/Off Settings>Picture menu. To Switch the TV On Depending on the model of your TV and the country Connect the power cord to a power source such as a selection Privacy Settings menu may appear at wall socket (220-240V AC, 50 Hz). -
Page 12: Media Playback Via Usb Input
When finished, highlight Next and press OK button Media Playback via USB Input to continue. You can connect 2.5” and 3.5” inch (HDD with external power Note: Searching duration will change depending on the supply) external hard disk drives or USB memory stick to your selected Search Step. - Page 13 It is recommended to use USB hard disk drives for Slow Forward recording HD programmes. If you press Pause button while watching recorded Do not pull out the USB/HDD during a recording. This programmes, the slow forward feature will be available. may harm the connected USB/HDD.
-
Page 14: Media Browser
not meet the speed requirements. Try connecting it and press OK to view it in full screen. Press the another USB disk. Info button, highlight the gear wheel symbol on the information bar and press OK. Select Options and Media Browser press OK to enter. -
Page 15: E-Manual
System Audio Control Allows an Audio Amplifier/Receiver to be used with the TV. The volume can be controlled using the remote control of the TV. To activate this feature set the Sound Output option in the Settings>Sound menu as HDMI ARC. When HDMI ARC option is selected, CEC option will be set as Enabled automatically, if it is not already set. -
Page 16: Settings Menu Content
Settings Menu Content Picture Menu Content You can change the picture mode to suit your preference or requirements. Picture mode can Mode be set to one of these options: Cinema, Game(optional), Sports, Dynamic and Natural. Contrast Adjusts the light and dark values on the screen. Brightness Adjusts the brightness values on the screen. - Page 17 Sound Menu Content Smart, Movie, Music, News and Off options will be available. Set as Off to disable. Dolby Audio Note: Some items in Sound menu will be grayed out and unavailable if set to an option other than Off. Surround Sound Surround Sound mode can be changed as On or Off.
- Page 18 Network Menu Content Network Type Disable the network connection or change the connection type. Scan Wireless Start a search for wireless networks. This option will be available if the Network Type Networks is set as Wireless Device. To disconnect from a wireless network and delete your saved wireless network profile (if previously saved), highlight this option and press OK.
- Page 19 System Menu Content Accessibility Displays accessibility options of the TV. Increase the contrast of the menu options and texts to make them easier to read. White High Contrast Text, Yellow Text and Off options will be available. Hard of Hearing Enables any special feature sent from the broadcaster.
- Page 20 Enter correct password to change parental settings. You can easily adjust Menu Lock, Maturity Lock, Child Lock or Guidance in this menu. You can also set a new PIN or change the Default CICAM PIN using the related options. Parental Note: Some menu options may not be available depending on the country selection in the First Time Installation.
- Page 21 This setting configures the power up mode preference. Last State and Standby Mode Power Up Mode options are available. Virtual Remote Enable or disable the virtual remote feature. Displays Open Source Software license information. You can set your preference regarding the priority between the broadcast applications Application and CICAM AppMMI applications using this option.
-
Page 22: General Tv Operation
Child Lock: If this option is set to On, the TV can only General TV Operation be controlled by the remote control. In this case the Using the Channel List control buttons on the TV will not work. The TV sorts all stored stations in the channel list. You Internet Lock: If this option is set to ON, the internet can edit this channel list, set favourites or set active using applications will be disabled. -
Page 23: Teletext Services
database in accordance with the selected criteria. Digital Teletext Matching results will be listed. Press the Text button to view digital teletext information. Now: Displays current event of the highlighted Operate it with the coloured buttons, cursor buttons channel. and the OK button. The operation method may differ Zoom: Highlight and press OK to see events in a depending on the contents of the digital teletext. -
Page 24: Av And Hdmi Signal Compatibility
No sound In some cases a signal on the TV may not be displayed properly. The problem may be an inconsistency with • Check if the TV sound is muted. Press the Mute standards from the source equipment (DVD, Set-top button or increase the volume to check. -
Page 25: Supported File Formats For Usb Mode
Supported File Formats for USB Mode Video File Formats Extension Video Codec Max. Resolution & Frame Rate & Bit Rate .mpg, .mpeg, .dat, .vob MPEG1/2, H.264, VC1 .ts, .trp, .m2ts .avi MPEG1/2, MPEG4, H.264, MJPEG .mp4, .m4a, .m4v, .mov, .qt, MPEG1/2, H.263, MPEG4, H.264 .3gp, .3g2, .3gpp .mkv... -
Page 26: Subtitle File Formats
Subtitle File Formats External Subtitles Extension Specification .ssa SubStation Alpha .ass Advanced SubStation Alpha .srt Subripper .sub Micro DVD / SubViewer .sub + .idx VOBSub .txt Micro DVD / TMPlayer / MPL2 .mpl MPL2 .smi Sami .jss JACOSUB .ttml TTML .txt / .sub DVDSUBTITLE .lrc... -
Page 27: Connectivity
Internet Speed Test Connectivity Highlight Internet Speed Test and press the OK Wired Connectivity button. TV will check the internet connection bandwidth To Connect to a Wired Network and display the result when complete. • You must have a modem/router connected to an Advanced Settings active broadband connection. -
Page 28: Networked Standby Mode
• The location where the transmission is most effective Advanced Settings and press the OK button to differs depending on the usage environment. open the advanced setting menu. Use directional and numeric buttons to set. Highlight Save and press the • The Wireless feature of the TV supports 802.11 a,b,g OK button to save settings when complete. & n type modems. It is highly recommended that you should use the IEEE 802.11n communication Other Information protocol in order to avoid any possible problems The status of the connection will be displayed as while watching videos. -
Page 29: Wireless Display
does not apply, when the TV is switched into the Connection is Slow standby mode. See the instruction book of your wireless modem to The performance of some devices in the market, get information on the internal service area, connection may vary due to the software architecture. In order to speed, signal quality and other settings. You need to use Networked Standby Mode feature with a better have a high speed connection for your modem. -
Page 30: Contents Apps
2. Connect to a Wired or Wireless Network Internet Browser See the Wired/Wireless Connectivity chapters for To use the internet browser, enter the Home menu first. detailed configuration information. Then launch the internet browser application which 3. Enable Audio Video Sharing has an orange coloured logo with earth symbol on it. Enter the Settings>System>More menu and In the initial screen of the browser, the thumbnails of enable the Audio Video Sharing option. -
Page 31: Hbbtv System
In some circumstances video contents might not be VOD (video on demand) and catch-up TV services. able to be played. The user can use play, pause, stop, forward, and rewind keys on the remote control to interact with the HBBTV System AV content. - Page 32 through this tab. You can also navigate through Mirror Mode channels by pressing on the selected channel on the This mode of FollowMe TV feature is enabled by EPG grid. Please note that updating / refreshing the default and allows streaming the content from any other EPG information may take a while depending on your selected TV sources and Media Browser.
-
Page 33: Dvb Functionality Information
For iOS devices, all screen sizes are supported. User interface of the Smart Center application is subject to change according to version installed on your device. DVB functionality information This DVB receiver is only suitable for use in the country which it was designed to be used in.
Need help?
Do you have a question about the FLS32227H and is the answer not in the manual?
Questions and answers