Table of Contents
Advertisement
Quick Links
Advertisement
Table of Contents

Related Manuals for Rebo systems SMS-R1

Summary of Contents for Rebo systems SMS-R1
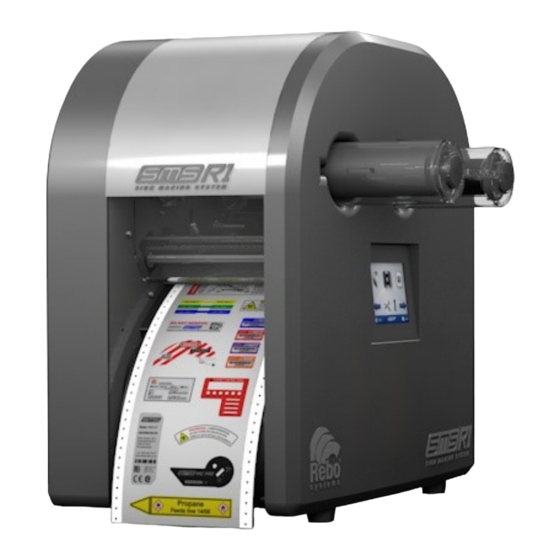
- Page 1 SMS - R1 User Manual...
-
Page 2: Table Of Contents
Table of contents Printer location environment & supply storage instructions..............4 System requirements........................... 4 Package contents - what is in the box ....................4 Setup & Installation ..........................5 Turning the printer on ......................... 5 Loading ribbon cassette & tape roll...................... 6 Printer controls (touchscreen) ...................... - Page 3 Disable a color ..........................17 Enable white primer paint......................17 Material supply information ......................18 Handling empty supplies........................18 What happens when ribbon cassette runs empty? ................. 18 What happens when tape roll length is not enough? ..............18 Print button ............................19 Advanced settings ..........................
-
Page 4: Printer Location Environment & Supply Storage Instructions
Display: 1920×1080 or higher resolution monitor with Windows (text font) scaling set to 100% • Connection: USB port or ethernet LAN port. Package contents - what is in the box SMS-R1 Printer Power & USB cable Squeegee Dust cover Spare cutting plotter knives... -
Page 5: Setup & Installation
Setup & Installation Turning the printer on Use a grounded wall socket. Place the SMS-R1 on Connect the power cable Turn the printer ON a steady surface... -
Page 6: Loading Ribbon Cassette & Tape Roll
Loading ribbon cassette & tape roll In order to start using your SMS-R1 you will need to insert two types of supplies: Ink ribbon cassette Printable tape roll Loading the ribbon cassette: 1. Make sure the black closed caps of the cassette are facing towards you and the open caps are pointing towards the printer. -
Page 7: Printer Controls (Touchscreen)
Printer controls (touchscreen) With the built-in touch screen you can control the printer and adjust cutting & network settings. Eject ribbon cassette Eject tape roll Open / Close tape collector Edit cutting settings Cut tape Feed tape Feed tape forward backward Ribbon quantity Tape quantity... - Page 8 On the main interface, hold the SMS-R1 logo on the bottom for 3 seconds to access the device information & network configuration. Device information & network configuration Configure fixed IP Set device to Set device to Enter numbers Confirm / Cancel settings...
-
Page 9: Installation Of Windows Printer Driver
[Troubleshooting in case USB Plug & Play installation fails: login as a user with local administrator rights. Then try again, or manually right mouse click > Remove the SMS-R1 device in hardware category "Unspecified". Then unplug and plug back in the device or press scan for hardware changes button for... -
Page 10: Using Lan Connection
2. Insert a ribbon cassette and a tape roll. View printer IP: 3. Hold the SMS-R1 logo in the bottom center of the printer touchscreen for 3 seconds to display the printer IP address and optionally configure the network settings. -
Page 11: Upgrading Software For Existing Installations
2. Download the latest SMS-R1 Firmware from our website: https://www.rebo.nl/en/downloads 3. Extract the contents of the zip file. 4. Start your label designer application and print 1 label to the printer so the SMS-R1 Manager application will open. 5. Click the Advanced button, click Upgrade firmware button. -
Page 12: Manager Application Controls & Print Process Logic
Manager application controls & print process logic Label dimensions Label dimension settings in Manager application: The label dimensions can be dynamically set based on the label data objects in your design (selected by default), or based on the original document size of the label design. You could also set a specific label size by inserting your own custom cut shape and set a specific size. -
Page 13: Cutting The Labels
Cutting the labels Automatic cut shape function in Manager application: There are two options to cut out your labels: let the Manager generate a rounded rectangle shape automatically for which you can make small adjustments before sending the final print job to the printer, or place a custom cut shape image on the label design yourself. -
Page 14: How To Set A Nicelabel Rectangle Or Ellipse Object As A Cut Shape
How to set a NiceLabel rectangle or ellipse object as a cut shape Set the object properties to: Thickness: 0,09 mm, When selecting the outline color RGB Magenta, Outline style: Solid and Fill style: None. choose the bottom right color as shown: Select a cut shape from the Graphical Symbol Library V4 for SMS label printers This requires the Graphical Symbol Library V4 for SMS label printers to be installed on your computer (if you don’t have it please download it from our Getting Started webpage or contact our support team). -
Page 15: Laminating Your Labels For Ultimate Protection
Cutter settings. We recommend you to do a short laminating test job to verify cutting depth is OK before sending a large print job. Link to YouTube instruction video: SMS-R1 | Laminating function... -
Page 16: Label Quantity / Number Of Copies
Label quantity / number of copies Label quantity options in Manager application: In the number of copies field you can set the number of labels that will be printed. The total length is displayed so you exactly know how much ribbon and tape you will need for the job. Enable option Cut per group of # labels to group labels and cut off the tape after each group. -
Page 17: Colors In Your Label Job
Colors in your label job Color job options in Manager application: Every color which has been detected in your label design will be listed in the job list. For each color job, you can: change to another color, disable the color or add a white primer paint layer. Switch a color You can switch a color to another color by choosing a color from the dropdown list that appears when you click Original. -
Page 18: Material Supply Information
Material supply information Supply information in Manager application: The Materials box displays the color and remaining length of the ribbon cassette and tape roll which are loaded in the printer. If you eject and insert another ribbon cassette or tape roll in the printer, the information will be updated automatically. -
Page 19: Print Button
Print button If you have reviewed all print options and the print preview, click the PRINT button to send the jobs to the printer. From this moment on, just insert the requested ribbon cassettes in the printer. After you have clicked the PRINT button the text changes from PRINT to Reset all print jobs: You can click this button to reset all jobs. -
Page 20: Automate Label Printing Process: Pre-Set Manager Settings In A Label Document
Automate label printing process: pre-set Manager settings in a label document You can pre-set many of the settings in the SMS-R1 Manager window in the label document's printer properties if your label design software supports this. Please read Support for saving printer preferences at the end of this chapter. - Page 21 Note: previously saved label files (made with driver version 17 or older) This functionality has been added in driver version 18, it was not available in version 17. If you create a new label with printer driver version 18 or newer installed it will work without any issue. If you however open an older label document which has been created while driver version 17 or older was installed at that time, you need to clear the old printer preferences cache of the document before the chosen settings will really be saved:...
-
Page 22: Automate Label Printing Process: Hide Manager Window
When Show SMS-R1 Manager is set to Yes the Manager will open so user can manually set options before sending print job. When Show SMS-R1 Manager is set to No the Manager window will be hidden and it will directly send the print job to the printer. -
Page 23: Supplies
Supplies Please contact us for detailed specifications, article numbers, prices and our recommendation for your specific use case. Tape rolls A wide range of vinyl and polyester tape rolls are available: • ST700 Series - Premium Vinyl (16 colors available) •... -
Page 24: Troubleshooting
Troubleshooting Various No Supply information is shown in SMS-R1 Manager The Manager application continuously queries the printer to show the loaded supplies in real-time. When printer is connected with a LAN connection and Manager does not show supply information, make sure your computer is in the same LAN as the printer, and check with IT if port 9101 is open. -
Page 25: Maintenance
Cleaning the print head Link to YouTube instruction video: SMS-R1 | Cleaning the print head Follow this procedure to clean the print head of the SMS-R1: 1. Power on the printer 2. Eject and remove the ribbon cassette 3. Power off the printer 4. -
Page 26: Technical Support
Technical support Contact us if you have any questions or experience an issue: Support e-mail address: support@rebo.nl Please send a detailed support request, including: • Printer serial number. • Label design software (+ version) and operating system (+ version) you use. •... -
Page 27: Appendix
Appendix Appendix A: How to set an Adobe Illustrator path as a cut shape Create a new document, set document color mode to RGB and set the Raster Effects to High (300 ppi). Or open an existing document and set color mode via menu File > Document Color mode > RGB Color. Design your shape. -
Page 28: Appendix B: How To Set A Coreldraw Path As A Cut Shape
Appendix B: How to set a CorelDRAW path as a cut shape Create a new document, set document Primary Color Mode to RGB. Or open an existing document and set color mode via menu Tools > Color Management: set Primary Color Mode to RGB. -
Page 29: Appendix C: How To Set An Inkscape Path As A Cut Shape
Appendix C: How to set an Inkscape path as a cut shape Open the color properties of the object and set the color to RGB Magenta (R: 255 G: 0 B: 255): Set the Width (line thickness) to 0,09 mm: Export your design as a SVG file and import it into your label design application. -
Page 30: Appendix D: How To Set An Autocad Path As A Cut Shape & General Autocad Settings
Maximum document dimension you can send to the printer is 103 x 2500 mm (10 cm x 2.5 meters). Print object color properties Set fill color to a RGB value for optimal color recognition in the SMS-R1 Manager. Custom cut shape properties The custom cut shape path must be a closed path, no open endings. - Page 31 Click OK and make sure to verify the dimensions of your design. In case your design is larger than default 103 x 300mm: the SMS-R1 has printing and cutting capability of 103mm wide (across tape direction) and up to 2.5 meter long.
- Page 32 Main Plot window settings 1. Paper size must be set to Custom Size 2. Plot area: set What to plot to Window, and click Window button to make a selection. While dragging the rectangle window: make sure to keep a margin around the edges of the objects so they will not be clipped.
-
Page 33: Appendix E: How To Set A Bartender Path As A Cut Shape
Appendix E: How to set a Bartender path as a cut shape Double click a shape to open its properties window. Set the Line Thickness to 0.1 pt and the Color to Pink (Magenta). Alternatively, you could design a custom cut shape with Adobe Illustrator, CorelDRAW or Inkskape and import the image file into your Bartender label design.
Need help?
Do you have a question about the SMS-R1 and is the answer not in the manual?
Questions and answers