Table of Contents
Advertisement
Quick Links
Advertisement
Table of Contents

Related Manuals for Atom ATOM 3 Series

Summary of Contents for Atom ATOM 3 Series
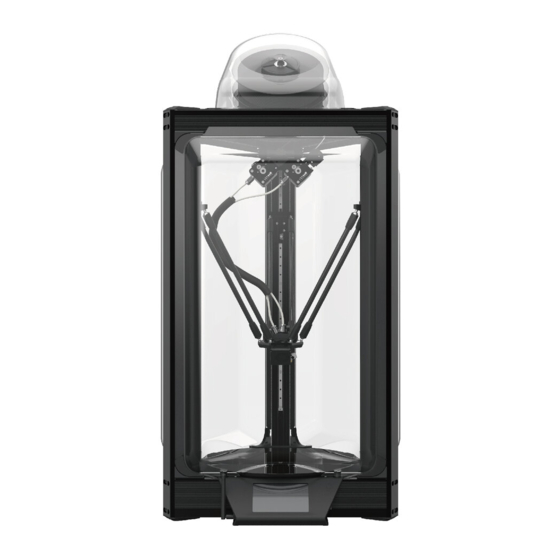
- Page 1 ATOM 3.5 USER'S MANUAL...
- Page 2 Hello! Welcome to join Atom 3D printer family! Atom 3.5 is a world-class desktop machine designed for speed, precision and reliability. We know you’ll love printing your designs on Atom 3 but before you do, please read the manual thoroughly.
-
Page 3: Table Of Contents
ATOM 3 SERIES: USER'S MANUAL SAFETY WARNINGS AND GUIDELINES P.16 PRINTING ENVIROMENT CUSTOMER SERVICE FILAMENT RUNOUT SENSOR P.16 PACKAGE CONTENT LANGUAGE SETTINGS P.16 SAFETY CERTIFICATIONS PRINTER SETTING P.6 / 7 PREPARING TO PRINT P.16 P.17 Auto-Leveling P.17 Cleaning the Build Plate Loading Filament P.10... -
Page 4: Safety Warnings And Guidelines
S A F E T Y WA R N I N G S A N D G U I D E L I N E S Safety Warnings and Guidelines 12. Do not expose this device to water or moisture of any kind. -
Page 5: Customer Service
• 1 x Power Supply Software Installation and Setup • 1 x Power Supply AC cable We recommend using Cura for use with both Atom 3.5 and • 1 x Antenna Atom 3.5 DX. Please visit Atom website to download Cura and •... -
Page 6: Printer Setting
P R I N T E R S E T T I N G Follow below instruction before to print : 3. Install the rod 1. Take the 3D printer out of the package and place it on a stable surface which near by the AC outlet. - Page 7 P R I N T E R S E T T I N G 5. Install antenna 6. Plug in the power and turn on the switch A. First lock the antenna horizontally into the screw and tighten it B. Fold up the antenna at the bend...
-
Page 8: Preparing To Print
P R E PA R I N G TO P R I N T Auto-Leveling Before your first print, and anytime you remove the build plate, you’ll want to run an auto-level to ensure that your parts adhere well to the glass. Follow the procedure below to run an auto- level 1. - Page 9 P R E PA R I N G TO P R I N T Clea n th e Buil d Pla te [ Control ] > [ HOME ] > [ Bed Calibration ] 3. Click on the LCD screen to auto-leveling. To prepare the build plate for printing, use rubbing alcohol and a soft, lint-free cloth or white paper towel to remove any dust Idle...
-
Page 10: Loading Filament
LOA D I N G F I L A M E N T Loading Filament 6. Touch the LCD screen to preheat the nozzle to the working temperature of the material, for example, 1. Place the filament spool PLA is 200° C. o n t h e h o l d e r s o t h a t the working end of the filament hangs down to... -
Page 11: Unloading Filament
U N LOA D I N G F I L A M E N T 7 . Whe n the nozzle re ache s the specif ied tem perature, Unloading Filament [ Macros ] > [ Load Filament ] c l ick Idle 1. -
Page 12: Swapping Hotends
T e f l o n h o s e. Atom 3’s hotend is easily swappable so you can print with different materials at different temperatures. While we always... - Page 13 W I - F I S E T T I N G 3 St ep s 1. M552SpaceS0 (Close Wi-Fi) M587SpaceS"Wi-Fi name"SpaceP"Wi-Fi password" 3. M552SpaceS1 (Turn on Wi-Fi) D O N O T t yp e Space Print Control Setup STOP B.
-
Page 14: Upload Files/Start Priting
U P LOA D F I L E S/S TA R T P R I N T I N G F. If the first layer D. Click left menu [ Jobs ] > [ UPLOAD G-CODE FILE(S) ] of printing does not stick to the Printing platform (the print... -
Page 15: Custom Setting
4 . L C D w i l l s h o w y o ur m o d i f i c a t i o n o f t h e p r i n te r n a m e . ATOM... -
Page 16: Filament Runout Sensor
P R I N T I N G E N V I RO N M E N T Fila m ent R u n ou t S en so r Lan g uag e Settin g I f t h e s e n s o r f a i l s t o d e t e c t t h e w i r e , t h e s c r e e n w i l l [ Setup ] >... - Page 17 M I C C E R T I F I CAT I O N...
- Page 18 F C C/C E C E R T I F I CAT I O N...
-
Page 19: Care And Maintenance
Care and Ma i nt e na nc e • The carriages have been factory calibrated to ensure many • Regular care and maintenance will keep your Atom 3 thousands of hours of consistent, precision movement. If looking and working like new for years. Please follow these... - Page 20 5、If the parts are damaged after the warranty expires, the modify the terms of service. consumer must bear the parts and repair with ATOM service *Note: "Consumable products and consumable parts" fees. If the consumer cannot accept the repair price, the include but are not limited to nozzles, Teflon tubes, normal original purchase channel may not accept the repair.
-
Page 21: Regulatory
R EG U L ATO RY Notice for FCC • Reorient or relocate the receiving antenna. This device complies with part 15 of the FCC Rules. Operation • Increase the separation between the equipment and receiver. is subject to the following two conditions: •... - Page 22 官 方 商 店 客服 信箱 10 4 台 灣 台北市 中山 區民 生東 路 二段 84 號 業務 客服 i n fo@a to m3d p. c o m 技術 支援 s u p p ort@a to m 3dp . c om 聯...
Need help?
Do you have a question about the ATOM 3 Series and is the answer not in the manual?
Questions and answers