Table of Contents
Advertisement
Quick Links
Installation Instructions
BEFORE YOU BEGIN - Read these instructions completely and carefully.
WARNING
To reduce the risk of electric shock, fire, or injury to persons, the installer must
ensure that the dishwasher is completely enclosed at the time of installation.
FOR PERSONAL SAFETY: Remove house fuse or open circuit breaker before
beginning installation. Do not use an extension cord or adapter plug with this
appliance.
The improper connection of the equipment grounding conductor can result in a
risk of electric shock. Check with a qualified electrician or service representative
if you are in doubt that the appliance is properly grounded.
If house wiring is not 2-wire with ground, a ground must be provided by the installer.
When house wiring is aluminum, be sure to use UL-Listed anti-oxidant
compound and aluminum-to-copper connectors.
To reduce the risk of electric shock, fire, or injury to persons, the installer should
check to ensure that wires are not pinched or damaged, the house wiring is attached
to the dishwasher through a strain relief, and all electrical connections made at
the time of install are contained inside of the terminal block cover.
For models equipped with power cord: Do not modify the plug provided
with the appliance; if it will not fit the outlet, have a proper outlet installed by a
qualified technician.
CAUTION
While performing installations described in this booklet, gloves, safety glasses
or goggles should be worn.
READ CAREFULLY
KEEP THESE INSTRUCTIONS
If you have questions, visit our website at: cafeappliances.com
TM
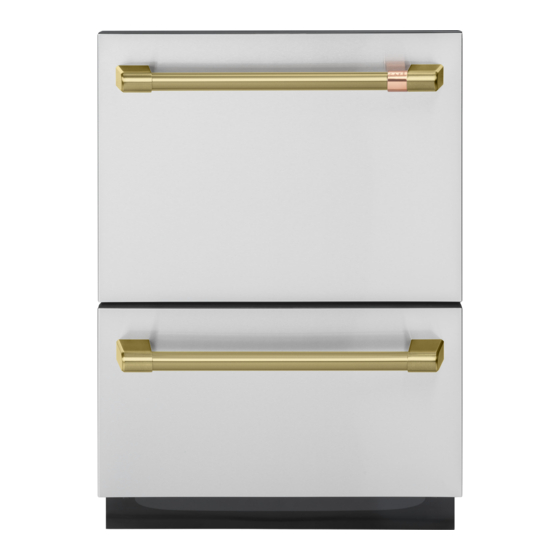
Dishwasher Drawer
FOR YOUR SAFETY
Read and observe all WARNINGS and CAUTIONS shown throughout these
instructions.
IMPORTANT – Observe all governing codes and ordinances.
Note to Installer – Be sure to leave these instructions for the consumer's and
local inspector's use.
Note to Consumer – Keep these instructions with your Owner's Manual for
future reference.
Skill Level – Installation of this dishwasher requires basic mechanical, electrical
and plumbing skills. Proper installation is the responsibility of the installer.
Product failure due to improper installation is not covered under the GE
Appliances Warranty. See Warranty information.
Completion Time – 1 to 3 Hours. New installations require more time than
replacement installations.
IMPORTANT – The dishwasher MUST be installed to allow for future removal from
the enclosure if service is required.
Care should be exercised when the appliance is installed or removed, to reduce the
likelihood of damage to the power supply cord.
If you received a damaged dishwasher, you should immediately contact your dealer
or builder.
Your dishwasher is a water heating appliance.
CAUTION
Opening a drawer will cause the dishwasher to tip forward
when it is not fully installed. When opening a drawer prior to
the dishwasher being fully installed, hold the drawer handle
securely with one hand and the top of the dishwasher with the
other hand. Gloves should be worn.
Advertisement
Table of Contents

Subscribe to Our Youtube Channel
Related Manuals for Cafe CDD420P2TS1


Summary of Contents for Cafe CDD420P2TS1
- Page 1 Installation Instructions Dishwasher Drawer If you have questions, visit our website at: cafeappliances.com FOR YOUR SAFETY BEFORE YOU BEGIN - Read these instructions completely and carefully. Read and observe all WARNINGS and CAUTIONS shown throughout these instructions. WARNING IMPORTANT – Observe all governing codes and ordinances. To reduce the risk of electric shock, fire, or injury to persons, the installer must Note to Installer –...
-
Page 2: Para Su Seguridad
Precauciones en Español PARA SU SEGURIDAD ANTES DE COMENZAR - Lea estas instrucciones en su totalidad y atentamente. Lea y cumpla con todas las ADVERTENCIAS y PRECAUCIONES que figuran en estas instrucciones. ADVERTENCIA IMPORTANTE – Cumpla con todos los códigos y ordenanzas gubernamentales. Para reducir el riesgo de descarga eléctrica, incendio o lesiones a personas, el Nota para el Instalador –... -
Page 3: Tools You Will Need
Installation Preparation DISHWASHER DRAWER INSTALLATION OVERVIEW This video provides an overview of what is needed to install a Dishwasher Drawer. It is intended as an overview only of the installation process and is not intended to be used as a guide on how to install the Dishwasher Drawer yourself. TOOLS YOU WILL NEED Safety Glasses Gloves... - Page 4 Installation Preparation PREPARE ELECTRICAL WIRING WARNING WARNING FOR PERSONAL SAFETY: Remove house fuse or open circuit breaker before The improper connection of the equipment grounding conductor can result in a risk beginning installation. of electric shock. Check with a qualified electrician or service representative if you are in doubt that the appliance is properly grounded.
- Page 5 Installation Preparation OPTIONAL - HARD WIRING PRIOR TO INSTALLATION REMOVE THE LOWER DRAWER REMOVE THE ACCESS COVER AND REMOVE THE POWER CORD To prevent kinked hoses Either sit the drawer down on the left hand side (recommended) or rotate the drawer clockwise, resting it on its side after removal.
- Page 6 Installation Preparation OPTIONAL - HARD WIRING PRIOR TO INSTALLATION - CONTINUED WARNING ADVERTENCIA If house wiring is not 2-wire with ground, a ground must be provided by the installer. Si el cableado doméstico no cuenta con un cable de 2 hilos con conexión a tierra, When house wiring is aluminum, be sure to use UL-Listed anti-oxidant compound un instalador debe realizar una conexión a tierra.
- Page 7 Installation Preparation OPTIONAL - HARD WIRING PRIOR TO INSTALLATION - CONTINUED REFIT THE DRAWER ONTO THE RUNNERS AND CLOSE Lift or rotate counter-clockwise the drawer back onto the drawer runners on either side. Before refitting the drawer, ensure the hoses are not twisted and the latches at the rear of each drawer Pull the release tabs forward on both...
-
Page 8: Product Dimensions
Installation Preparation PRODUCT DIMENSIONS FRONT SIDE PRODUCT DIMENSIONS INCHES (MM) Overall height of product 34 - 36 3/8” (864-924) Overall width of product 23 9/16” (599) Overall depth of product (excl. handle) 22 9/16” (573) Depth of chassis (to back of front drawer panel) 21 3/4”... -
Page 9: Cabinetry Dimensions
Installation Preparation CABINETRY DIMENSIONS Bracket slots PLAN SIDE CABINETRY DIMENSIONS INCHES (MM) Minimum clearances from adjacent cabinetry Inside height of cavity* min. 34” (864) Inside width of cavity 23 5/8” (600) Inside depth of cavity min. 22 1/16” (560) Recommended height of adjacent cabinet space 30”... -
Page 10: Cavity Preparation
Installation Preparation CAVITY PREPARATION COUNTERTOP Water Connection Recommended HOT Moisture 3/8” (Maximum 140°F/60°C). protection (10 mm) tape must be Supplied hose to applied. compression fitting. These marks indicate formed Water Pressure bracket screw locations, if Max. 1 MPa (145 psi) securing by drawer removal. - Page 11 Installation Preparation MAXIMUM DISTANCE OF HOSES AND CORD FROM CHASSIS EDGE LEFT HAND SIDE RIGHT HAND SIDE Drain hoses - 70 1/2” (1800mm) Drain hoses - 78 1/2” (2000mm) Inlet hose - 49” (1250mm) Inlet hose - 64 3/4” (1650mm) Power cord (excl.plug) - 29 1/2”...
- Page 12 Installation Instructions CHOOSE WHICH INSTALLATION METHOD (A) OR (B) IS MOST SUITABLE FOR YOUR CABINETRY RECOMMENDED METHOD (A) - SECURE WITHOUT DRAWER REMOVAL (FRAMELESS CABINETRY ONLY) OPTION A - RECOMMENDED ATTACH SIDE MOUNTING BRACKETS PULL HOSES THROUGH AND PUSH UNIT INTO THE CAVITY Clip all four side mounting brackets into their slots using a flat-bladed...
- Page 13 Installation Instructions OPTION A - RECOMMENDED ( CONTINUED ) SECURE TO THE SIDE CABINETRY - OPTION SECURE TO THE ABOVE CABINETRY - OPTION Open the Replace the The top mounting drawer grey rubber brackets will only halfway. plug back bend upwards a (x2) Using a into the trim...
- Page 14 Installation Instructions CHOOSE WHICH INSTALLATION METHOD (A) OR (B) IS MOST SUITABLE FOR YOUR CABINETRY ALTERNATE METHOD (B) - SECURE BY REMOVING THE LOWER DRAWER OPTION B - ALTERNATE METHOD PULL HOSES THROUGH AND PUSH UNIT INTO THE REMOVE THE LOWER DRAWER To prevent kinked hoses CAVITY Either sit the drawer down on the left hand...
- Page 15 Installation Instructions OPTION B - ALTERNATE METHOD ( CONTINUED ) SECURE TO THE SIDE CABINETRY - OPTION SECURE TO THE ABOVE CABINETRY - OPTION The top mounting brackets will only (x2) bend upwards a maximum of 10 mm. For further adjustment, using the most appropriate length Hexagonal socket supplied, fully extend...
-
Page 16: Install Toekick
Installation Instructions FIT THE SUPPLIED TOEKICK PANEL INSTALL TOEKICK WARNING ADVERTENCIA - Cut Hazard - Peligro de corte Take care - Panel edges are sharp. Tenga cuidado - Los bordes del panel son afilados. No tener cuidado podría resultar en heridas o Failure to use caution could result in cortes. - Page 17 Installation Instructions THERE ARE THREE DIFFERENT PLUMBING AND DRAINAGE OPTIONS - CHOOSE WHICH IS MOST SUITABLE DRAINAGE OPTION 1 - Dishwasher and Ø 1 1/2” (38 mm) Standpipe Screw Drain hose support to back wall at correct height. If space is limited max.
- Page 18 Installation Instructions THERE ARE THREE DIFFERENT PLUMBING AND DRAINAGE OPTIONS - CHOOSE WHICH IS MOST SUITABLE DRAINAGE OPTION 2 - Dishwasher using Dual Air Gap/Break with Drain Hose Joiner IMPORTANT We recommend the use of a commercially available Dual (Double) Air Gap/Break Kit.
- Page 19 Installation Instructions THERE ARE THREE DIFFERENT PLUMBING AND DRAINAGE OPTIONS - CHOOSE WHICH IS MOST SUITABLE DRAINAGE OPTION 3 - Dishwasher using drain hose joiner onto sink trap/waste tee Supplied drain hose joiner to suit Screw Drain hose Ø 3/4” (19 mm) waste tee support to back wall at correct height.
-
Page 20: Troubleshooting
Installation Instructions CONNECT WATER AND SWITCH DISHWASHER ON CONNECT INLET HOSE TO HOT WATER SWITCH PRODUCT ON No leaks! Ensure the Tighten coupling supplied rubber with spanner. washer is fitted inside the coupling. TROUBLESHOOTING Excessive water remaining above the filter plate, after the rinse cycle. (This is displayed as an A3 fault. See Owner’s Manual, “How to attend to a fault”.) Check for a kinked drain hose, blocked or incorrectly drilled out waste connection, highloop not properly installed, drain hose not routed correctly or spray arms not in place. -
Page 21: Final Checklist
Installation Instructions FINAL CHECKLIST TO BE COMPLETED BY THE INSTALLER Check all parts are installed. Turn on the power and water supplies, then open the drawers. You should hear a beep and see a program indicator light up on the internal control panel. Ensure that all panels and parts thereof are secure and final electrical tests have been conducted in accordance with local electrical regulations. - Page 22 Notes...
- Page 23 Notes...
- Page 24 518862 31-4000257 Rev 0 Printed in Thailand 11-21 GEA...
Need help?
Do you have a question about the CDD420P2TS1 and is the answer not in the manual?
Questions and answers