Advertisement
Quick Links
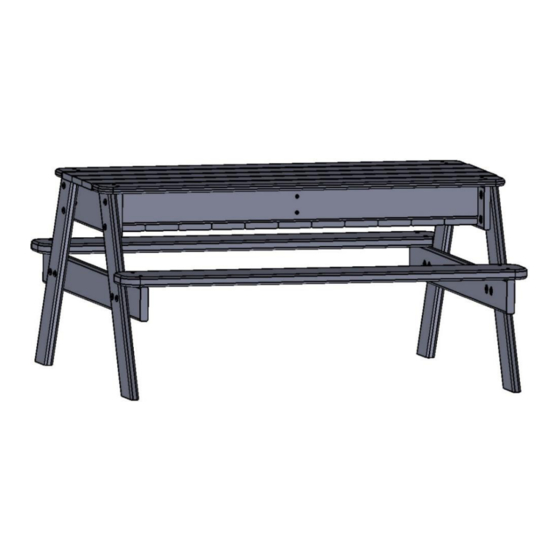
SAND AND WATER PICNIC TABLE
INSTRUCTION MANUAL
(MODEL # 42668756)
ASSEMBLY, INSTALLATION, CARE, MAINTENANCE AND USE INSTRUCTONS
FOR RESIDENTIAL USE ONLY
!
WARNING
Carefully read and understand the entire manual before assembling and using this
product.
This product is intended for use by children from ages 3 to 8.
Do not allow more than 4 children to use the sand and water picnic table at the same
time. Maximum user weighti s 100lbs (45kg), with combined weight nott o exceed 400 lbs
(180kg)
Assembly requires at least TWO adults.
Always inspect product thoroughly before each use.
PLEASE RETAIN THESE INSTRUCTIONS FOR FUTURE REFERENCE
Advertisement

Subscribe to Our Youtube Channel
Related Manuals for KMART 42668756

Summary of Contents for KMART 42668756
- Page 1 SAND AND WATER PICNIC TABLE INSTRUCTION MANUAL (MODEL # 42668756) ASSEMBLY, INSTALLATION, CARE, MAINTENANCE AND USE INSTRUCTONS FOR RESIDENTIAL USE ONLY WARNING Carefully read and understand the entire manual before assembling and using this product. This product is intended for use by children from ages 3 to 8.
- Page 2 MONDAY-FRIDAY, 9 A.M.-5 P.M.CENTRAL TIME IMPORTANT INFORMATION Important –Please read these instructions thoroughly before assembly or use. Dear valued customer, Congratulations on your sand and water table purchase! Please read and understand the contents of this instruction manual. This manual contains specific safety instructions that must be followed to prevent injuries and ensure proper maintenance.
-
Page 3: Safety Information
SAFETY INFORMATION BEFORE YOU BEGIN: Carefully read all instructions in this manual before assembling and using this product. The unit must be assembled by adults. Heavy duty working gloves must be worn to avoid injuries during assembly. WARNING READ ALL INSTRUCTIONS BEFORE ASSEMBLING OR USING THIS PLAY SET Observing the following statements and warnings reduces the likelihood of serious or fatal injury. -
Page 4: Disposal Instructions
SAFETY INFORMATION Important –Please read these instructions thoroughly before assembly or use. WARNING BEFORE YOU BEGIN ASSEMBLING: . Take a complete inventory of components using the parts list. . Sort and lay out the wood pieces. Some wooden components may twist or warp in the carton after packaging. Usually, these parts straighten out when assembled. -
Page 5: Choosing A Site
SAFETY INFORMATION Important –Please read these instructions thoroughly before assembly or use. WARNING READ ALL INSTRUCTIONS BEFORE ASSEMBLING OR USING THIS PLAY SET INSPECTION PRIOR TO EACH USE OR DAILY INSPECTION • DO NOT use the equipment if any bolts or nuts are missing or loose. ALWAYS check to ensure the equipment and all parts are well secured and stable before each use. - Page 6 IMPORTANT INFORMATION Important –Please read these instructions thoroughly before assembly or use. Do not install home playground play set over concrete, asphalt, or any other hard surface. A fall onto a hard surface can result in serious injury to the play set user. Grass and dirt are not considered protective surfacing because wear and environmental factors can reduce their shock absorbing effectiveness.
- Page 7 CARE AND MAINTENANCE CHECKLIST AT THE BEGINNING OF EACH PLAY SEASON: Tighten all hardware. Lubricate all metallic moving parts per manufacturer’s instructions. Check all protective coverings on bolts, pipes, edges, and corners. Replace if they are loose, cracked, or missing. Check all moving parts including swing seats, ropes, cables and chains for wear, rust or other deterioration.
- Page 8 Tools Required for Assembly (Not Included) Electric Drill Cross Slot Screwdriver Phillips Head Screwdriver Working Gloves INCLUDED Allen Wrench (#5)
- Page 9 Wood parts list...
- Page 10 Hardware parts list...
- Page 11 IMPORTANT!!! Please do not over-tighten the screws until the entire play set is completely assembled. Screws should be tightened just enough to hold the parts together initially. Once the whole unit is assembled, you must go back and tighten all screws and inspect for stability before allowing children to use the play set.
- Page 12 STEP 1 Assembly Instructions Wood Boards Needed: Hardware Needed: Part No. Quantity Part No. Quantity 2 pieces 16 pieces 2 pieces 1 piece Connect part #D1 to part #D2 using S6 (12 pieces). Connect part #D3 to part #D2 using S6 (4 pieces).
- Page 13 STEP 2 Assembly Instructions Hardware Needed: Wood Boards Needed: Part No. Quantity Part No. Quantity 10 pieces 44 pieces 1 piece Connect part #D4 (10 pieces) to part #D2 using S5 (40 pieces). Connect part #D5 (1 piece) to the end of part #D2 using S5 (4 pieces).
- Page 14 STEP 3 STEP 4 Assembly Instructions Wood Boards Needed: Hardware Needed: Part No. Quantity Part No. Quantity 4 pieces 8 pieces 2 pieces 8 pieces Attach part #D6 (2 pieces) to part #D7 using B16. Repeat in the same manner for both sets.
- Page 15 STEP 4 Assembly Instructions Wood Boards Needed: Hardware Needed: Part No. Quantity Part No. Quantity 2 pieces 12 pieces 2 pieces 8 pieces 2 pieces HINT :please be sure to haveD8,D9 with counter bore hole face up. Connect part #D8 to the two sides of the assembled tabletop using S5 (12 pieces). Connect part #D9 to part #D7 using S7 (8 pieces).
- Page 16 STEP 5 Assembly Instructions Wood Boards Needed: Part No. Quantity 1 piece Place part #D10 to cover the tabletop when not playing with water or sand. SP-26-WP-582-KM.AU-18001...
Need help?
Do you have a question about the 42668756 and is the answer not in the manual?
Questions and answers