Table of Contents
Advertisement
Quick Links
Advertisement
Table of Contents

Summary of Contents for Microtech Xstreamjet
- Page 1 Inkjet Printer Manual Document 003-0109-02 • November 2008...
- Page 2 Microtech Systems, Inc. Microtech Systems, Inc. assumes no responsibil- ity or liability for any errors or inaccuracies that may appear in this book.
- Page 3 Trademarks Xstreamjet Microtech Systems and the Microtech Systems logo are trademarks of Microtech Systems, Inc. All other products, names and services are trademarks or registered trademarks of their respective owners. Microtech Systems, Inc., 2 Davis Drive, Belmont, CA 94002 USA Part number 003-0109-02 –...
- Page 4 Microtech Systems - iv -...
-
Page 5: Table Of Contents
Setting Up the Xstreamjet ..................11 Xstreamjet Printer Components .......................11 Unpacking the Xstreamjet .........................12 Loading Inkjet Cartridges ........................13 Installing the Xstreamjet onto a Host System ................13 Cabling the Xstreamjet ........................17 Installing and Configuring the Xstreamjet Software ..............19 Testing Printer Operations .........................21 Calibrating the Xstreamjet .........................23... - Page 6 Microtech Systems - vi -...
-
Page 7: Introducing The Xstreamjet
What’s more, the Xstreamjet has been designed to provide maximum versatility, reli- ability and high-speed printing. The Xstreamjet can be used with any Microtech disc publishing system; use it with an autoloader or automated disc duplicator for fast, unattended publishing of discs at high volume. - Page 8 Microtech Systems - 2 -...
-
Page 9: Getting Acquainted
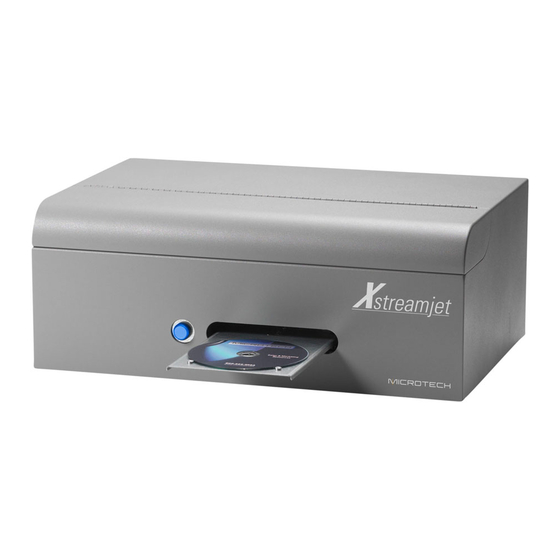
Getting Acquainted Getting Acquainted This chapter helps you get acquainted with the Xstreamjet by describing its main com- ponents. Important safety information is provided, as well as tips for general printer use. The Xstreamjet’s specifications are also included. Xstreamjet Components The Xstreamjet is easy to operate and maintain. - Page 10 Xstreamjet. Vent A slotted vent in the rear of the unit provides air flow to the device internals. Do not block the vent by placing the Xstreamjet flush against a vertical surface such as a wall or partition. Cable Connectors Cables that connect the printer to its host are attached to the rear of the printer.
-
Page 11: Safety Information
Getting Acquainted Safety Information Power and Electrical Precautions • Use only the type of power source indicated on the printer’s label. • Use only the power cord that comes with this product. Use of another cord may result in fire or electric shock. •... - Page 12 Microtech Systems than 10 cm clearance between the back of the printer and the wall. The printer will not operate properly if it is tilted or placed at an angle. • When storing or transporting the printer, do not tilt it, stand it on its side, or turn it upside down.
-
Page 13: Specifications
Getting Acquainted immediately with water. If discomfort or vision problems continue after a thorough flushing, see a doctor immediately. • Do not remove or tear the label on the cartridge; this can cause leakage. • Install ink cartridges immediately after removing from packaging. Leav- ing a cartridge unpacked for a long time before use may impede printing. - Page 14 Microtech Systems Environment • Operating temperature range: 15 to 35 °C • Operating humidity range: 20 to 80% RH non-condensing Media Support • Prints directly onto surface of inkjet printable discs Connectivity • USB 2.0 Full Speed Maximum Resolution •...
-
Page 15: Manually Inserting Or Retrieving A Disc
(024-MS486-01) Manually Inserting or Retrieving a Disc The Xstreamjet uses standard 120mm CD, DVD or Blu-Ray disc media. Normally the discs are inserted into the printer and retrieved from it by commands from Microtech software. However, there are instances (such as during calibration) when the printer’s disc tray is operated manually. - Page 16 Microtech Systems - 10 -...
-
Page 17: Setting Up The Xstreamjet
Setting Up the Xstreamjet Setting Up the Xstreamjet Before setting up your Xstreamjet, ensure that all components have been received and there is no shipping damage. In the event of a missing or damaged part, notify the shipping carrier as soon as pos- sible, then contact Microtech Technical Support at (650) 596-1900. -
Page 18: Unpacking The Xstreamjet
Microtech Systems Unpacking the Xstreamjet Follow these steps to unpack your Xstreamjet: Carefully open the top of the carton. Remove packaging material and set it aside. Remove the printer, mounting plate, and accessory packages containing cables, cartridges, and software media. -
Page 19: Loading Inkjet Cartridges
Close the printer cover. Installing the Xstreamjet onto a Host System The Xstreamjet brings professional-quality inkjet printing capabilities to all of the disc publishing systems from Microtech Systems. This section discusses how to attach the printer to each of those systems. - Page 20 • X100 The same procedure is used to install the Xstreamjet to an Xpress XE and Xpress XP. See the section Xpress XE / XP Installation below. The procedure to install the Xstreamjet to an Xpress XL is described in the section Xpress XL Installation below.
- Page 21 Proceed to the section Cabling the Xstreamjet below. Xpress XL Installation Follow the steps below to install an Xstreamjet printer onto an Xpress XL system from Microtech Systems. Unpack the mounting plate. Align the screw heads on the bottom of the mounting plate with the holes near the front of the top drive enclosure.
- Page 22 Proceed to the section Cabling the Xstreamjet below. X100 Installation Follow the steps below to install an Xstreamjet printer onto an X100 system from Microtech Systems. Unpack the mounting plate. Place the mounting plate onto the top of the X100 system.
-
Page 23: Cabling The Xstreamjet
Figure 15 Final mounting position Cabling the Xstreamjet below. Proceed to the section Cabling the Xstreamjet Cabling the Xstreamjet consists of making connections with three cables provided with the unit: • Printer control cable (mini-din connector, direct to host system) •... - Page 24 Microtech Systems Connecting Cables to an Xpress XE After plugging in the cables on the Xstreamjet, make the following connections on the host system. a) to port marked Printer on back of XE. • Connect USB cable ( b) to port marked Printer Control on •...
-
Page 25: Installing And Configuring The Xstreamjet Software
Microtech Systems. System originally purchased from Microtech are configured at the factory. After physically installing the Xstreamjet onto its host system, follow the steps below to install the printer driver software and configure it for production use. - Page 26 Microtech Systems Right click the entry Microtech Xstreamjet Printer. Click Printing Preferences. Figure 19 Printers and Faxes window The Printing Preferences window opens on the Main tab. On the Main tab, specify the following settings: • Quality Option: Best Photo Sheet •...
-
Page 27: Testing Printer Operations
Printer. On the pop-up menu, click Set as Default Printer. Figure 22 Printer and Faxes window Testing Printer Operations After installing and configuring the Xstreamjet print driver, follow the steps below to verify printer connectivity and operations. Configure ImageMaker application. (This program is found on the Start Start the menu under All Programs / ImageMaker.) - Page 28 Microtech Systems Figure 23 Configure ImageMaker, Printing tab Printer name drop-down list, click Microtech Xstreamjet Printer. From the Control Port drop-down list, click the COM port on which printer con- From the trol signals will be communicated. Click Save. As the number and availability of COM ports differs between host systems, selecting the correct COM port typically involves some trial and error.
-
Page 29: Calibrating The Xstreamjet
Setting Up the Xstreamjet Figure 25 Printing Test Page window Click Close to exit the IcdrCfg (Configure ImageMaker) window. Calibrating the Xstreamjet Calibration refers to the process of physically aligning the printer to the host system such that the target disc media is in the optimal position for printing. There are two parts to the process: (i) calibrating the printer to receive a disc from the host system in the optimal position, and (ii) calibrating the printer’s output image relative to the disc... - Page 30 Microtech Systems Calibrating the Printer’s Output Image DiscPrint program via its desktop icon. Click File / Calibrate Printer. Start the Figure 28 Printer Calibration window The Printer Calibration window appears. Horizontal Offset and Vertical Offset to zero. Set the values for Open the disc tray via the Status LED / Tray Control button on front of printer.
-
Page 31: Using Xstreamjet Software
The Xtreamjet device driver provides fine-grained control over many aspects of the printer’s performance. The most common settings are explained in the section Setting Up the Xstreamjet above. This section completes the explanation of the software’s properties. Starting the Software... - Page 32 Microtech Systems Figure 30 Printing Preferences window Quality Option Output quality may be one of the following choices: • Draft – highest print speed, least ink consumption. • Text – faster printing that Text & Image mode with high text quality.
- Page 33 Using Xstreamjet Software Make a selection for the type of output that will be printed; experiment with different types to achieve best results. Guidelines for common applications include: • For basic text, select CD/DVD. Photo Quality Ink Jet Paper. •...
- Page 34 Microtech Systems - 28 -...
-
Page 35: Maintaining The Xstreamjet
Maintaining the Xstreamjet Maintaining the Xstreamjet Use the Maintenance tab of the Xstreamjet’s device driver software to perform regular maintenance activities. Figure 32 Printing Preferences (Maintenance) window Status Monitor This utility is disabled by default. Do not change this setting. Doing so may adversely impact printer performance. -
Page 36: Running The Head Cleaning Utility
Ensure that the printer is turned on, but is not printing. Do not use the printer while cleaning the print head. Discprint or the Access the Xstreamjet device control application either via Printers & Faxes window in Windows as noted in the section Starting the Software above. -
Page 37: Inserting/Changing Ink Cartridges
Emptying the Waste Ink Tank The Xstreamjet uses two high-capacity waste ink reservoirs that store ink used during print head nozzle clearing. The main reservoirs (also known as the rear tank) is end- user serviceable and should be emptied as necessary to avoid overfilling. -
Page 38: Packing And Shipping The Printer
Turn the printer on before resuming operations. Packing and Shipping the Printer Before moving or shipping your Xstreamjet, take care to pack it properly. Best results are always obtained by reusing the Xstreamjet’s original carton and packing material. If such is not available use a carton of similar size and packing material that cannot flake or chip as small pieces may jam the printer. - Page 39 Maintaining the Xstreamjet Remove the front waste ink tank – Open the printer cover. Remove the small waste ink receptacle by loosening the two thumb screws. Pull the tank straight up to remove it. Thumb screws Figure 34 Front waste ink tank...
- Page 40 Microtech Systems Install the rear waste ink tank – Replace the yellow tank cap and reattach the tank to the mounting bracket using the two screws. Reattach the tube using the connector. Slide the tank into the printer and secure it by tightening the thumbscrew.
-
Page 41: Troubleshooting
Printer Status Codes The Xstreamjet communicates a variety of status codes via the Status LED / Tray Control button on the front of the unit. Normally the LED glows continuously. However, to indicate an error, it flashes a pattern. -
Page 42: Common Problems And Solutions
Common Problems and Solutions This section discusses common problems end users may experience with the Xstreamjet. A recommended solution is given for each. In cases where the solution fails to cure the problem, or you experience a problem not listed here, contact Microtech or the party that supplied the printer for support. - Page 43 Troubleshooting The printer makes noise after ink cartridge installation. • The first time ink cartridges are installed, the printer must charge its print head for about two minutes. Wait until charging finishes before turning the printer off, or it may charge improperly and use excess ink the next time the printer is started.
- Page 44 • Turn off the Preferences window. Image position is incorrect. • Calibrate the printer; refer to the section Calibrating the Xstreamjet above. Printed output includes incorrect characters. • Ensure the USB cable is securely connected. • If an intermediate device such as a USB hub is used, connect the printer directly to the host system.
-
Page 45: Getting Xstreamjet Help
Before Calling Many problems results from cabling or electrical issues. Always check external con- nections for power, data, and printer control. Reseat the connections as necessary. Before contacting Microtech Technical Support, obtain the following: • Xstreamjet Serial Number – found on the serial number tag affixed to the back, bottom-left of the unit •...
Need help?
Do you have a question about the Xstreamjet and is the answer not in the manual?
Questions and answers