Advertisement
Quick Links
Advertisement

Related Manuals for Cookmaster CM3IN1CSGOA

Summary of Contents for Cookmaster CM3IN1CSGOA
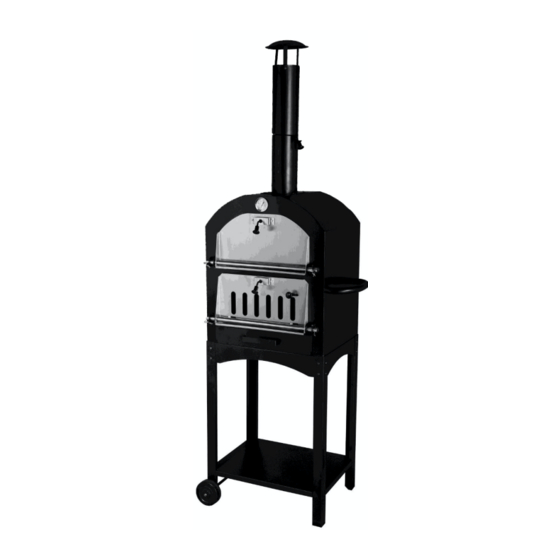
- Page 1 3-IN-1 OUTDOOR CHARCOAL SMOKER GRILL PIZZA OVEN CM3IN1CSGOA...
-
Page 3: Safety And Warnings
SAFETY & WARNINGS WARNING: Read the entire user guide before installation and use of this product. Failure to follow these instructions could result in property damage, personal injury or even death. Contact your local building or fire authorities about restrictions and installation requirements in your area. -
Page 4: Important Safety Instructions
IMPORTANT SAFETY INSTRUCTIONS This appliance must only be used in an above ground open-air situation with natural ventilation. • Do not store chemicals or flammable materials near this oven. • Children and pets should always be supervised and kept clear of oven while cooking or during warm up and cool down. - Page 5 Pre-caution: • Always ensure hands are protected when placing or removing food from oven. • Always ensure oven is completely cool before touching or cleaning the internal areas. • Do not subject the ceramic stone plate to sudden changes in temperature as this may damage the ceramic stone plate.
- Page 6 COMPONENTS Lay all components out on a clean floor and ensure all parts are included. If any pieces are missing, check all packaging thoroughly, then contact help.Kogan.com for assistance. 1. Chimney Cover 2. Chimney 3. Oven Body 4. Wheel Axle 5.
- Page 7 Hardware A. M6x12 Bolt (x2) B. M5x10 Bolt (x35) C. M5 Nut (x32) D. Split Pin (x4) E. M6 Lock Nut (x2) F. M6 Flat Washer (x2) G. Plug Pin (x4)
- Page 8 OVERVIEW...
- Page 9 Part Description Part Description Chimney cover Cooking rack Chimney Charcoal grid Chimney vent Bottom panel Oven body Ceramic stone Temperature gauge Handle Oven door Short leg Door Handle bracket Long leg Door handle 20 Shelf Door axle Wheel Charcoal door vent 22 Wheel axle Charcoal door 23 Chimney vent handle...
- Page 10 ASSEMBLY Remove all contents from packaging and ensure that all parts are present before attempting to assemble. Tighten all fasteners by hand first. When the oven is fully assembled, retighten the screws, nuts and bolts by using a wrench and screwdriver. Step 1: Attach the short legs (14) and long legs (15) to the shelf (16) using x8 M5x10 bolts (B) and x8 M5 nuts (C).
- Page 11 Step 2: Attach the short legs (14) and long legs (15) onto the bottom panel (11) using x16 M5x10 bolts (B) and x16 M5 nuts (C).
- Page 12 Step 3: • Insert the wheel axle (4) through the holes in the short legs (14). • Secure the wheels (17) to the wheel axle (4) using x2 M6 lock nuts (E).
- Page 13 Step 4: Attach the oven body (3) to the bottom panel (11) and secure it in place using x4 M5x10 bolts (B) and x4 M5 nuts (C).
- Page 14 Step 5: Attach the chimney cover (1) to the chimney (2) using x3 M5x10 bolts (B).
- Page 15 Step 6: Install the chimney (2) onto the oven body (3) and secure it in place using x4 M5x10 bolts (B) and x4 M5 nuts (C).
- Page 16 Step 7: Attach the handle (13) onto the body (3) using x2 M6x12 bolts (A) and x2 flat washers (F).
- Page 17 Step 8: • Attach the oven door (5) to the oven body (3) by inserting the door axle (6). • Use the x2 split pins (D) and x2 plug pins (G) to secure the door in place.
- Page 18 Step 9: • Attach the charcoal door (7) to the oven body (3) by inserting the door axle (6). • Use the x2 split pins (D) and x2 plug pins (G) to secure the door in place.
- Page 19 Step 10: Insert the charcoal drawer (8) into the oven body (3).
- Page 20 Step 11: Place the cooking rack (9) and charcoal grid (10) into their respective compartments as shown below.
- Page 21 Step 12: Place the ceramic stone (12) onto the cooking rack (9).
- Page 22 Step 12: Complete!
- Page 23 NOTES...
- Page 24 Need more information? We hope that this user guide has given you the assistance needed for a simple set-up. For the most up-to-date guide for your product, as well as any additional assistance you may require, head online to help.kogan.com...
Need help?
Do you have a question about the CM3IN1CSGOA and is the answer not in the manual?
Questions and answers