Table of Contents
Advertisement
Advertisement
Table of Contents

Summary of Contents for Felder FD 21 professional
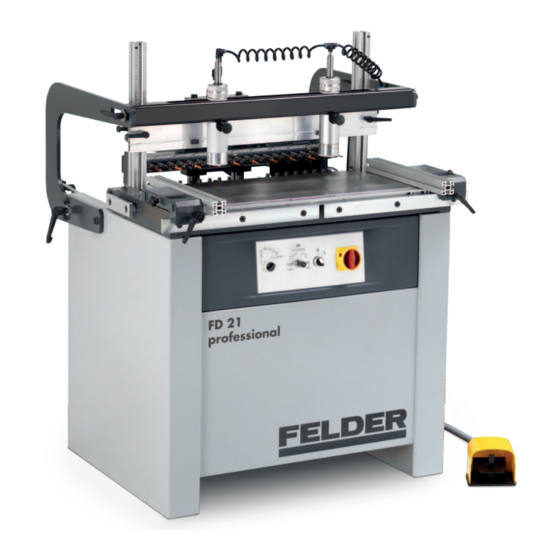
- Page 1 Aufstellung und Installation Setup and installation V I D E O http://fg.am/fd21install User manual Multi Boring Machine FD 21 professional Translation Keep this manual handy and in good condition for continual reference! Dok.ID: 432010-911_02 • Englisch • 2019-04-11...
- Page 2 Please note, that depending on the model of the machine, not all described functions are present, or additional functions and buttons are available (e.g. machines with special functions). FELDER A product of the FELDER GROUP! © Felder KG KR-Felder-Str. 1 A-6060 Hall in Tirol Tel.: +43 (0) 5223 5850 0...
-
Page 3: Table Of Contents
Multi Boring Machine FD 21 professional Content Content 1 General ......................6 1.1 Symbol legend ....................6 1.2 Information about the manual ................6 1.3 Copyright ....................... 6 1.4 Liability and warranty ..................7 1.5 Warranty notice ....................7 1.6 Spare parts ..................... 7 1.7 Disposal ...................... - Page 4 Multi Boring Machine FD 21 professional Content 5 Setup and installation ................... 20 5.1 Safety instructions ..................20 5.2 Floor space requirement ................. 20 5.3 Positioning and levelling the machine ............... 21 5.4 Assembly ...................... 21 5.4.1 Pneumatic clamp frame / Workpiece clamp ..........21 5.4.2 Lateral stops .....................
- Page 5 Multi Boring Machine FD 21 professional Content 8 Operation ....................36 8.1 Safety instructions ..................36 8.2 Drilling–Authorised and prohibited work techniques ........... 37 8.3 Workpiece dimensions ................... 37 8.4 Switching on the machine / Switching off the machine / Emergency-stop ..... 37 8.5 Mortising work sequence ................
-
Page 6: General
Multi Boring Machine FD 21 professional General 1 General 1.1 Symbol legend Important technical safety instructions in this manual are In all these particular cases, special attention must be marked with symbols. paid in order to avoid accidents, injury to persons or These instructions for work safety must be followed. -
Page 7: Liability And Warranty
Multi Boring Machine FD 21 professional General 1.4 Liability and warranty The contents and instructions in this manual have been scale. The actual delivery contents are dependent on compiled in consideration of current regulations and custom-build specifications, add-on options or recent... -
Page 8: Safety
Multi Boring Machine FD 21 professional Safety 2 Safety At the time of its development and production, the safety and ensure the safe and trouble-free operation of machine was built in accordance with prevailing the machine. technological regulations and therefore conforms to To further minimise risks, the other chapters of this industry safety standards. -
Page 9: Making Changes And Modifications To The Machine
Multi Boring Machine FD 21 professional Safety 2.3 Making changes and modifications to the machine In order to minimise risks and to ensure optimal perfor- machine must be kept visible, readable and may not be mance, it is strictly prohibited to alter, retrofit or modify removed. -
Page 10: Machine Hazards
Multi Boring Machine FD 21 professional Safety 2.7 Machine hazards The machine has undergone a hazard analysis. The The machine is considered operationally safe when used design and construction of the machine are based on the properly. results of this analysis and correspond to state-of-the-art Nevertheless, there are some remaining risks that must be technology. -
Page 11: Personal Protective Equipment
Multi Boring Machine FD 21 professional Safety 2.8 Personal protective equipment When working on or with the machine, the following must always be worn by personnel: Protective clothes Sturdy, tight-fitting clothing (tear-resistant, no wide sleeves, no jewellery (rings, bracelets, necklaces, etc.)). -
Page 12: Technical Specifications
Multi Boring Machine FD 21 professional Specifications C1 (Option) 3 Technical specifications 3.1 Dimensions and weight C1 (max) Fig. 3-1: Dimensions Machine FD 21 professional Base dimensions A x B 910 x 720 mm Total height C 1125 mm Total height C1 (max. / Option) 1285 mm / 1595 mm Overall width D (max.) -
Page 13: Electrical Connection/Drive Motor
Compressed air— quality: Free of oil, condensate and particles according to: ISO 8573-1 5-4-3 3.4 Tooling / Mortising spindles Note: We recommend that only original Felder tools are used (Felder catalogue). Type of tool Drill bits Shaft diameter 10 mm Tool diameter min./max. -
Page 14: Chip Extraction
Multi Boring Machine FD 21 professional Specifications 3.5 Chip extraction Dust extraction outlet, Ø 80 mm Air speed 24 m/s Vacuum min. 470 Pa Volume flow min. 434 m³/h 3.6 Particle emission The working areas of this machine comply to BGI 739-1 This only applies if the conditions that are specified in and are classed as dust reduced. - Page 15 Multi Boring Machine FD 21 professional Specifications...
-
Page 16: Transport, Packaging And Storage
Multi Boring Machine FD 21 professional Transport, packaging and storage 4 Transport, packaging and storage 4.1 Safety instructions Attention! Risk of material damage! The machine can be damaged or destroyed if it is subjected to improper handling during transport. Warning! Risk of injury! There is a risk of injury as a result of falling parts while transporting, loading or unloading the machine. -
Page 17: Storage
Multi Boring Machine FD 21 professional Transport, packaging and storage 4.4 Storage Keep items sealed in their packaging until they are assembled/installed and be sure to observe the stacking and storage symbols on the outside of the packaging. Store packed items only under the following conditions •... -
Page 18: Lifting And Transport
Multi Boring Machine FD 21 professional Transport, packaging and storage 4.5.2 Lifting and transport Attention! Heavy dead weights can easily cause an injury Depending on the equipment, two or three additional helpers may be necessary when unloading. Attention! Risk of material damage! / Danger of tipping Consider the centre of gravity when hoisting the machine (danger of overturning). -
Page 19: Transport With A Pallet Jack
Multi Boring Machine FD 21 professional Transport, packaging and storage 4.5.3 Transport with a pallet jack Attention! Heavy dead weights can easily cause an injury / Danger of tipping Consider the centre of gravity when hoisting the machine (danger of overturning). -
Page 20: Setup And Installation
Multi Boring Machine FD 21 professional Setup and installation 5 Setup and installation 5.1 Safety instructions Warning! Risk of injury! Improper assembly and installation can lead to serious physical injury or equipment damage. For this reason, this work may only be carried out by authorised, trained personnel who are familiar with how to operate the machine and in strict observance of all safety instructions. -
Page 21: Positioning And Levelling The Machine
Multi Boring Machine FD 21 professional Setup and installation 5.3 Positioning and levelling the machine 1. Transport the machine to the installation site as instructed in the “Transport“ chapter and the enclo- sed transport or installation instructions. 2. Position the machine with the aid of a spirit level to ensure that the machine functions precisely and operates smoothly. -
Page 22: Lateral Stops
Multi Boring Machine FD 21 professional Setup and installation 5.4.2 Lateral stops Attention! Risk of material damage! locking (Option: quick adjustment) Loosen the thumb screws from the locking. 1. Place lateral stops in their running groove 2. Tighten the clamping lever 3. -
Page 23: Mounting The Extension As Depth Stop
Multi Boring Machine FD 21 professional Setup and installation 5.4.4 Mounting the extension as depth stop Position the vertical borer See chapter entitled >Making adjustments and preparations< / > Drill unit tilt< ... 3, 2, 1 1. Release the clamping lever. -
Page 24: Chip Extraction
Warning! Risk of injury! The dust extraction hose must be non-flammable and must not conduct electricity! For this reason, only use genuine FELDER dust extraction hoses! Note: As a rule, all units must be vacuumed during use. A time delayed socket is available as an accessory. -
Page 25: Electrical Connection
(for a three-phase alternating current motor, CEE). Note: The machine's circuit box may only be opened with the express consent of the FELDER service team. Violating this stipulation shall render the right to make claims under the warranty null and void. -
Page 26: Assembly
Multi Boring Machine FD 21 professional Assembly 6 Assembly 6.1 Overview & " Fig. 6-1: Operation and display elements Control panel " Switch: Drill unit tilt Single-hand clamping lever: Drill unit tilt Tilt stop (0°–90°) Drill head (incl. Motor) &... -
Page 27: Data Plate
FD 21 professional Assembly 6.2 Data plate The data plate can be found on the right-hand side of the A-6060 HALL in Tirol, KR-Felder-Straße 1, machine as illustrated. Austria, Tel. +43 (0) 5223 58500, & The data plate displays the following specifications: Fax +43 (0) 5223 56130, info@felder.at... -
Page 28: Accessories
Multi Boring Machine FD 21 professional Assembly 6.4 Accessories Note: Further information See chapter entitled >Making adjustments and preparations< and >Operation< See assembly instructions Fig. 6-4: Quick-change chucks Quick-change chucks (Order no. 15.0.310) Supplied with 5 standard pieces mitre fence / Middle strip (Order no. -
Page 29: Tool Holder + Fence Sockets
Multi Boring Machine FD 21 professional Assembly 6.4.2 Tool holder + Fence sockets 10 x Stop extension Side stop Fig. 6-9: Fence sockets Tool holder + Fence sockets (Order no. 432-316) Assembly: Required tools: • Allen key 3 + 5 mm •... -
Page 30: Making Adjustments And Preparations
Note: Standard right-hand side cutting borers have a black main body, left-hand side cutting borers have a red main body Note: We recommend that only original Felder tools are used (Felder catalogue). allowed boring tools: See technical data Before securing the drill bit, the following must be taken "... -
Page 31: Clamping The Quick-Change Chuck With Tools To The Spindle
Multi Boring Machine FD 21 professional Making adjustments and preparations 7.3 Clamping the quick-change chuck with tools to the spindle Note: Standard right-hand side cutting borers have a black main body, left-hand side cutting borers have a red main body. -
Page 32: Setting The Feed Rate
Multi Boring Machine FD 21 professional Making adjustments and preparations 7.5 Setting the feed rate 1. Switch off the machine. 2. Remove tools and stops from the work bench. 90˚ 3. Switch machine on. 0˚ 4. During forward movement adjust the rotary switch to... -
Page 33: Lateral Stops
Multi Boring Machine FD 21 professional Making adjustments and preparations 7.7 Lateral stops Note: every marked mortising position on the scale corresponds to its mortising centre. 1. Switch off the machine. 2. Loosen the thumb screws from the locking. Nr. 10 3. -
Page 34: Depth Stop (With Vertical Drill)
Multi Boring Machine FD 21 professional Making adjustments and preparations 7.9 Depth stop (with vertical drill) Note: with vertical drill: Mortising height adjustment = 0 mm See chapter entitled >Mortising height adjustment / Mortising depth adjustment< 1. Switch off the machine. -
Page 35: Workpiece Clamp
Multi Boring Machine FD 21 professional Making adjustments and preparations 7.11 Workpiece clamp 1. Switch off the machine. 2. attach the tool to the required stop. 3. Loosen clamping bolt. 4. Workpiece clamp: is brought sideways on the pneu- matic clamp into the desired position. -
Page 36: Operation
Multi Boring Machine FD 21 professional Operation 8 Operation 8.1 Safety instructions Warning! Risk of injury! Improper operation may lead to severe physical injury or material damage. For this reason, this work may only be carried out by authorised, trained personnel who are familiar with how to operate the machine and in strict observance of all safety instructions. -
Page 37: Drilling-Authorised And Prohibited Work Techniques
Multi Boring Machine FD 21 professional Operation 8.2 Drilling–Authorised and prohibited work techniques Note: A workpiece lying on the mortising table is held in place by an eccentric clamp and can only be ma- chined on the front side. Only the following working techniques are permitted on the drilling unit: •... -
Page 38: Mortising Work Sequence
Multi Boring Machine FD 21 professional Operation 8.5 Mortising work sequence Warning! Risk of injury due to insufficient preparation! It is only permitted to switch on the machine if, for the work at hand, the required preconditions are fulfilled and any preliminary work is completed. Therefore, the adjusting, fitting and operating instructions (see the corresponding chapters) must be read before switching on the machine. -
Page 39: Examples Of Usage For Work Piece And Stop Positioning
Multi Boring Machine FD 21 professional Operation 8.6 Examples of usage for work piece and stop positioning Warning! Risk of injury! Adjustments to the machine or tool replacement may only be conducted once the machine has stopped. See chapter entitled >Making adjustments and preparations<... -
Page 40: Fixed 90° Dowel Joint
Multi Boring Machine FD 21 professional Operation 8.6.2 Fixed 90° dowel joint Alternative procedure to that in: —> Corpus 90 degree dowel connection Process step 1 Mounting the stop extension onto the lateral clamps Process step 2 position the attachments required... -
Page 41: In-Line Hole Boring
Multi Boring Machine FD 21 professional Operation 8.6.4 In–line hole boring Note: with vertical drill: Mortising height adjustment = 0 mm See chapter entitled >Depth stop (with vertical drill)< Alternative procedure to that in: —> Corpus 90 degree dowel connection... -
Page 42: Frame Of 90° Dowel Joint
Multi Boring Machine FD 21 professional Operation 8.6.5 Frame of 90° dowel joint Alternative procedure to that in: —> Corpus 90 degree dowel connection Process step 1 set up to 90 degrees Process step 2 adapt boring depth to correct length of dowels Fig. -
Page 43: Service
Multi Boring Machine FD 21 professional Service 9 Service 9.1 Safety instructions Warning! Risk of injury! Improper maintenance can cause serious injury or damage. For this reason, this work may only be carried out by authorised, trained personnel who are familiar with how to operate the machine and in strict observance of all safety instructions. -
Page 44: General Maintenance Instructions
Multi Boring Machine FD 21 professional Service 9.3 General maintenance instructions Attention! Risk of material damage! Only high quality machine grease order nr. 10.2.002 may be used! Spray oils such as graphite and Mos2 oils may damage the guide tracks! Attention! Risk of material damage! Never use caustic or abrasive detergents. - Page 45 Multi Boring Machine FD 21 professional Service...
-
Page 46: Faults
Multi Boring Machine FD 21 professional Faults 10 Faults 10.1 Safety instructions Warning! Risk of injury! Repairing faults incorrectly can result in personal injury or damage to the machine. For this reason, this work may only be carried out by authorised, trained personnel who are familiar with how to operate the machine and in strict observance of all safety instructions. -
Page 47: Faults, Causes And Repairs
Multi Boring Machine FD 21 professional Faults 10.4 Faults, causes and repairs Fault Cause Repair Machine does not start Power supply Check the power supply Main switch at setting „0“ (Spindle does not turn) Check switch position Emergency stop switch engaged EMERGENCY STOP button: release Boring head doesn’t proceed... -
Page 48: Altering The Head Of The Spindle Holder
Multi Boring Machine FD 21 professional Faults 10.4.1 Altering the head of the spindle holder To set the head of the spindle head (1) parallel to the workbench (2): 1. Switch the machine off and ensure that it cannot be "... -
Page 49: Error Correction-Digital Display
Multi Boring Machine FD 21 professional Faults 10.4.3 Error correction–Digital display • Switch the machine off and ensure that it cannot be 30 mm switched on again. • Use the system handwheel to set the desired measure- " ment (e.g. 30 mm) Check by boring. -
Page 50: Annex-Declaration Of Conformity
Modifying or altering the machine without the express written agreement of the manufacturer shall render the warranty null and void. The signatory of this statement is the appointed agent for the compilation of the technical information. Johann Felder, Managing Director FELDER KG Hall in Tirol, 1.2.2016 KR-FELDER-STR.1 • A-6060 Hall in Tirol... - Page 51 Dübellochbohrmaschine Multi Boring Machine FD 21 professional FD 21 professional...
- Page 52 FELDER KG KR-Felder-Straße 1 A-6060 Hall in Tirol Tel.: +43 (0) 5223 / 58 50 0 Fax: +43 (0) 5223 / 56 13 0 Email: info@felder.at Internet www.felder.at...
Need help?
Do you have a question about the FD 21 professional and is the answer not in the manual?
Questions and answers