Table of Contents
Advertisement
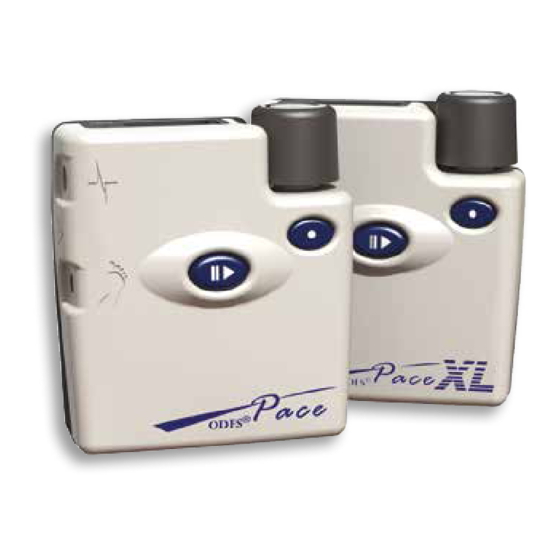
USER INSTRUCTION MANUAL
Odstock Dropped Foot Stimulator
®
Model: ODFS
Pace V1
®
Model: ODFS
Pace XL V1
Software: V1.4
The output of this device has a physiological effect.
The device should only be supplied and set up by a trained clinician.
This instruction manual is intended for the end user and should be supplied to
them by the clinician.
Read the instructions and precautions before use.
...a confident choice
USA only: Rx Only
Advertisement
Table of Contents

Related Manuals for NHS ODFS Pace V1

Summary of Contents for NHS ODFS Pace V1
- Page 1 USER INSTRUCTION MANUAL Odstock Dropped Foot Stimulator ® Model: ODFS Pace V1 ® Model: ODFS Pace XL V1 Software: V1.4 The output of this device has a physiological effect. The device should only be supplied and set up by a trained clinician. This instruction manual is intended for the end user and should be supplied to them by the clinician.
-
Page 2: Table Of Contents
Contents Introduction Introduction Key Features of the Stimulator ODFS ® Pace (XL) Pouch and Belt Clip Intended Use Important Information Contraindications Warnings 8 - 10 Precautions 10 - 13 Adverse Reaction / Residual Risk / Safe Disposal Symbols and Definitions 15 - 17 Operating Guide Changing the Battery... - Page 3 Technical Information Technical Specification - ODFS Pace (XL) ® Wireless Information - ODFS ® Pace XL Electromagnetic Compliance 49 - 52 Notes 53 - 54 Regulatory Representatives...
-
Page 4: Introduction
Introduction ® ® The Odstock Dropped Foot Stimulator ODFS Pace and it’s wireless version ODFS Pace XL is a Functional Electrical Stimulation (FES) device designed to improve walking for people who have a dropped foot or other gait problems. It is controlled with a footswitch placed in the shoe, which is used to turn the stimulation on and off at the right time while walking. -
Page 5: Key Features Of The Stimulator
Key Features of the Stimulator Indicator light G O O D Display Control knob on/off & output level Pause/start button Electrodes socket Test button (plastic pin) Footswitch socket (metal pin) Battery compartment (on the back) -
Page 6: Odfs ® Pace (Xl) Pouch And Belt Clip
ODFS Pace (XL) Pouch and Belt Clip ® The pouch has an integral belt loop and fixing for a carabiner. The belt clip is easily removable, ® reducing the overall size if the ODFS Pace (XL) is carried in a pocket. Use a ball point pen or other similar tool to press the release button through the hole in the centre of the clip to allow the clip to slide from the pouch. -
Page 7: Intended Use
Intended Use The ODFS® Pace (XL) is intended to be used for the alleviation of neurological injury or disability due to upper motor neurone disease or injury including stroke, multiple sclerosis incomplete spinal cord injury (T12 and above), head injury, cerebral palsy, Parkinson’s disease and hereditary spastic paraparesis. -
Page 8: Important Information
Important Information (Contraindications/Warnings) The clinician shall brief the user on any known contraindications and warnings to the use of this system and any precautions to be taken. The clinician shall issue and guide the user through the User Instruction Manual. Contraindications ®... - Page 9 Important Information (Warnings) Strangulation There is a risk of strangulation with the wires of the system. Do not place leads around the neck. Use an appropriate length of lead. Chest stimulation Stimulation should not be applied between the chest and upper back, crossing over the heart, because the introduction of electrical current into the chest may cause rhythm disturbances to the heart, which could be fatal.
-
Page 10: Precautions
Important Information (Warnings/Precautions) Oxygen rich environments Do not use stimulation within oxygen rich environments such as a hyperbaric oxygen chamber or in close proximity to an oxygen mask. External orthopaedic metal fixation Stimulation should not be applied in the area of exposed orthopaedic metal work. Latex allergies The elasticated tubular stocking contains natural rubber latex which may cause allergic ®... - Page 11 Important Information (Precautions) Exposed electrode pins Ensure that the pins of the electrode wire are fully inserted into each electrode before use. Skin irritation Some people may experience skin irritation due to electrical stimulation or from the electrodes. The irritation can usually be reduced by using an alternative type of electrode, different device settings or a new electrode position.
- Page 12 Important Information (Precautions) Autonomic dysreflexia Users who have high level spinal cord injuries (T6 and above), may experience symptoms of autonomic dysreflexia (increased blood pressure or sweating) in response to stimulation. This may also be seen in users with multiple sclerosis. If affected, the user should discontinue use and consult their physician.
- Page 13 Important Information (Precautions) Battery change and battery cover Do not operate the stimulator with the battery cover removed. Disconnect all the leads prior to opening the battery cover. The clinician/carer should not be in contact with the user when changing the battery. Equipment modification Do not tamper with or modify the equipment.
-
Page 14: Adverse Reaction / Residual Risk / Safe Disposal
Important Information Adverse reactions The user should report any undesirable outcomes, malfunctioning of the device, mistakes in using the device or injury from the use of this device to the clinician who provided it to them. The clinician is responsible for reporting all adverse events to Odstock Medical Limited or their local representative. -
Page 15: Symbols And Definitions
Symbols and Definitions Attention: device has a physiological effect Caution (used throughout the instruction manual to identify caution item). Applied parts of insulation type BF. Read the instructions and precautions before use. Consult instructions for use. This product should not be disposed of with other household waste. Your ODFS ®... - Page 16 Symbols and Definitions Expiry date (Year, Month, Day) of product (may relate to specific components, such as electrodes and batteries inside the packaging). Manufactured by Odstock Medical Limited Odstock Medical Limited National Clinical FES Centre Tel: +44 (0) 1722 439540 Salisbury District Hospital www.odstockmedical.com Salisbury, Wiltshire, UK...
- Page 17 Symbols and Definitions Pause/start button. Batch number. Unique serial number of the stimulator. Odstock Medical Limited stimulator reference number. EC REP European authorised representative. ® Light flashes on the ODFS Pace (XL) Beeps heard from the ODFS ® Pace (XL)
-
Page 18: Changing The Battery
Changing the Battery A single PP3 9V, alkaline or rechargeable nickel metal hydride (NiMH) or lithium polymer (LiPo) battery can be used. If the device is not going to be used for an extended period of time, remove the battery. Do not use if the battery cover is missing. Removing and installing the battery 1. -
Page 19: System Set-Up On A User
System Set-up on a User A typical system set-up is shown in the photograph. The footswitch is within the shoe, typically placed midline of the foot and under the heel. The footswitch is placed on the underside of ® the supplied insole. For a wireless set-up (ODFS Pace XL) the footswitch and footswitch lead would be replaced by a wireless accessory. -
Page 20: Controls And Connectors
Controls and Connectors Controls Control knob This control has three actions; • Twist clockwise to turn up or ‘increase’ • Twist anticlockwise to turn down or ‘decrease’ • Press down and release to unlock, click or select The control knob is also used to navigate the menu and select menu options. -
Page 21: Operating Guide
Operating Guide Turning the stimulator on Press the control knob and hold it down until the display comes on and the indicator light flashes. If the stimulator has been set to use beeps, a series of three short beeps will accompany the light flash. The display will either show “ODFS -Pace-”... - Page 22 Operating Guide Adjusting the output level (pulse width) ® The output level of the ODFS Pace (XL) is adjusted by first clicking (press and release to disable the control lock) and then turning the control knob. This sets the stimulation pulse width which determines the strength of the muscle contraction.
- Page 23 Operating Guide The level displayed follows the output as it ramps up and down. The light flashes in sequence with the stimulation. The stimulation will time-out and stop or can be stopped at any time by pressing the test button again or pressing the pause button. Using the pause button When the stimulator is set for walk or exercise the pause button is used to start and stop the operation of the stimulator.
- Page 24 Operating Guide To stop stimulator operation, press the pause button again. A shorter higher pitch beep is heard in walk mode or a descending pattern of beeps in exercise mode. From active mode the battery level will be displayed. If a wireless P a c e ®...
- Page 25 Operating Guide Then press and hold down the control knob to turn the device off. If the stimulator has been set to use beeps, the light flashes will be accompanied by two beeps. The stimulator can also be turned off from the user accessible menu. Please refer to page 26 for further details.
-
Page 26: User Accessible Menu
User Accessible Menu To enter the user accessible menu the stimulator should be paused. Unlock by clicking the control knob. Press and hold down the control knob for more than 2 seconds, then release. If control lock has been disabled, clicking to unlock will not be necessary. - Page 27 User Accessible Menu Wireless options ® This menu is only visible on the ODFS Pace XL. “WIRELESS OPTIONS” allows for either a wireless footswitch or remote control accessory to ® be joined to the ODFS Pace XL. This is described in more detail on page 37 and the instruction manual that accompanied the wireless accessory.
-
Page 28: Auto Turn Off
Auto Turn Off Auto turn off ® If the ODFS Pace (XL) is paused and not used for more than 4 hours, the device will automatically turn off. The output level maybe require adjustment when turned on again. -
Page 29: The Correct Movement For Dropped Foot Correction
The Correct Movement For Dropped Foot Correction The aim of stimulation is to produce as natural a movement as possible. Stimulation produces foot lift (dorsiflexion) and ankle stabilisation (eversion) as the foot leaves the ground, leaving sufficient time for push off using voluntary calf muscle activity. The foot clears the ground with sufficient clearance to prevent the toe from catching. -
Page 30: Electrode Placement
Electrode Placement Electrode Placement Some care is needed to find the best position for the electrodes. Your clinician will show you how to apply the electrodes and give you a diagram and/or a photo showing the positions. Place your leg in a relaxed, slightly bent position when placing the electrodes. You should only use the electrode positions that your clinician has asked you to use. - Page 31 Electrode Placement 4. If stimulation of the common peroneal nerve is unsuccessful, the muscles that lift the foot can be stimulated directly. The active electrode is placed over the widest part of the muscle at the front of the leg, approximately three finger breadths below the tibial tuberosity (the knobbly bump at the front of the leg, just below the knee) and one fingers breadth to the outside of the shin bone.
-
Page 32: Setting Stimulation Level
Setting the Stimulation Level Getting started Once the electrodes are placed and before walking with the stimulator the output level must be set. ® Turn on the ODFS Pace (XL) by pressing and holding down the control knob. Press the test button. Observe that the indicator light flashes. You may feel the sensation of stimulation. - Page 33 Setting the Stimulation Level Finding the electrode positions again Once the correct electrode positions are found, it is sometimes useful to mark them with an indelible marker pen so they can be easily found again. However it is better to learn to find the electrode placement by understanding the anatomy of your leg and how to move the electrodes to create the correct movement.
-
Page 34: Footswitch Placement
Footswitch Placement The footswitch is used to detect when the foot is on or off the ground and triggers the stimulation to occur at the correct time in the walking cycle. The footswitch is placed on the underside of a cork or solid foam insole with the black disc of the footswitch stuck to the insole. -
Page 35: Electrodes And Electrode Care
Electrodes and Electrode Care Odstock Medical Limited recommend the use of 50mm x 50mm self adhesive square ® electrodes supplied within the ODFS Pace (XL) boxed kits. These electrodes have proved to be the most reliable in clinical practice, are the easiest to use and the least likely to cause ®... - Page 36 Electrodes and Electrode Care 5. After repeated use the electrodes lose their stickiness. Dampen the surface of the electrodes with water by running two fingers under a tap then wiping across the electrode a couple of times and then leave for a few seconds to dry. This rehydrates the electrode and also removes any debris from the surface.
-
Page 37: Odfs Odfs
ODFS Pace XL Wireless Set-up ® ® The ODFS Pace XL is capable of accepting a selection of Odstock Medical Limited wireless ® accessories. Before a wireless accessory can be used it must first be joined to the ODFS Pace XL. Each accessory may have a different method of enabling ‘joining’ (a procedure to connect two devices so that they are able to communicate wirelessly with each other). -
Page 38: Pace Xl Wireless Set-Up
ODFS Pace XL Wireless Set-up ® When successful the screen will indicate that either a wireless footswitch or remote control has successfully joined. If unsuccessful “JOINING FAILED” will be displayed. The user can cancel I N I N G I L E D the joining process by pressing the pause button whilst the hour glass is on screen. - Page 39 ODFS Pace XL Wireless Set-up ® Create network menu An additional menu is available for users to allow resetting of a network in case of interference. If there is strong interference this may result in intermittent operation in one location while operation is trouble free away from that location.
-
Page 40: Cleaning And Care Guidance
Cleaning and Care Guidance Many of the components of the system can be cleaned. The system does not require regular cleaning, only as necessary. Please follow the instructions below. Remove the battery before cleaning the system. Do not scrub with abrasive material Make sure all parts are dry before re-use. -
Page 41: Maintenance, Servicing And Calibration
Maintenance, Servicing and Calibration Servicing ® The ODFS Pace (XL) does not require any regular servicing. If it becomes faulty please refer to troubleshooting on page 44 or return to Odstock Medical Limited. The operation of the system should be checked regularly. If the footswitch lead or electrode lead becomes stiff or cracked they should be replaced. -
Page 42: Expected Service Life And Maintenance
Expected Service Life and Maintenance This is an indication of the life span of the parts (figures based upon daily use). Life span will depend on usage. Expected Service Part Shelf Life Life ® ODFS Pace (XL) Stimulator 5 years •... -
Page 43: Travel Advice
Travel Advice ® The ODFS Pace (XL) system may attract attention from security staff at airports and shipping ports. For this reason it is advisable to take the following precautions to ease your journey. ® • Unless the use of the ODFS Pace (XL) system is essential while travelling, pack it in your luggage. -
Page 44: Troubleshooting
Troubleshooting Troubleshooting To help you understand some of the problems that might occur, here is a list of potential faults with some solutions. For assistance in setting up, using or maintaining the equipment please contact Odstock Medical Limited or their local representative. 1. - Page 45 Troubleshooting 4. The correct movement produced but a higher output level is required Fault Action Incorrect electrode placement Refer to electrode placement instructions Poor electrode condition Replace electrodes Poor electrode contact Dampen the electrodes and skin with water Muscle fatigue Rest Failing battery Replace (or recharge)* the battery...
-
Page 46: Warranty Information
Troubleshooting / Warranty Information Audio warnings Warning Action Stimulator beeps every 30 seconds Replace/charge the battery Siren beep is heard Replace/charge the battery Error messages If an error message is shown turn off the device by pressing and holding R O R ! the control knob. - Page 47 Technical Specification - ODFS Pace (XL) ® Medical device Class IIa, internally powered, continuous operation. Type BF classification: applied part(s) Ingress protection Rating of IP22. Vertically falling drops have no harmful effects rating when the stimulator is tilted at any angle up to 15° on either side of the vertical.
- Page 48 Wireless Information - ODFS Pace XL ® Description The ODFS Pace XL contains an industry standard ZigBee ® PRO compliant RF telemetry module, the ETRX3. Contains RF transmitter S4GEM35XA (FCC ID) Industry Canada (IC-ID) 8735A-EM35XA Frequency band 2.4 to 2.483 GHz (2.4GHz ISM band) Radiated power +8dBm Wireless compliance...
- Page 49 Electromagnetic Compliance If the performance of the system is compromised by other equipment (such as home routers), the user should turn off the system and move away from the interfering equipment. Please refer to fault finding. ® Like all radio telemetry devices the ODFS Pace XL and wireless accessories ®...
- Page 50 Electromagnetic Compliance Manufacturer’s declaration of electromagnetic immunity ® The ODFS Pace (XL) is intended for use in the electromagnetic environment specified ® below. The customer or user of the ODFS Pace (XL) should assure that it is used in such an environment.
- Page 51 Electromagnetic Compliance Manufacturer’s declaration of electromagnetic immunity continued Immunity test IEC 60601 Compliance Electromagnetic environ- test level level ment - guidance Portable and mobile RF communications equipment should be used no closer to any part ® of the ODFS Pace (XL), including cables, than the recommended separation distance calculated from the equation applicable to the frequency of the transmitter.
- Page 52 Electromagnetic Compliance ® The ODFS Pace (XL) is intended for use in an electromagnetic environment in which ® radiated RF disturbances are controlled. The customer or the user of the ODFS Pace (XL) can help prevent electromagnetic interference by maintaining a minimum distance between portable and mobile RF communications equipment (transmitters) and the ®...
- Page 53 Notes...
- Page 54 Notes...
- Page 55 Regulatory Representatives Odstock Medical Limited is based in the United Kingdom. Odstock Medical Limited uses external bodies as representatives where required by local regulations. Any adverse incidences or regulatory problems should be reported via local representative. If in doubt please contact Odstock Medical Limited for advice. Emergo Europe EC REP Prinsessegracht 20...
- Page 56 Odstock Medical Limited +44 (0) 1722 439540 The National Clinical FES Centre Salisbury District Hospital, www.odstockmedical.com Salisbury, Wiltshire SP2 8BJ United Kingdom enquiries@odstockmedical.com Registered Company No. 5532620 © Copyright Odstock Medical Limited 2008 - 2021 Revision: 4.0 Manual Product Code: 11-003-0079 QF/019 2797...
Need help?
Do you have a question about the ODFS Pace V1 and is the answer not in the manual?
Questions and answers