Table of Contents
Advertisement
Quick Links
Advertisement
Table of Contents

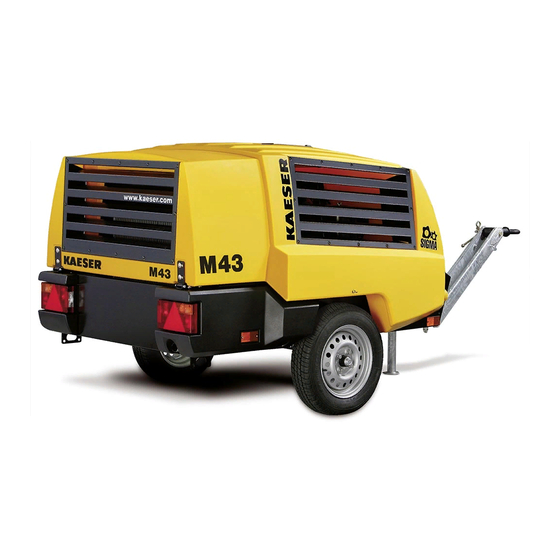
Summary of Contents for KAESER KOMPRESSOREN M43
- Page 1 All manuals and user guides at all-guides.com Service Manual Screw Compressor No.: 9_9432 02 E Manufacturer: KAESER KOMPRESSOREN GmbH 96410 Coburg • PO Box 2143 • GERMANY • Tel. +49-(0)9561-6400 • Fax +49-(0)9561-640130 http://www.kaeser.com...
- Page 2 All manuals and user guides at all-guides.com Original instructions /KKW/M43 1.02 en SBA-MOBILAIR-PE 20100819 162014...
-
Page 3: Table Of Contents
All manuals and user guides at all-guides.com Contents Regarding this document Using the Document ......................Further Documents ......................Copyright .......................... Symbols and Identification ....................1.4.1 Warnings ......................1.4.2 Other instructions and symbols ................Technical Specification Nameplate ........................Options ..........................2.2.1 Tool lubricator ..................... - Page 4 All manuals and user guides at all-guides.com Contents 3.4.2 Defining personnel ....................3.4.3 Adherence to inspection schedules and accident prevention regulations ..Dangers ..........................3.5.1 Safely dealing with sources of danger ..............3.5.2 Safe machine operation ..................3.5.3 Organisational Measures ..................3.5.4 Danger areas ......................
- Page 5 All manuals and user guides at all-guides.com Contents Operation Starting and stopping ....................... 8.1.1 Starting ....................... 8.1.2 Allow the machine to run up to operating temperature ........8.1.3 Shutting down ..................... Operating the battery isolating switch ................Operating the tool lubricator ..................... Using the low-temperature equipment ................
- Page 6 All manuals and user guides at all-guides.com Contents 10.6 Maintain rubber sealing strips ..................102 10.7 Options ..........................102 10.7.1 Tool lubricator maintenance ................102 10.7.2 Frost protector maintenance ................103 10.7.3 Spark arrestor cleaning ..................104 10.7.4 Engine air intake shut-off valve maintenance ............. 106 10.8 Document maintenance and service work.
- Page 7 All manuals and user guides at all-guides.com List of Illustrations Fig. 1 Location of safety signs ......................Fig. 2 Overview Bodywork ........................Fig. 3 Side view (canopy removed) ...................... Fig. 4 General design ........................... Fig. 5 Tool lubricator ..........................Fig. 6 Frost protector ..........................
- Page 8 All manuals and user guides at all-guides.com List of Illustrations Service Manual Screw Compressor No.: 9_9432 02 E...
- Page 9 All manuals and user guides at all-guides.com List of Tables Tab. 1 The levels of danger and their meaning ..................Tab. 2 Nameplate ..........................Tab. 3 Combined label for coupling load and options fitted ..............Tab. 4 Tool lubricator ..........................Tab.
- Page 10 All manuals and user guides at all-guides.com List of Tables Tab. 55 Maintenance tasks after commissioning ..................Tab. 56 Maintenance intervals and regular maintenance tasks .............. Tab. 57 Regular maintenance tasks ......................Tab. 58 Regular maintenance tasks for options ..................Tab.
-
Page 11: Regarding This Document
All manuals and user guides at all-guides.com Regarding this document Using the Document 1 Regarding this document Using the Document The service manual is part of the machine. It describes the machine as it was at the time of first delivery after manufacture. -
Page 12: Other Instructions And Symbols
All manuals and user guides at all-guides.com Regarding this document Symbols and Identification 2. Always read and comply with warning instructions. Signal word Meaning Consequences of non-observance DANGER Warns of an imminent threat of danger Death or serious injury may result WARNING Warns of possible danger Death or serious injury are possible CAUTION... -
Page 13: Technical Specification
All manuals and user guides at all-guides.com Technical Specification Nameplate 2 Technical Specification Nameplate The machine's nameplate provides the model designation and important technical information. The nameplate is located on the outside of the machine (see illustration in chapter 13.1). ➤... -
Page 14: Tool Lubricator
All manuals and user guides at all-guides.com Technical Specification Options ➤ Take a list of fitted options from the combined coupling load / options label. MATNo SERNo Options fitted Here is given the specified coupling load. oa oe sa sb sd se Tab. -
Page 15: Low Temperature Equipment
All manuals and user guides at all-guides.com Technical Specification Options 2.2.4 Option ba, bb Low temperature equipment ➤ Enter the fitted option as reference. Option Option code Exists? Frost protector Engine coolant pre-heating Tab. 7 Low temperature equipment 2.2.5 Option oa Battery isolating switch ➤... -
Page 16: Lighting
All manuals and user guides at all-guides.com Technical Specification Options Option Option code Available? EU chassis 03 EU chassis 04 EU ≙ Europe Tab. 11 Chassis Further information For an exact description of the characteristics of the chassis and models, see chapter 4.6.8. 2.2.9 Option tb, tc, te Lighting... -
Page 17: Machine (Without Options)
All manuals and user guides at all-guides.com Technical Specification Machine (without options) Machine (without options) 2.3.1 Sound emission 2.3.1.1 Sound emission Measurement conditions ■ Free-field measurement to directive 2000/14/EC ■ Measuring distance: d=1 m ■ Logarithmic surface ratio: Q2=16,8dB(A) Sound emission Guaranteed sound power level [dB(A)] Emission sound pressure level* [dB(A)] 81,0... -
Page 18: Dimensions
All manuals and user guides at all-guides.com Technical Specification Chassis 2.3.4 Dimensions For specifications according to the machine's operating licence, such as: ■ dimensions, ■ track width, ■ footprint, see the dimensional drawings in chapter 13.3. Chassis 2.4.1 Weights Maximum weights are shown. Actual weights of individual machines are dependent on equip‐ ment fitted (see machine nameplate). -
Page 19: Compressor
All manuals and user guides at all-guides.com Technical Specification Compressor Compressor 2.5.1 Working pressure and FAD Maximum working pressure [bar] SIGMA airend Free air delivery [m /min] Tab. 23 Working pressure and FAD 2.5.2 Compressed air outlet Discharge valve ["] G 3/4 *G 1 *Optional... -
Page 20: Cooling Oil Charge
All manuals and user guides at all-guides.com Technical Specification Engine Characteristic SIGMA FLUID Oil grade S–460 Classification Silicone-free, Mineral oil synthetic oil Application Standard oil for all applications except in Standard oil for all applications connection with foodstuffs. except in connection with food‐ stuffs. -
Page 21: Oil Recommendation
All manuals and user guides at all-guides.com Technical Specification Engine Feature Specification * Use only diesel fuel to EN 590 or ASTM D975. Consult the engine manufacturer on the use of other fuels if necessary. Tab. 29 Engine specification 2.6.2 Oil recommendation The engine oil must meet the following classification: ■... -
Page 22: Options
All manuals and user guides at all-guides.com Technical Specification Options Feature Value PTC testing current [A] (according to EN 50342) Tab. 32 Battery Further information Depending on machine equipment, a higher capacity battery may be required. See chapter 2.7.2 for low temperature equipment. Options 2.7.1 Option ea... -
Page 23: Safety And Responsibility
All manuals and user guides at all-guides.com Safety and Responsibility Basic Information 3 Safety and Responsibility Basic Information The machine is manufactured to the latest engineering standards and acknowledged safety regula‐ tions. Nevertheless, dangers can arise through its operation: ■ danger to life and limb of the operator or third parties, ■... -
Page 24: Defining Personnel
All manuals and user guides at all-guides.com Safety and Responsibility User's Responsibilities 3.4.2 Defining personnel Suitable personnel are experts who, by virtue of their training, knowledge and experience as well as their knowledge of relevant regulations can assess the work to be done and recognize the pos‐ sible dangers involved. -
Page 25: Dangers
All manuals and user guides at all-guides.com Safety and Responsibility Dangers ➤ Oil changing according to BGR 500, chapter 2.11: The user must ensure that the cooling oil is changed as required or at least annually and the oil change must be documented. This requirement may be waived if an oil analysis proves that the oil is still usable. - Page 26 All manuals and user guides at all-guides.com Safety and Responsibility Dangers ➤ Never top up antifreeze (option ba) unless the machine is stopped and cooled down. ➤ Make sure that the ambient temperature at the machine's place of use is within permissible lim‐ its.
-
Page 27: Safe Machine Operation
All manuals and user guides at all-guides.com Safety and Responsibility Dangers Electricity ➤ Allow only qualified and authorized electricians or trained personnel under the supervision of a qualified and authorized electrician to carry out work on electrical equipment according to elec‐ trical engineering regulations. - Page 28 All manuals and user guides at all-guides.com Safety and Responsibility Dangers Transport ➤ Shut down and fully disconnect the machine before transporting it. ➤ Allow transport only by personnel trained in safely dealing with motor vehicles and the trans‐ port of goods. ➤...
-
Page 29: Organisational Measures
All manuals and user guides at all-guides.com Safety and Responsibility Dangers Operation ➤ Keep the access doors closed for safety and to ensure correct cooling function. ➤ Carry out regular inspections: ■ for visible damage and leakage, ■ of safety devices, ■... -
Page 30: Safety Devices
All manuals and user guides at all-guides.com Safety and Responsibility Safety Devices Safety Devices Safety devices ensure safe working with the machine. ➤ Do not change, bypass or disable safety devices. ➤ Check safety devices for correct function regularly. ➤ Do not remove or obliterate labels and notices. ➤... -
Page 31: Tab. 39 Safety Signs
All manuals and user guides at all-guides.com Safety and Responsibility Safety signs Item Sign Meaning Hot surfaces and dangerous gas! Burning, from contact with hot components or gasses. ➤ Do not touch the surface. ➤ Wear long-sleeved garments (not synthetics such as polyester) and protective gloves. -
Page 32: In Emergency
All manuals and user guides at all-guides.com Safety and Responsibility In Emergency In Emergency 3.8.1 Correct fire fighting Suitable extinguishing agents: ■ Foam ■ Carbon dioxide ■ Sand or earth Unsuitable extinguishing agents: ■ Strong jet of water 1. Keep calm. 2. -
Page 33: Environmental Protection
All manuals and user guides at all-guides.com Safety and Responsibility 3.10 Environmental Protection In addition, we accept no warranty obligation for: ■ the use of unsuitable parts or operating materials, ■ unauthorised modifications, ■ incorrect maintenance, ■ incorrect repair. Correct maintenance and repair includes the use of original spare parts and operating materials. ➤... -
Page 34: Design And Function Bodywork
All manuals and user guides at all-guides.com Design and Function Bodywork 4 Design and Function Bodywork Bodywork is understood to be the exterior of the machine mounted on the chassis. Fig. 2 Overview Bodywork Canopy Snap fastener Lower body Canopy safety catch Cooling air inlet Lock Recessed grip for the canopy... -
Page 35: Component Identification
All manuals and user guides at all-guides.com Design and Function Component identification Component identification Fig. 3 Side view (canopy removed) Instrument panel Compressor air filter Oil separator tank Inlet valve Fuel tank Airend Oil cooler Compressed air outlet valve Battery Pressure relief valve Canopy safety catch lock Thermostatic valve... -
Page 36: Machine Function
All manuals and user guides at all-guides.com Design and Function Machine function Machine function Machine function (without options) Item numbers correspond to the pipe and instrument flow diagram in chapter 13.2. Service Manual Screw Compressor No.: 9_9432 02 E... -
Page 37: Fig. 4 General Design
All manuals and user guides at all-guides.com Design and Function Machine function Fig. 4 General design Compressor air filter Dirt trap Inlet valve Thermostatic valve (oil temperature con‐ Airend trol) Oil separator tank Oil cooler Oil separator cartridge Proportional controller Compressed air distributor Engine air filter Pressure relief valve... -
Page 38: Operating Modes And Control Modes
All manuals and user guides at all-guides.com Design and Function Operating modes and control modes The air is then compressed in the airend The airend is driven by an internal combustion engine. Cooling oil is injected into the airend. It lubricates moving parts and forms a seal between the ro‐ tors themselves and between them and the airend casing. -
Page 39: Modulating Control
All manuals and user guides at all-guides.com Design and Function Safety devices 4.4.2 MODULATING control The control system regulates the volume of air generated to match the actual demand. The ma‐ chine keeps the working pressure constant by varying the volume of compressed air delivered, thereby matching the air demand. -
Page 40: Low Temperature Equipment
All manuals and user guides at all-guides.com Design and Function Options Fig. 5 Tool lubricator Bodywork Oil tank Instrument panel Air line Location of the tool lubricator Shut-off valve (opened) Tool lubricator Air pipe Metering knob Further information See chapter 8.3 for tool lubricator operation. 4.6.2 Option ba, bb Low temperature equipment... -
Page 41: Fig. 6 Frost Protector
All manuals and user guides at all-guides.com Design and Function Options Fig. 6 Frost protector Shut-off valve Control line (bypass line) Control line (frost protection) Oil separator tank cover Frost protector Frost protection The frost protector comes into action when the machine is stopped in ambient temperatures below freezing. -
Page 42: Sealed Floor Pan
All manuals and user guides at all-guides.com Design and Function Options Fig. 7 Coolant pre-heating Bodywork Coolant pre-heating Connecting socket for coolant pre-heating Engine Instrument panel The ideal coolant pre-heating period is 2-3 hours before the machine is started. A pre-heating peri‐ od of more than 3 hours is not necessary, as the maximum effect has already been achieved within this period (thermal balance). -
Page 43: Fuel Filter With Water Trap
All manuals and user guides at all-guides.com Design and Function Options CAUTION Danger of short circuit Damage to the machine electrics is possible. ➤ Use the «battery isolating switch» only when the machine is at standstill. ➤ Do not use the «battery isolating switch» as a main or emergency switch. Fig. -
Page 44: Optional Anti-Theft Device
All manuals and user guides at all-guides.com Design and Function Options 4.6.6.2 Option lb Engine air intake shut-off valve Any flammable gas drawn into the diesel engine's air intake alters and enriches the controlled fuel/ air mixture fed to the engine. This causes a sudden and uncontrolled increase in engine speed that can lead to serious mechanical damage. -
Page 45: Tab. 40 Chassis - Overview
All manuals and user guides at all-guides.com Design and Function Options Option Name Characteristics EU chassis 03 ■ Single-axle ■ Axle rubber-sprung ■ Jockey wheel ■ Fixed height towbar ■ Parking brake ■ Breakaway cable EU chassis 04 ■ Single-axle ■... -
Page 46: Installation And Operating Conditions Safety
All manuals and user guides at all-guides.com Installation and Operating Conditions Safety 5 Installation and Operating Conditions Safety ➤ Strictly forbid fire, open flame and smoking. ➤ If welding is carried out on or near the machine, take adequate measures to prevent sparks or heat from igniting fuel or oil vapours or parts of the machine. - Page 47 All manuals and user guides at all-guides.com Installation and Operating Conditions Installation conditions 6. Keep air inlet and outlet openings free of obstructions so that the cooling air can flow freely through the machine. 7. Do not allow wind to blow into the cooling air outlet. 8.
-
Page 48: Installation
All manuals and user guides at all-guides.com Installation Safety 6 Installation Safety Follow the instructions below for safe installation. Warning instructions are located before a potentially dangerous task. Basic safety instructions 1. Follow the instructions in chapter "Safety and Responsibility". 2. -
Page 49: Adjusting The Towbar Height
All manuals and user guides at all-guides.com Installation Adjusting the chassis 6.3.1 Option sa Adjusting the towbar height The purpose of height adjustment is to bring the towing eye, or coupling, to the correct height for the towing vehicle. At the correct height, the towing eye or coupling should be parallel to the ground. Height adjustment is by two serrated joints. -
Page 50: Adjusting The Towbar Height
All manuals and user guides at all-guides.com Installation Adjusting the chassis 6. Draw out the split pin 7. Undo the locking lever until the serrated joint is disengaged. 8. Adjust the angle of the serrated joint to bring the towing eye or coupling parallel to the ground at the height of the towing vehicle hitch. -
Page 51: Fig. 11 Towbar Height Adjustment Sb
All manuals and user guides at all-guides.com Installation Adjusting the chassis Fig. 11 Towbar height adjustment sb Split pin Towing eye Locking lever Ball coupling Serrated joint 1 Split pin securing principle Serrated joint 2 Overrun damper Towbar tube Parking brake Towbar centre-piece 1. -
Page 52: Changing The Towing Eye Or Coupling
All manuals and user guides at all-guides.com Installation Adjusting the chassis 12. Insert the split pins 13. Check the correct position of the split pin. The split pin must be fully inserted so that it is trapped by its bow over the axis of the locking lever (see 11). -
Page 53: Fig. 12 Change From Eye To Ball Coupling (Height Adjustable Towbar)
All manuals and user guides at all-guides.com Installation Adjusting the chassis 6.3.3.1 Option sa Changing a height adjustable towbar from eye to ball coupling The eye coupling on the height adjustable towbar is replaced by a ball coupling. Fig. 12 Change from eye to ball coupling (height adjustable towbar) Towing eye Serrated joint... - Page 54 All manuals and user guides at all-guides.com Installation Adjusting the chassis ➤ Check that the ball coupling to be fitted is complete. ➤ Proceed as illustrated. Removing the towing eye 1. Remove the split pins 2. Loosen and remove the locking lever 3.
-
Page 55: Fig. 13 Change From Eye To Ball Coupling (Height Adjustable Towbar With Overrun Brake)
All manuals and user guides at all-guides.com Installation Adjusting the chassis Fig. 13 Change from eye to ball coupling (height adjustable towbar with overrun brake) Towing eye Tension rod Self-locking nut Saddle Screw Protective sleeve Bushing overrun damper Ball coupling Overrun damper ➤... - Page 56 All manuals and user guides at all-guides.com Installation Adjusting the chassis 2. Remove both bolts 3. Draw off the eye from the towbar Fitting the ball coupling Precondition The towing eye has been removed. The assembly condition as shown in the centre graphic in 13 has been achieved. The ball coupling is complete with sleeve.
-
Page 57: Fig. 14 Change From Eye To Ball Coupling (Fixed Height Towbar)
All manuals and user guides at all-guides.com Installation Adjusting the chassis 6.3.3.3 Option sd Changing a fixed height towbar from eye to ball coupling Fig. 14 Change from eye to ball coupling (fixed height towbar) Towing eye Self-locking nut Screw Ball coupling Sleeve Towbar tube... -
Page 58: Fig. 15 Changing From Eye To Ball Coupling (Fixed Height Towbar With Overrun Brake)
All manuals and user guides at all-guides.com Installation Adjusting the chassis 2. If necessary, use a metal rod to adjust until the hole is flush with the sleeve 3. Push the ball coupling on to the towbar 4. Check the alignment of the holes in the towbar tube and coupling 5. - Page 59 All manuals and user guides at all-guides.com Installation Adjusting the chassis ➤ Check that the ball coupling to be fitted is complete. ➤ Proceed in the sequence as illustrated. Removing the towing eye 1. Push back the protective sleeve to the position shown to expose both bolts.
-
Page 60: Initial Start-Up
All manuals and user guides at all-guides.com Initial Start-up Safety 7 Initial Start-up Safety Here you will find instructions for safe commissioning of the machine. Warning instructions are located before a potentially dangerous task. Basic safety instructions 1. Follow the instructions in chapter "Safety and Responsibility". 2. -
Page 61: After Storing The Machine For A Long Period
All manuals and user guides at all-guides.com Initial Start-up After storing the machine for a long period Function See chapter Confirmed? ➤ Canopy closed and all panels in place? – ➤ Are the tyre pressures OK? – Engine SM = engine manufacturer's service manual. Tab. -
Page 62: Starting Assistance
All manuals and user guides at all-guides.com Initial Start-up Low-temperature operation (winter) Machine operational state 1. CAUTION! Problems with pneumatic control at low temperatures. Damage to the machine may be caused by ice particles in the pneumatic control and feedback systems. -
Page 63: Starting Up Low-Temperature Equipment
All manuals and user guides at all-guides.com Initial Start-up Low-temperature operation (winter) ➤ Follow the safety rules when dealing with batteries: ■ Connect batteries of the same voltage only. ■ The assisting vehicle and machine to be started must not touch. ■... -
Page 64: Tab. 45 Low-Temperature Equipment Checklist
All manuals and user guides at all-guides.com Initial Start-up Low-temperature operation (winter) Function See chapter Confirmed? Close the tap on the frost protector. Tab. 45 Low-temperature equipment checklist Service Manual Screw Compressor No.: 9_9432 02 E... -
Page 65: Operation
All manuals and user guides at all-guides.com Operation Starting and stopping 8 Operation Starting and stopping Pictograms on the instrument panel illustrate the starting and stopping procedures, see also item in the following illustration. Precondition No personnel are working on the machine. Fig. -
Page 66: Allow The Machine To Run Up To Operating Temperature
All manuals and user guides at all-guides.com Operation Starting and stopping 2. CAUTION! Destruction of the starter. Improper operation could destroy the starter. ➤ The starter must not operate while the engine is running. ➤ Do not hold the start switch in the start position for longer than 30 seconds. ➤... -
Page 67: Operating The Battery Isolating Switch
All manuals and user guides at all-guides.com Operation Operating the battery isolating switch 2. Close the «compressed air outlet valves» on the air distributor. The engine runs in IDLE and the turbo charger can cool down. 3. Turn the «starter switch» to the “0”... -
Page 68: Operating The Tool Lubricator
All manuals and user guides at all-guides.com Operation Operating the tool lubricator Option ea Operating the tool lubricator Fig. 20 Setting the tool lubricator Tool lubricator Metering knob Ball valve A – open B – closed Adding lubricating oil 1. Open the shut-off valve 2. -
Page 69: Coolant Pre-Heating
All manuals and user guides at all-guides.com Operation Using the low-temperature equipment Fig. 21 Switching on the frost protector Shut-off valve Control line (bypass line) A – open Oil separator tank cover B – closed Control line (frost protection) Frost protector Running the machine with the frost protector (winter operation) ➤... -
Page 70: Using The Hose Reel
All manuals and user guides at all-guides.com Operation Using the hose reel Option ua Using the hose reel The machine is fitted with an additional compressed air extension hose. A hose reel is provided for safe storage of this hose. ➤... - Page 71 All manuals and user guides at all-guides.com Operation Using the hose reel 8.5.1.3 Securing the hose reel for transport 1. Check that the hose is firmly and evenly reeled in. Reel again, if necessary. 2. Locate the securing hole in the reel's side plate until it is aligned with the securing screw 3.
-
Page 72: Fault Recognition And Rectification
All manuals and user guides at all-guides.com Fault Recognition and Rectification Basic instructions 9 Fault Recognition and Rectification Basic instructions The following tables are intended to assist in fault finding and rectification. 1. Do not attempt fault rectification measures other than those given in this manual. 2. -
Page 73: Engine Does Not Reach Full Speed
All manuals and user guides at all-guides.com Fault Recognition and Rectification Engine faults and alarms Possible cause Action Where can I get help? Special‐ KAESER Engine ised Service service work‐ manual shop Oil pressure switch sensing in‐ Check the engine oil level. –... -
Page 74: Compressor Faults And Alarms
All manuals and user guides at all-guides.com Fault Recognition and Rectification Compressor faults and alarms Compressor faults and alarms 9.3.1 Working pressure too high Possible cause Remedy Where can I get help? Specialised KAESER Ser‐ workshop vice Proportional controller maladjus‐ Check the diaphragm and clean –... -
Page 75: Pressure Relief Valve Blowing Off
All manuals and user guides at all-guides.com Fault Recognition and Rectification Compressor faults and alarms 9.3.3 Pressure relief valve blowing off Possible cause Remedy Where can I get help? Specialised KAESER Ser‐ workshop vice Oil separator cartridge heavily Change, see chapter 10.4.5. –... -
Page 76: Too Much Oil Residue In The Compressed Air
All manuals and user guides at all-guides.com Fault Recognition and Rectification Compressor faults and alarms 9.3.5 Too much oil residue in the compressed air Possible cause Remedy Where can I get help? Specialised KAESER Ser‐ workshop vice Oil separator cartridge scavenge Clean the strainer in the separa‐... -
Page 77: 10 Maintenance
All manuals and user guides at all-guides.com Maintenance 10.1 Safety 10 Maintenance 10.1 Safety Follow the instructions below to ensure safe machine maintenance. Warning instructions are located before a potentially dangerous task. Basic safety instructions 1. Follow the instructions in chapter 'Safety and Responsibility'. 2. -
Page 78: Maintenance Tasks After Commissioning
All manuals and user guides at all-guides.com Maintenance 10.2 Maintenance schedules 2. Keep a log of all properly carried out maintenance and service work. This enables the frequency of individual maintenance tasks and deviations from our recom‐ mendations to be determined. Further information A prepared list is provided in chapter 10.8. - Page 79 All manuals and user guides at all-guides.com Maintenance 10.2 Maintenance schedules 10.2.3.1 Maintenance schedule ➤ Carry out maintenance tasks according to the following schedule. Component Function Engine Check inlet air filter mainte‐ 10.3.2 nance indicator Check engine oil level. Engine Clean the engine air filter 10.3.2 Engine...
- Page 80 All manuals and user guides at all-guides.com Maintenance 10.2 Maintenance schedules Component Function Replace the fuel filter. Engine Clean the fuel tank. Clean the tank fuel strainer. Check the fuel return line for leakage and firm fixing. Have the fuel injectors checked. Have the fuel injector pump checked.
-
Page 81: Tab. 57 Regular Maintenance Tasks
All manuals and user guides at all-guides.com Maintenance 10.2 Maintenance schedules Component Function Check all screw connections, hinges, locks, catches, handles and snap fasteners for wear and secure fixing. Grease the canopy hinges. Carry out rubber sealing strip 10.6 maintenance. Have the lifting eye checked. -
Page 82: Engine
All manuals and user guides at all-guides.com Maintenance 10.3 Engine Option Function Option lb - engine air intake shut-off valve Clean and check the engine air 10.7.4 intake shut-off valve Fuel filter with water trap, option ne 10.3.3.1 TL-SM = Tool lubricator service manual; EL = refer to an electrician; SW = refer to a specialized workshop;... -
Page 83: Fig. 23 Checking Coolant Level
All manuals and user guides at all-guides.com Maintenance 10.3 Engine CAUTION Insufficient coolant can damage the engine. Insufficient coolant will cause the engine to overheat. Overheating can cause serious dam‐ age to the engine. ➤ Check the coolant level daily. ➤... -
Page 84: Tab. 59 Coolant Frost Protection
All manuals and user guides at all-guides.com Maintenance 10.3 Engine 1. CAUTION! The engine can be damaged if the antifreeze concentration is insufficient. Corrosion Damage to the cooling system Engine casing fracture ➤ Check coolant. ➤ Protect the coolant against frost. ➤... -
Page 85: Air Filter Maintenance
All manuals and user guides at all-guides.com Maintenance 10.3 Engine Fig. 24 Draining the coolant from the radiator Radiator Radiator drain plug 1. Have a coolant receptacle ready. 2. Unscrew the expansion tank cap (see Fig. 23). 3. Loosen and remove the drain plug Result Coolant flows from the expansion tank and radiator. -
Page 86: Fig. 25 Engine Air Filter Maintenance
All manuals and user guides at all-guides.com Maintenance 10.3 Engine Fig. 25 Engine air filter maintenance Filter housing Reset knob for the maintenance indicator Air filter element Red zone indicator scale Filter cap Indicating piston of the maintenance indi‐ Spring retaining flap cator Dust evacuating valve Valve part... -
Page 87: Fuel System Maintenance
All manuals and user guides at all-guides.com Maintenance 10.3 Engine 5. Clean the filter element: Cleaning: ■ by tapping to remove course dirt ─ some taps of the face side with the heel of the hand ■ by blowing out (as required) ─... -
Page 88: Fig. 26 Bleeding The Fuel System
All manuals and user guides at all-guides.com Maintenance 10.3 Engine Bleeding the fuel system The electric fuel pump is used to bleed the system. The negative battery terminal must be connec‐ ted for the pump to operate and bleeding to be carried out. When the starter switch is turned to the "II"... - Page 89 All manuals and user guides at all-guides.com Maintenance 10.3 Engine 7. Insert the new element. 8. Replace the filter cap. 9. Connect the fuel line. 10. Tighten the hose clamp. 11. Bleed the system as described previously. Catch any escaping fuel. Dispose of escaped fuel, contaminated fuel and working materials and components contami‐...
-
Page 90: Fig. 27 Fuel Filter With Water Trap
All manuals and user guides at all-guides.com Maintenance 10.3 Engine Option ne Fig. 27 Fuel filter with water trap Filter head Water trap Filter element Drain plug Checking the water trap The water trap is semi-transparent so the fuel level can be seen from outside. ■... -
Page 91: Changing The Engine Oil
All manuals and user guides at all-guides.com Maintenance 10.3 Engine Precondition The negative cable to the battery is disconnected. 1. Raise the canopy. 2. Empty the water trap (see above). 3. Unscrew the filter element from the filter head anti-clockwise. 4. -
Page 92: Fig. 28 Changing The Engine Oil
All manuals and user guides at all-guides.com Maintenance 10.3 Engine CAUTION Danger of burns from hot components and escaping engine oil! ➤ Wear long-sleeved clothing and gloves. Fig. 28 Changing the engine oil Oil filler cap Engine block Oil filter Oil pan Oil dipstick Oil drain plug... -
Page 93: Fig. 29 Engine Sump Drain Valve
All manuals and user guides at all-guides.com Maintenance 10.3 Engine 1. Pull out the dip stick , wipe it clean and reinsert it. 2. Pull out the dip stick once more and read off the oil level. 3. Top up if the level is too low. 4. -
Page 94: Fig. 30 Changing The Engine Oil Filter
All manuals and user guides at all-guides.com Maintenance 10.3 Engine 2. Position the receptacle. 3. Unscrew and remove the engine sump drain plug 4. Open the shut-off valve and drain the oil into the receptacle. 10.3.4.2 Changing the engine oil filter Material Spares Common tools... -
Page 95: Motor Belt Maintenance
All manuals and user guides at all-guides.com Maintenance 10.3 Engine Dispose of old oil filters, old oil and materials contaminated with oil according to environmen‐ tal protection regulations. 10.3.5 Motor belt maintenance ➤ See the engine service manual. 10.3.6 Battery maintenance ➤... - Page 96 All manuals and user guides at all-guides.com Maintenance 10.3 Engine 10.3.6.2 Battery checking and care Even so-called 'maintenance-free' batteries need a degree of care to obtain their maximum opera‐ tional life. The outside of the battery and the terminals should be cleaned regularly with a soft cloth. This avoids current leaks and minimises the discharge rate.
-
Page 97: Compressor
All manuals and user guides at all-guides.com Maintenance 10.4 Compressor 3. If the machine is to be unused for a number of weeks, remove the battery and store in a frost proof room. In extreme cases, the use of heavy-duty cold-start batteries (to DIN 75311) and/or additional batteries is recommended. -
Page 98: Topping Up The Cooling Oil
All manuals and user guides at all-guides.com Maintenance 10.4 Compressor Material Wrench Cleaning cloths Precondition The machine is shut down. The machine is standing level. The machine is fully vented, the pressure gauge reads 0 bar. All compressed air consumers are disconnected and the air outlet valves are open. Fig. -
Page 99: Changing The Cooling Oil
All manuals and user guides at all-guides.com Maintenance 10.4 Compressor 1. CAUTION! The machine could be damaged by unsuitable oil. ➤ Never mix incompatible types of oil. ➤ Never top up with a different type of oil to that already used in the machine. 2. -
Page 100: Fig. 33 Changing The Cooling Oil
All manuals and user guides at all-guides.com Maintenance 10.4 Compressor CAUTION There is risk of burns from hot components and escaping oil. ➤ Wear long-sleeved clothing and gloves. Fig. 33 Changing the cooling oil Oil separator tank Oil cooler Oil separator tank drain plug Oil cooler drain plug Oil filler port Combination valve... -
Page 101: Fig. 34 Shut-Off Valves For Oil Cooler And Separator Tank
All manuals and user guides at all-guides.com Maintenance 10.4 Compressor 4. Wait until the machine has automatically vented. Pressure gauge reads 0 bar. 5. Open the outlet valves. 6. Check the oil level after about 5 minutes. Top up if necessary. 7. -
Page 102: Changing The Oil Filter
All manuals and user guides at all-guides.com Maintenance 10.4 Compressor 10.4.4 Changing the oil filter Material Spares Receptacle Cleaning cloths Precondition The machine is shut down. The machine is fully vented, the pressure gauge reads 0 bar. Machine cooled down. All compressed air consumers are disconnected and the air outlet valves are open. -
Page 103: Changing The Oil Separator Cartridge
All manuals and user guides at all-guides.com Maintenance 10.4 Compressor 3. Shut down the machine. 4. Wait until the machine has automatically vented. Pressure gauge reads 0 bar. 5. Open the outlet valves. 6. Check the oil level after about 5 minutes. Top up if necessary. -
Page 104: Fig. 36 Changing The Oil Separator Cartridge
All manuals and user guides at all-guides.com Maintenance 10.4 Compressor Fig. 36 Changing the oil separator cartridge Control air line union nut Fixing screw Oil scavenge pipe union nut Cover Compressed air hose union nut Oil separator cartridge Dirt trap Gasket Oil scavenge pipe Metal clip... -
Page 105: Fig. 37 Oil Separator Tank Dirt Trap Maintenance
All manuals and user guides at all-guides.com Maintenance 10.4 Compressor Option ba Changing the oil separator cartridge Changing the oil separator cartridge with the frost protector option is carried out as described above. In addition, the frost protector must be emptied and its fittings undone. Be careful of the frost protector control lines when removing the separator tank cover. -
Page 106: Air Filter Maintenance
All manuals and user guides at all-guides.com Maintenance 10.4 Compressor 1. Raise the canopy. 2. Undo the union nut and bend the oil return line to one side. 3. Unscrew the dirt trap 4. Remove and clean the strainer and O-ring 5. -
Page 107: Fig. 38 Compressor Air Filter Maintenance
All manuals and user guides at all-guides.com Maintenance 10.4 Compressor Fig. 38 Compressor air filter maintenance Wing nut Maintenance indicator Washer Airend Filter cap Reset knob for the maintenance indicator Air filter element Red zone Inlet valve Indicator piston Checking contamination of the air filter Air filter maintenance is necessary when the yellow piston inside the maintenance indicator rea‐... -
Page 108: Pressure Relief Valve Checking
All manuals and user guides at all-guides.com Maintenance 10.4 Compressor 9. Secure the cover with washer and wing nut. 10. Check that the cover is properly seated. Resetting the maintenance indicator ➤ Press the maintenance indicator reset knob a number of times. The yellow piston within the indicator is reset and the maintenance indicator is ready for use again. -
Page 109: Chassis
All manuals and user guides at all-guides.com Maintenance 10.5 Chassis Fig. 39 Cooler/radiator cleaning Rear of the machine Direction of impacting water or steam jet (from outside to inside). 1. Seal off the air intakes of the engine and compressor air filters before starting cleaning. 2. -
Page 110: Towbar Maintenance
All manuals and user guides at all-guides.com Maintenance 10.5 Chassis 10.5.2 Towbar maintenance Clean and lubricate all sliding and rotating bearings as necessary but at least every 6 months. Material Lithium enriched multi-purpose grease Non-corroding oil Cleaning rags Precondition The machine is shut down. The machine is disconnected from the towing vehicle and safely parked. -
Page 111: Greasing The Brake Rods
All manuals and user guides at all-guides.com Maintenance 10.5 Chassis Checking the overrun damper 1. Loosen the transfer cable one side. 2. Press in the damper against its damping force. Have the damper replaced by a specialist workshop if: ■ There is little resistance to pushing in, ■... -
Page 112: Maintain Rubber Sealing Strips
All manuals and user guides at all-guides.com Maintenance 10.6 Maintain rubber sealing strips 10.6 Maintain rubber sealing strips The rubber sealing strips between the lower body and the canopy serve both as a soundproofing measure and to prevent ingress of rain water. Care of the rubber sealing strips is very necessary during the winter months to prevent the strips from sticking and tearing when the canopy is opened. -
Page 113: Frost Protector Maintenance
All manuals and user guides at all-guides.com Maintenance 10.7 Options 2. Slowly unscrew and withdraw the plug from the oil filler port. A dipstick is attached to the plug. 3. Wipe off the dipstick with a lint-free cloth or rag and screw the plug fully in again. 4. -
Page 114: Spark Arrestor Cleaning
All manuals and user guides at all-guides.com Maintenance 10.7 Options Option ba Fig. 42 Filling the frost protector Shut-off valve Bowl clamp ring Open Frost protector bowl Closed 1. Open the shut-off valve ( ) and wait about 30 seconds until the frost protector is fully depres‐ surised. -
Page 115: Fig. 43 Spark Arrestor Cleaning
All manuals and user guides at all-guides.com Maintenance 10.7 Options DANGER Danger of suffocation from toxic exhaust fumes. Exhaust fumes from internal combustion engines contain carbon monoxide, which is odour‐ less and deadly. ➤ Use the machine only outdoors! ➤ Do not inhale exhaust fumes. CAUTION Danger of burns from hot components and sparks. -
Page 116: Engine Air Intake Shut-Off Valve Maintenance
All manuals and user guides at all-guides.com Maintenance 10.7 Options 10.7.4 Option lb Engine air intake shut-off valve maintenance Material Compressed air for blowing out Cleaning fluid or spirit Cleaning cloths Precondition The machine is shut down. The machine is fully vented, the pressure gauge reads 0 bar. Machine cooled down. - Page 117 All manuals and user guides at all-guides.com Maintenance 10.7 Options 3. Check if the interior of the shut-off valve is clean. Blow out any dirt with compressed air. The valve cannot be completely cleaned with a compressed air blast. ➤ Remove the engine air intake shut-off valve, noting its mounted position. ➤...
-
Page 118: Document Maintenance And Service Work
All manuals and user guides at all-guides.com Maintenance 10.8 Document maintenance and service work. 10.8 Document maintenance and service work. Machine number: ➤ Enter maintenance and service work carried out in the list. Date Maintenance task carried out Operating hours Signature Tab. -
Page 119: 11 Spares, Operating Materials, Service
All manuals and user guides at all-guides.com Spares, Operating Materials, Service 11.1 Note the Nameplate 11 Spares, Operating Materials, Service 11.1 Note the Nameplate The nameplate contains all information to identify your machine. This information is essential to us in order to provide you with optimal service. ➤... -
Page 120: Kaeser Air Service
All manuals and user guides at all-guides.com Spares, Operating Materials, Service 11.3 KAESER AIR SERVICE 11.3 KAESER AIR SERVICE KAESER AIR SERVICE offers: ■ Authorized service technicians with KAESER factory training. ■ Increased operational reliability ensured by preventive maintenance. ■ Energy savings achieved by avoidance of pressure losses. - Page 121 All manuals and user guides at all-guides.com Spares, Operating Materials, Service 11.5 Spares for service and repair Service Manual Screw Compressor No.: 9_9432 02 E...
- Page 122 All manuals and user guides at all-guides.com Spares, Operating Materials, Service 11.5 Spares for service and repair Service Manual Screw Compressor No.: 9_9432 02 E...
- Page 123 All manuals and user guides at all-guides.com Spares, Operating Materials, Service 11.5 Spares for service and repair Service Manual Screw Compressor No.: 9_9432 02 E...
- Page 124 All manuals and user guides at all-guides.com Spares, Operating Materials, Service 11.5 Spares for service and repair Service Manual Screw Compressor No.: 9_9432 02 E...
- Page 125 All manuals and user guides at all-guides.com Spares, Operating Materials, Service 11.5 Spares for service and repair Service Manual Screw Compressor No.: 9_9432 02 E...
- Page 126 All manuals and user guides at all-guides.com Spares, Operating Materials, Service 11.5 Spares for service and repair Service Manual Screw Compressor No.: 9_9432 02 E...
- Page 127 All manuals and user guides at all-guides.com Spares, Operating Materials, Service 11.5 Spares for service and repair Service Manual Screw Compressor No.: 9_9432 02 E...
- Page 128 All manuals and user guides at all-guides.com Spares, Operating Materials, Service 11.5 Spares for service and repair Service Manual Screw Compressor No.: 9_9432 02 E...
- Page 129 All manuals and user guides at all-guides.com Spares, Operating Materials, Service 11.5 Spares for service and repair Service Manual Screw Compressor No.: 9_9432 02 E...
- Page 130 All manuals and user guides at all-guides.com Spares, Operating Materials, Service 11.5 Spares for service and repair Service Manual Screw Compressor No.: 9_9432 02 E...
- Page 131 All manuals and user guides at all-guides.com Spares, Operating Materials, Service 11.5 Spares for service and repair Service Manual Screw Compressor No.: 9_9432 02 E...
- Page 132 All manuals and user guides at all-guides.com Spares, Operating Materials, Service 11.5 Spares for service and repair Service Manual Screw Compressor No.: 9_9432 02 E...
- Page 133 All manuals and user guides at all-guides.com Spares, Operating Materials, Service 11.5 Spares for service and repair Service Manual Screw Compressor No.: 9_9432 02 E...
- Page 134 All manuals and user guides at all-guides.com Spares, Operating Materials, Service 11.5 Spares for service and repair Service Manual Screw Compressor No.: 9_9432 02 E...
- Page 135 All manuals and user guides at all-guides.com Spares, Operating Materials, Service 11.5 Spares for service and repair Service Manual Screw Compressor No.: 9_9432 02 E...
- Page 136 All manuals and user guides at all-guides.com Spares, Operating Materials, Service 11.5 Spares for service and repair Service Manual Screw Compressor No.: 9_9432 02 E...
- Page 137 All manuals and user guides at all-guides.com Spares, Operating Materials, Service 11.5 Spares for service and repair Service Manual Screw Compressor No.: 9_9432 02 E...
- Page 138 All manuals and user guides at all-guides.com Spares, Operating Materials, Service 11.5 Spares for service and repair Service Manual Screw Compressor No.: 9_9432 02 E...
- Page 139 All manuals and user guides at all-guides.com Spares, Operating Materials, Service 11.5 Spares for service and repair Service Manual Screw Compressor No.: 9_9432 02 E...
- Page 140 All manuals and user guides at all-guides.com Spares, Operating Materials, Service 11.5 Spares for service and repair Service Manual Screw Compressor No.: 9_9432 02 E...
- Page 141 All manuals and user guides at all-guides.com Spares, Operating Materials, Service 11.5 Spares for service and repair Service Manual Screw Compressor No.: 9_9432 02 E...
- Page 142 All manuals and user guides at all-guides.com Spares, Operating Materials, Service 11.5 Spares for service and repair Service Manual Screw Compressor No.: 9_9432 02 E...
- Page 143 All manuals and user guides at all-guides.com Spares, Operating Materials, Service 11.5 Spares for service and repair Service Manual Screw Compressor No.: 9_9432 02 E...
- Page 144 All manuals and user guides at all-guides.com Spares, Operating Materials, Service 11.5 Spares for service and repair Service Manual Screw Compressor No.: 9_9432 02 E...
- Page 145 All manuals and user guides at all-guides.com Spares, Operating Materials, Service 11.5 Spares for service and repair Service Manual Screw Compressor No.: 9_9432 02 E...
- Page 146 All manuals and user guides at all-guides.com Spares, Operating Materials, Service 11.5 Spares for service and repair Service Manual Screw Compressor No.: 9_9432 02 E...
- Page 147 All manuals and user guides at all-guides.com Spares, Operating Materials, Service 11.5 Spares for service and repair Service Manual Screw Compressor No.: 9_9432 02 E...
- Page 148 All manuals and user guides at all-guides.com Spares, Operating Materials, Service 11.5 Spares for service and repair Service Manual Screw Compressor No.: 9_9432 02 E...
- Page 149 All manuals and user guides at all-guides.com Spares, Operating Materials, Service 11.5 Spares for service and repair Service Manual Screw Compressor No.: 9_9432 02 E...
- Page 150 All manuals and user guides at all-guides.com Spares, Operating Materials, Service 11.5 Spares for service and repair Service Manual Screw Compressor No.: 9_9432 02 E...
- Page 151 All manuals and user guides at all-guides.com Spares, Operating Materials, Service 11.5 Spares for service and repair Service Manual Screw Compressor No.: 9_9432 02 E...
- Page 152 All manuals and user guides at all-guides.com Spares, Operating Materials, Service 11.5 Spares for service and repair Service Manual Screw Compressor No.: 9_9432 02 E...
- Page 153 All manuals and user guides at all-guides.com Spares, Operating Materials, Service 11.5 Spares for service and repair Service Manual Screw Compressor No.: 9_9432 02 E...
- Page 154 All manuals and user guides at all-guides.com Spares, Operating Materials, Service 11.5 Spares for service and repair Service Manual Screw Compressor No.: 9_9432 02 E...
- Page 155 All manuals and user guides at all-guides.com Spares, Operating Materials, Service 11.5 Spares for service and repair Service Manual Screw Compressor No.: 9_9432 02 E...
- Page 156 All manuals and user guides at all-guides.com Spares, Operating Materials, Service 11.5 Spares for service and repair Service Manual Screw Compressor No.: 9_9432 02 E...
- Page 157 All manuals and user guides at all-guides.com Spares, Operating Materials, Service 11.5 Spares for service and repair Service Manual Screw Compressor No.: 9_9432 02 E...
- Page 158 All manuals and user guides at all-guides.com Spares, Operating Materials, Service 11.5 Spares for service and repair Service Manual Screw Compressor No.: 9_9432 02 E...
- Page 159 All manuals and user guides at all-guides.com Spares, Operating Materials, Service 11.5 Spares for service and repair Service Manual Screw Compressor No.: 9_9432 02 E...
- Page 160 All manuals and user guides at all-guides.com Spares, Operating Materials, Service 11.5 Spares for service and repair Service Manual Screw Compressor No.: 9_9432 02 E...
- Page 161 All manuals and user guides at all-guides.com Spares, Operating Materials, Service 11.5 Spares for service and repair Service Manual Screw Compressor No.: 9_9432 02 E...
- Page 162 All manuals and user guides at all-guides.com Spares, Operating Materials, Service 11.5 Spares for service and repair Service Manual Screw Compressor No.: 9_9432 02 E...
- Page 163 All manuals and user guides at all-guides.com Spares, Operating Materials, Service 11.5 Spares for service and repair Service Manual Screw Compressor No.: 9_9432 02 E...
- Page 164 All manuals and user guides at all-guides.com Spares, Operating Materials, Service 11.5 Spares for service and repair Service Manual Screw Compressor No.: 9_9432 02 E...
- Page 165 All manuals and user guides at all-guides.com Spares, Operating Materials, Service 11.5 Spares for service and repair Service Manual Screw Compressor No.: 9_9432 02 E...
- Page 166 All manuals and user guides at all-guides.com Spares, Operating Materials, Service 11.5 Spares for service and repair Service Manual Screw Compressor No.: 9_9432 02 E...
- Page 167 All manuals and user guides at all-guides.com Spares, Operating Materials, Service 11.5 Spares for service and repair Service Manual Screw Compressor No.: 9_9432 02 E...
- Page 168 All manuals and user guides at all-guides.com Spares, Operating Materials, Service 11.5 Spares for service and repair Service Manual Screw Compressor No.: 9_9432 02 E...
- Page 169 All manuals and user guides at all-guides.com Spares, Operating Materials, Service 11.5 Spares for service and repair Service Manual Screw Compressor No.: 9_9432 02 E...
- Page 170 All manuals and user guides at all-guides.com Spares, Operating Materials, Service 11.5 Spares for service and repair Service Manual Screw Compressor No.: 9_9432 02 E...
- Page 171 All manuals and user guides at all-guides.com Spares, Operating Materials, Service 11.5 Spares for service and repair Service Manual Screw Compressor No.: 9_9432 02 E...
- Page 172 All manuals and user guides at all-guides.com Spares, Operating Materials, Service 11.5 Spares for service and repair Service Manual Screw Compressor No.: 9_9432 02 E...
- Page 173 All manuals and user guides at all-guides.com Spares, Operating Materials, Service 11.5 Spares for service and repair Service Manual Screw Compressor No.: 9_9432 02 E...
- Page 174 All manuals and user guides at all-guides.com Spares, Operating Materials, Service 11.5 Spares for service and repair Service Manual Screw Compressor No.: 9_9432 02 E...
- Page 175 All manuals and user guides at all-guides.com Spares, Operating Materials, Service 11.5 Spares for service and repair Service Manual Screw Compressor No.: 9_9432 02 E...
- Page 176 All manuals and user guides at all-guides.com Spares, Operating Materials, Service 11.5 Spares for service and repair Service Manual Screw Compressor No.: 9_9432 02 E...
- Page 177 All manuals and user guides at all-guides.com Spares, Operating Materials, Service 11.5 Spares for service and repair Service Manual Screw Compressor No.: 9_9432 02 E...
- Page 178 All manuals and user guides at all-guides.com Spares, Operating Materials, Service 11.5 Spares for service and repair Service Manual Screw Compressor No.: 9_9432 02 E...
- Page 179 All manuals and user guides at all-guides.com Spares, Operating Materials, Service 11.5 Spares for service and repair Service Manual Screw Compressor No.: 9_9432 02 E...
- Page 180 All manuals and user guides at all-guides.com Spares, Operating Materials, Service 11.5 Spares for service and repair Service Manual Screw Compressor No.: 9_9432 02 E...
- Page 181 All manuals and user guides at all-guides.com Spares, Operating Materials, Service 11.5 Spares for service and repair Service Manual Screw Compressor No.: 9_9432 02 E...
- Page 182 All manuals and user guides at all-guides.com Spares, Operating Materials, Service 11.5 Spares for service and repair Service Manual Screw Compressor No.: 9_9432 02 E...
- Page 183 All manuals and user guides at all-guides.com Spares, Operating Materials, Service 11.5 Spares for service and repair Service Manual Screw Compressor No.: 9_9432 02 E...
- Page 184 All manuals and user guides at all-guides.com Spares, Operating Materials, Service 11.5 Spares for service and repair Service Manual Screw Compressor No.: 9_9432 02 E...
- Page 185 All manuals and user guides at all-guides.com Spares, Operating Materials, Service 11.5 Spares for service and repair Service Manual Screw Compressor No.: 9_9432 02 E...
- Page 186 All manuals and user guides at all-guides.com Spares, Operating Materials, Service 11.5 Spares for service and repair Service Manual Screw Compressor No.: 9_9432 02 E...
- Page 187 All manuals and user guides at all-guides.com Spares, Operating Materials, Service 11.5 Spares for service and repair Service Manual Screw Compressor No.: 9_9432 02 E...
- Page 188 All manuals and user guides at all-guides.com Spares, Operating Materials, Service 11.5 Spares for service and repair Service Manual Screw Compressor No.: 9_9432 02 E...
- Page 189 All manuals and user guides at all-guides.com Spares, Operating Materials, Service 11.5 Spares for service and repair Service Manual Screw Compressor No.: 9_9432 02 E...
- Page 190 All manuals and user guides at all-guides.com Spares, Operating Materials, Service 11.5 Spares for service and repair Service Manual Screw Compressor No.: 9_9432 02 E...
- Page 191 All manuals and user guides at all-guides.com Spares, Operating Materials, Service 11.5 Spares for service and repair Service Manual Screw Compressor No.: 9_9432 02 E...
- Page 192 All manuals and user guides at all-guides.com Spares, Operating Materials, Service 11.5 Spares for service and repair Service Manual Screw Compressor No.: 9_9432 02 E...
- Page 193 All manuals and user guides at all-guides.com Spares, Operating Materials, Service 11.5 Spares for service and repair Service Manual Screw Compressor No.: 9_9432 02 E...
- Page 194 All manuals and user guides at all-guides.com Spares, Operating Materials, Service 11.5 Spares for service and repair Service Manual Screw Compressor No.: 9_9432 02 E...
- Page 195 All manuals and user guides at all-guides.com Spares, Operating Materials, Service 11.5 Spares for service and repair Service Manual Screw Compressor No.: 9_9432 02 E...
- Page 196 All manuals and user guides at all-guides.com Spares, Operating Materials, Service 11.5 Spares for service and repair Service Manual Screw Compressor No.: 9_9432 02 E...
- Page 197 All manuals and user guides at all-guides.com Spares, Operating Materials, Service 11.5 Spares for service and repair Service Manual Screw Compressor No.: 9_9432 02 E...
- Page 198 All manuals and user guides at all-guides.com Spares, Operating Materials, Service 11.5 Spares for service and repair Service Manual Screw Compressor No.: 9_9432 02 E...
- Page 199 All manuals and user guides at all-guides.com Spares, Operating Materials, Service 11.5 Spares for service and repair Service Manual Screw Compressor No.: 9_9432 02 E...
- Page 200 All manuals and user guides at all-guides.com Spares, Operating Materials, Service 11.5 Spares for service and repair Service Manual Screw Compressor No.: 9_9432 02 E...
- Page 201 All manuals and user guides at all-guides.com Spares, Operating Materials, Service 11.5 Spares for service and repair Service Manual Screw Compressor No.: 9_9432 02 E...
-
Page 202: Decommissioning, Storage And Transport 12.1 De-Commissioning
All manuals and user guides at all-guides.com Decommissioning, Storage and Transport 12.1 De-commissioning 12 Decommissioning, Storage and Transport 12.1 De-commissioning De-commissioning is necessary, for example, under the following circumstances: ■ The machine is temporarily not needed ■ The machine will not be needed for a considerable time. ■... -
Page 203: Long-Term Decommissioning
All manuals and user guides at all-guides.com Decommissioning, Storage and Transport 12.1 De-commissioning Decommissioning of the compressor for several weeks during severe frost 1. CAUTION! Danger of batteries freezing. Discharged batteries are subject to frost damage and can freeze at −10 °C. ➤... -
Page 204: Transporting
All manuals and user guides at all-guides.com Decommissioning, Storage and Transport 12.2 Transporting Long-term decommissioning tasks See chapter Confirmed? ➤ Hang a notice on the instrument panel informing of the decommis‐ – sioning measurements taken. Engine SM = engine manufacturer's service manual. Tab. -
Page 205: Fig. 45 Towing Alignment
All manuals and user guides at all-guides.com Decommissioning, Storage and Transport 12.2 Transporting Additional loading Do not exceed the permissible loading (overall weight, coupling load, axle load). Observe national traffic laws. Any essential but excessive additional loads must be carried by the towing vehicle. -
Page 206: Fig. 46 Ball Coupling Function
All manuals and user guides at all-guides.com Decommissioning, Storage and Transport 12.2 Transporting 1. WARNING! Unstable towing alignment. Personal injury may result from towing. Stability problems with the machine or towing vehicle. Damage to the machine towbar or vehicle tow hitch. ➤... - Page 207 All manuals and user guides at all-guides.com Decommissioning, Storage and Transport 12.2 Transporting 5. If the locking indicator is not visible: ■ Press down on the coupling until the closing mechanism can be heard to lock into place. ■ Press down on the release lever to bring it to the horizontal position.
-
Page 208: Fig. 47 Safety Signs: Secure The Chocks
All manuals and user guides at all-guides.com Decommissioning, Storage and Transport 12.2 Transporting Option sh Carry out the following before starting to tow Option sh Fig. 47 Safety signs: Secure the chocks 1. WARNING! Missing chocks Serious injury or death can result from an unsecured machine rolling away. ➤... -
Page 209: Parking The Compressor
All manuals and user guides at all-guides.com Decommissioning, Storage and Transport 12.2 Transporting 1. CAUTION! Unintentional brake application. If the breakaway cable is too short it can apply the brakes when rounding a curve. This impo‐ ses high wear on the braking system. ➤... -
Page 210: Fig. 50 Safety Sign - Secure The Chocks
All manuals and user guides at all-guides.com Decommissioning, Storage and Transport 12.2 Transporting 2. Pull on the parking brake. 3. Detach the breakaway cable. 4. Wind down the jockey wheel. 5. Place chocks under the wheels. 6. Pull up the parking brake to the stop. 7. -
Page 211: Transporting With A Crane
All manuals and user guides at all-guides.com Decommissioning, Storage and Transport 12.2 Transporting Precondition Safety chain present Lock present Key custody is decided 1. Remove the safety chain from the storage locker on the machine. 2. Loop the safety chain around a solidly anchored object. 3. -
Page 212: Transporting As A Load
All manuals and user guides at all-guides.com Decommissioning, Storage and Transport 12.2 Transporting Take care when setting down the machine 1. CAUTION! Incorrect setting down can damage the machine. Machine components, particularly the chassis, can be damaged by incorrectly setting down. ➤... -
Page 213: Storage
All manuals and user guides at all-guides.com Decommissioning, Storage and Transport 12.3 Storage Contact KAESER Service with any questions regarding transporting or load securing. KAESER accepts no liability for damages arising through incorrect transport methods or in‐ sufficient or wrong securing of loads. The transport restraints on rented, hired or exhibition machines should be re-used for the re‐... - Page 214 All manuals and user guides at all-guides.com Decommissioning, Storage and Transport 12.4 Disposal ➤ Parts contaminated with cooling oil or engine oil must be disposed of in accordance with local environment protection regulations. Service Manual Screw Compressor No.: 9_9432 02 E...
-
Page 215: Annex 13.1 Marking
All manuals and user guides at all-guides.com Annex 13.1 Marking 13 Annex 13.1 Marking Fig. 52 Marking VIN *) (stamped under the reflector) Engine nameplate with serial number *Vehicle identity number Combined label for coupling loading and Machine nameplate with serial number built-in options 13.2 Pipeline and instrument flow diagram (P+I diagram) - Page 216 All manuals and user guides at all-guides.com Annex 13.2 Pipeline and instrument flow diagram (P+I diagram) Service Manual Screw Compressor No.: 9_9432 02 E...
- Page 217 All manuals and user guides at all-guides.com Annex 13.2 Pipeline and instrument flow diagram (P+I diagram) Service Manual Screw Compressor No.: 9_9432 02 E...
- Page 218 All manuals and user guides at all-guides.com Annex 13.2 Pipeline and instrument flow diagram (P+I diagram) Service Manual Screw Compressor No.: 9_9432 02 E...
-
Page 219: Dimensional Drawings
All manuals and user guides at all-guides.com Annex 13.3 Dimensional drawings 13.3 Dimensional drawings 13.3.1 Option sa Dimensional drawing - chassis with height-adjustable tow bar Service Manual Screw Compressor No.: 9_9432 02 E... - Page 220 All manuals and user guides at all-guides.com Annex 13.3 Dimensional drawings Service Manual Screw Compressor No.: 9_9432 02 E...
-
Page 221: Dimensional Drawing - Chassis With Height-Adjustable Tow Bar
All manuals and user guides at all-guides.com Annex 13.3 Dimensional drawings 13.3.2 Option sb Dimensional drawing - chassis with height-adjustable tow bar Service Manual Screw Compressor No.: 9_9432 02 E... - Page 222 All manuals and user guides at all-guides.com Annex 13.3 Dimensional drawings Service Manual Screw Compressor No.: 9_9432 02 E...
-
Page 223: Dimensional Drawing - Fixed Height Towbar And Parking Brake
All manuals and user guides at all-guides.com Annex 13.3 Dimensional drawings 13.3.3 Option sd Dimensional drawing - fixed height towbar and parking brake Service Manual Screw Compressor No.: 9_9432 02 E... - Page 224 All manuals and user guides at all-guides.com Annex 13.3 Dimensional drawings Service Manual Screw Compressor No.: 9_9432 02 E...
-
Page 225: Dimensional Drawing - Fixed Height Towbar And Overrun Brake
All manuals and user guides at all-guides.com Annex 13.3 Dimensional drawings 13.3.4 Option se Dimensional drawing - fixed height towbar and overrun brake Service Manual Screw Compressor No.: 9_9432 02 E... - Page 226 All manuals and user guides at all-guides.com Annex 13.3 Dimensional drawings Service Manual Screw Compressor No.: 9_9432 02 E...
-
Page 227: Electrical Diagram
All manuals and user guides at all-guides.com Annex 13.4 Electrical Diagram 13.4 Electrical Diagram Service Manual Screw Compressor No.: 9_9432 02 E... - Page 228 All manuals and user guides at all-guides.com Annex 13.4 Electrical Diagram Service Manual Screw Compressor No.: 9_9432 02 E...
- Page 229 All manuals and user guides at all-guides.com Annex 13.4 Electrical Diagram Service Manual Screw Compressor No.: 9_9432 02 E...
- Page 230 All manuals and user guides at all-guides.com Annex 13.4 Electrical Diagram Service Manual Screw Compressor No.: 9_9432 02 E...
- Page 231 All manuals and user guides at all-guides.com Annex 13.4 Electrical Diagram Service Manual Screw Compressor No.: 9_9432 02 E...
- Page 232 All manuals and user guides at all-guides.com Annex 13.4 Electrical Diagram Service Manual Screw Compressor No.: 9_9432 02 E...
- Page 233 All manuals and user guides at all-guides.com Annex 13.4 Electrical Diagram Service Manual Screw Compressor No.: 9_9432 02 E...
- Page 234 All manuals and user guides at all-guides.com Annex 13.4 Electrical Diagram Service Manual Screw Compressor No.: 9_9432 02 E...
- Page 235 All manuals and user guides at all-guides.com Annex 13.4 Electrical Diagram Service Manual Screw Compressor No.: 9_9432 02 E...
- Page 236 All manuals and user guides at all-guides.com Annex 13.4 Electrical Diagram Service Manual Screw Compressor No.: 9_9432 02 E...
-
Page 237: Lighting And Signalling System Connection
All manuals and user guides at all-guides.com Annex 13.5 Lighting and signalling system connection 13.5 Option tc Lighting and signalling system connection Service Manual Screw Compressor No.: 9_9432 02 E... - Page 238 All manuals and user guides at all-guides.com Annex 13.5 Lighting and signalling system connection Service Manual Screw Compressor No.: 9_9432 02 E...
- Page 239 All manuals and user guides at all-guides.com Annex 13.5 Lighting and signalling system connection Service Manual Screw Compressor No.: 9_9432 02 E...
- Page 240 All manuals and user guides at all-guides.com Annex 13.5 Lighting and signalling system connection Service Manual Screw Compressor No.: 9_9432 02 E...
- Page 241 All manuals and user guides at all-guides.com Annex 13.5 Lighting and signalling system connection Service Manual Screw Compressor No.: 9_9432 02 E...
- Page 242 All manuals and user guides at all-guides.com Annex 13.5 Lighting and signalling system connection Service Manual Screw Compressor No.: 9_9432 02 E...
-
Page 243: Fuel Circulation Diagram
All manuals and user guides at all-guides.com Annex 13.6 Fuel circulation diagram 13.6 Fuel circulation diagram Service Manual Screw Compressor No.: 9_9432 02 E... - Page 244 All manuals and user guides at all-guides.com Annex 13.6 Fuel circulation diagram Service Manual Screw Compressor No.: 9_9432 02 E...
- Page 245 All manuals and user guides at all-guides.com Annex 13.6 Fuel circulation diagram Service Manual Screw Compressor No.: 9_9432 02 E...
- Page 246 All manuals and user guides at all-guides.com Annex 13.6 Fuel circulation diagram Service Manual Screw Compressor No.: 9_9432 02 E...
Need help?
Do you have a question about the M43 and is the answer not in the manual?
Questions and answers