
Related Manuals for CRX SW Brushless Series

Summary of Contents for CRX SW Brushless Series
- Page 1 SW Brushless Series Kero Start Full Auto Start with Restart Operations Manual Written by CRX Turbines - Andrew Fioretti Ver. 203107...
-
Page 2: Table Of Contents
Ear Protection ....................6 Burns ......................6 Turbine Oil Toxicity ..................6 Ground Assistants ..................6 Turbine Oil ...................... 7 CRX/SWIWIN Limited Lifetime Warranty .............. 7 Terms ......................7 Exclusions ....................... 8 Operation and Setup .................... 9 Preparation of Fuel ..................9 Motor Setup.................... - Page 3 Max – Throttle up, trim up ................. 22 Running Menu .................... 22 Starter ......................24 Test function menu ..................24 Other ......................25 Data chart ....................24 USB Adapter ....................25 Software Updates ....................26 Engine Diagrams ....................27 Specifications ...................... 28 ECU Parameters –...
- Page 4 Figure 36 SW45B Diagram ......................27 Figure 37 SW 60 and 80B ....................... 27 Figure 38 SW 120 and 140B ......................28 Figure 39 SW 160, 170, 190 and 210B ................... 28 Written by CRX Turbines - Andrew Fioretti Ver. 203107 Pg. 4...
-
Page 5: Introduction
This manual is intended to aid the user in setup and running practices associated with the SWIWIN SW and CRX series micro turbines. This manual is not intended to take the place of a primer on micro-turbines. It is assumed that the user has working knowledge and experience with turbines and that each user is familiar with best practices before attempting to run a turbine. -
Page 6: Warning To Bystanders
User accepts responsibility and bares all risks associated with operation of SWIWIN/CRX turbine engines. Warning to Bystanders - User acknowledges the risk of injury or burns to bystanders during start-up or while operating a turbine. User agrees to take all steps necessary to ensure that all persons are situated a safe distance from the operations of the engine. -
Page 7: Turbine Oil
4. Buyer does not need to register the motor with SWIWIN at the time of purchase. CRX maintains a customer database by serial number. 5. Buyer agrees to cover the cost of shipping the turbine to CRX for repair. CRX may at their discretion, pay postages to return the engine for service. -
Page 8: Exclusions
7. If a problem occurs during the warranty period, please contact our service department and take the following steps: Contact CRX in order to coordinate shipping of the turbine to the service center for evaluation and repair. b. A service order form is located on our site. Please include a copy with the engine. -
Page 9: Operation And Setup
Operation and Setup Figure 2 Items Included in Motor Kit Preparation of Fuel In a clean fuel container mix fuel using the following ratio: 3% oil diesel 5% oil Kerosene or JetA General rule of thumb is to mix 5 gallons of fuel. For smaller or larger amounts the following formula can be used: ... - Page 10 Figure 3 Brushless Pumps 1. Connect one end of the MR30 black cable to the ECU receptacle labeled “motor”. Connect the other end of to the yellow MR30 engine port. 2. Connect the yellow XT30 power cable (Male) to the ECU port labeled “Power Cable”. Figure 4 ECU Connections and Power Connection 3.
- Page 11 7. Follow diagrams below to connect Telemetry. Refer to Transmitter instructions for further details Figure 6 ECU Connections Figure 5 Engine Connection and Pump Figure 7 Motor Setup Figure 8 Telemetry Spectrum Diagram Pg. 11...
-
Page 12: Motor Setup
Figure 9 Telemetry Cabling Figure 10 Spectrum Cable Motor Setup Introduction – For first time users and for first time use of any engine, it is strongly recommended that the motor be placed into a test stand for the first time. I cannot count how many times, we have gotten calls from customers that have worked tirelessly to install a motor in their plane only to and caused realize it had to come out and/or they experienced an issue on startup... -
Page 13: Radio Setup And Radio Training - Study Rc
1. Please refer Motor Setup above. Connect the motor festo fitting to a section of 4mm tubing (included). Route the tubing to the filter then to the shut off as shown. 2. Connect the other end of the shutoff with 4mm tubing to the output of the pump. 3. -
Page 14: Shutdown Procedure
Note: First time motor use. Please be sure to prime the pump and remove all air from the lines before attempting to start the engine. 1. Turn the fuel valve to the on position 2. Turn on power to the transmitter and receiver and observe GSU startup. The motor and GSU will sync up with an audible signal. - Page 15 3. Turn off power to the ECU and plane 4. Turn off power to your radio EXPERT TIP: At any interval whether after shutdown or prior to startup, whenever the stick is raised to max, the motor enters cool down mode and continues spinning at a rate defined in the “cooling menu”...
- Page 16 Figure 12 Version 2 Brushless ECU Figure 13 V3 ECU Figure 14 Power and Control Figure 15 Throttle Cable Connections Figure 16 Engine and Pump Connections Figure 17 GSU Figure 18 Optional Temp/RPM Monitor Figure 19 Engine Cable (Female to Female Mr30) Pg.
- Page 17 Figure 21 Power Cable Figure 20 Pump Cable (Male to Female MR30) Pg. 17...
-
Page 18: Ecu
High Altitudes – Altitude affects the startup of any jet engine. Since air is thinner at higher altitudes, the engine that you receive might need to be tweaked to work in your area. CRX is at 982 FT ASL. For areas at sea level there is no concern but for others where ASL might be at 4 or 5000 such as areas in mountains, there are parameters that will need to be adjusted. - Page 19 Gas Valve Ignition RPM Preheat RPM RPM Starter off Acceleration/Deceleration Pg. 19...
-
Page 20: Ecu/Gsu Operation
ECU/GSU Operation GSU Screen Button Function “OK” Invoke a change or command “C” Clear a screen “+” Increment a value “-“ Decrement a value Figure 22 GSU Screen Initial Screen RPM – Current running status of the turbine Temp – Current temperature of engine Curr –... -
Page 21: Start Up Screen
StartUp – enter startup menu Running – enter Running menu StudyRC – train Radio to ECU Starter – sets starter engagement Cooling – set cooling rpm Other – enter other parameters menu Test – enter Test menu DataChart – displays engine information Language - switchable Chinese or English Figure 25 Running Information Start Up Screen... -
Page 22: Study Rc -Train The Transmitter To The Ecu
It is best to play with this setting until you reach a happy medium between a motor that is responsive but Figure 28 Cooling Menu not unstable. Motor default from CRX is 30. Max RPM – Set maximum RPM Idle RPM – set idle RPM Min RPM –... - Page 23 setting, motor will shutdown. MaxTemp (EGT) - Set maximum running temp. If motor exceeds this value, ECU will automatically limit fuel in order to reduce the temp but under normal conditions will not shut down the engine. LowVolt – set low volt warning Restart - Can be set “valid”...
- Page 24 Starter Eject Time – sets the time for a reverse voltage pulse to disengage the starter. Eject Voltage – sets the eject voltage in order engage the clutch on startup Run Voltage – Sets the voltage for the starter during startup RPM Stable –...
- Page 25 controls fuel to the glow plug. You will hear click, click, click Test Glow Plug – press “OK” to activate Glow Plug circuit. A glow can be seen from the rear of the motor. Test Starter – Press “OK” to activate starter. Use this function to manually cool the motor if needed.
- Page 26 Software Updates Swiwin continuously updates software for the turbines. There are 3 updates: (TCU) turbine control unit (MR30) (ECU) connection labeled GSU (JR) (GSU) female JR connection Use the optional USB Dongle to connect each device. The provided cable has all 3 connections but connect each one separately.
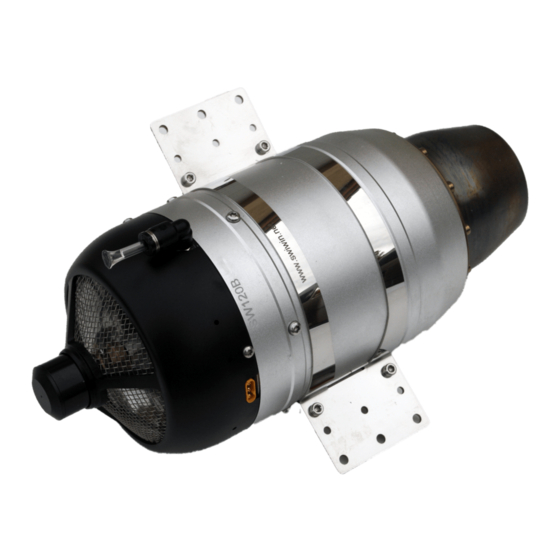
- Page 27 Engine Diagrams Figure 36 SW45B Diagram Figure 37 SW 60 and 80B Pg. 27...
- Page 28 Figure 38 SW 120 and 140B Figure 39 SW 160, 170, 190 and 210B Specifications CRX60B CRX80B CRX120 CRX140B CRX160 CRX170 CRX190B Diameter 84mm 84mm 100mm 100mm 110mm 110mm 110mm Length 203mm 203mm 250mm 250mm 258mm 258mm 258mm Weight 783g 788g 1255g 1255g...
- Page 29 output @ 144k @ 155k @ 112.5k @ 115.2k @ 99k @ 100.8k @ 103.5k Fuel kero or kero or kero or kero or kero or kero or kero or diesel diesel diesel diesel diesel diesel diesel Lubrication 5% kero 5% kero 5% kero 5% kero...
- Page 30 6000 6000 5000 5000 5000 5000 5000 Table 2 ECU Parameters Pg. 30...
- Page 31 CRX Turbines is located outside of Buffalo New York. Our mailing address for all motor related matters is: CRX Turbines PO Box 491 East Aurora, New York 14052 Service Request Form Please refer to the following link for a copy of our service request form.
Need help?
Do you have a question about the SW Brushless Series and is the answer not in the manual?
Questions and answers