
Subscribe to Our Youtube Channel
Summary of Contents for Crysalli CP2000-R-UC-BH
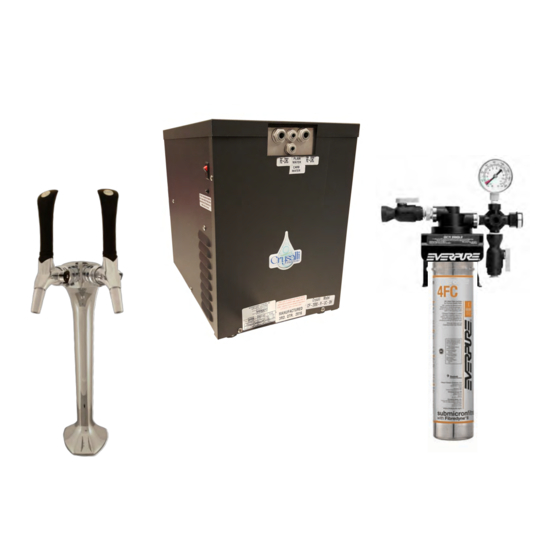
- Page 1 CP2000-R-UC-BH Installation Guide Sparkling & Still Chilled Undercounter System CP2000-R-UC-BH undercounter chiller With CBR or LIT Series Draft tower. www.Crysalli.com REV_1018...
- Page 2 Start-up Sequence: • Turn Water on to unit (confirm flow from faucets) Notes and Signature: • Plug unit in and toggle On/Off switch to the On position. • Turn CO2 on at tank. (carb tank may need to be bled) •...
- Page 3 CP2000-R-UC-BH Undercounter Chilled Sparkling & Still Water Dispenser Installation Guide Overview Instructions 1: Select a counter location for your Draft Tower and an undercounter location for the CP2000 Chiller making sure they are within 6’ of each other (unit requires ventilation inside space it is being placed and clearance around it).
- Page 4 Connect JG Fittings to tower and “Chilled Water” and “Carb Water” lines to the bulk head connections on chiller. Connect the U bend JG fitting at the tower end of the trunkline to loop the red recirc lines. And connect these lines to ‘Recirc” bulk head fittings at the chiller.
- Page 5 15" Zip Ties For securing hose and water reg to wall. Fitting to hook up a CR-14FC Filter system to a Crysalli Countertop CP2000-UC-BH and Tower or Facuet Water Pressure Reducer Use PSEI6012U9 angle...
- Page 6 Mounting the RDP-1SSQ or RDP-3SS Recessed Drain Pan Counter requires a Square cut for drain pan section and Hole cut for tower: • CBR-V1: 1 3/8” Hole • CBR-V2: 1 1/2” Hole • CBR-V3: 1 7/8” Hole 2” Threaded stud for mounting. 10-24 Thread with Locking Nut •...
- Page 7 (using the red locking clips), then connect them to the Superseal fittings on the tower tubes (see “CR-4L38 Trunkline Tower End Connections” page). SI030812S Superseal Elbow, loosen collet nut, push into SS tube and tighten collet nut. Crysalli 1739 Sabre St. Hayward, CA 94545. 510-732-0100. www.crysalli.com...
- Page 8 CR-4L14 Trunkline Tower End Connections Step #1 Locate the CR-4L14 Trunkline. 6’ will be included with the CPUC install kit. And Prep both ends for connection to the Chiller and Draft tower. This trunkline typically doesn't need to be cut shorter, the extra length can act as a service loop so the chiller can be moved for maintenance and service.
- Page 9 Mounting Faucets & Handles to Tower Locate the Faucet Bodies, Handles and Faucet Wrench. The faucet bodies attach to the shanks, that are pre-attached to the tower and leak tested. When attaching the faucet body to the shank, be sure the faucet is properly aligned before tightening it down.
- Page 10 Sparkling Water Flow Adjustment Lock Out. Upon start up of the system, the CR-SSQ1231 Faucets used on the CBR-V1, CBR-V2, CBR-V3, LIT-V2C and LIT-V3C dispensing towers will need the flow rate adjusted and set. These faucets are designed with a flow control adjustment knob (decrease or increase the flow of the water) on the right side of the faucet body.
- Page 11 Your install kit may have some 1/4” braided hose in it. That hose is for the CO2 only. Do Not use the braided hose on JG fittings. To Crysalli Chiller unit NOTE: Always reference local plumbing...
- Page 12 Place the unit in the cabinet space, with at least 4” of space behind it for clearance for the trunkline bundle, connections and chiller vents louvers on the side panels. Do not block any of the ventilated panels on the chiller. Install CR-TFB1 Fan Box in cabinet at this time if using one.
- Page 13 The CP2000-R-UC-BH has four bulk head outlet connections to attach the trunkline too. Two horizontal 3/8” connections for the red striped re-circ lines and two 1/4” vertical connections for the Product water lines.
- Page 14 Connecting CO2 and Filling Water Bath The Hose for the CO2 connection is 6’ long, 1/4” braided hose with a 1/4” flare nut on the end extending out from the chiller near the water inlet. Route this hose to the location of the CO2 tank. If additional hose is required, the UCM install kit comes with an additional 8’...
- Page 15 ---------------------------------------------------------------------------------------------------------------------------------------------- CR-3741 High Pressure CO2 Regulator 0-160 PSI: Attaches to 5-100 lb CO2 tanks. Set to 75 PSI (Note: Low Pressure Beer Regulators 0-50 psi, will not work properly with Crysalli) Output Pressure Gauge: Fill Level Gauge: Volume of CO2 Shows CO2 output pressure in Tank.
- Page 16 Model Number:________________ Serial Number: ___________________ Install Date: _____________ Installer/Servicer: ________________________ CP2000-R-UC-BH & CBR Tower Cleaning and Maintenance Recommendations Daily: Wipe down the unit or draft tower, cleaning and drying all surfaces. window cleaner on mirrored and chrome finishes). Clean and dry drain pan and drain grate. Check that water is draining, pour warm water down drain if necessary.
Need help?
Do you have a question about the CP2000-R-UC-BH and is the answer not in the manual?
Questions and answers