
Summary of Contents for AEROSPA PH050006
- Page 1 Owner’s Manual Model PH050006 Manufactured Shanghai Qinxu Plastics Products Co., Ltd. No. 5151, Dongchuan Road Heqing Town, Pudong New Area Shanghai, CN 201201...
-
Page 2: Important Safety Instructions
IMPORTANT SAFETY INSTRUCTIONS The following instructions are required to be printed by Underwriters Laboratory (U.L.) as well as ETL Testing Laboratories Inc. as a condition of their listing of this product. They contain important safety information and we strongly encourage you to read and apply them. SAFETY INSTRUCTIONS When installing and using this electrical equipment, basic safety precaution should always be followed, including the following:... - Page 3 DANGER: Risk of Accidental Drowning. Extreme caution must be exercised to prevent un- authorized access by children. To avoid accidents, ensure that children cannot use this spa unless they are supervised at all times. DANGER: RISK OF ELECTRIC SHOCK. Install at least 5 feet (1.5m) away from all metal surfaces.
-
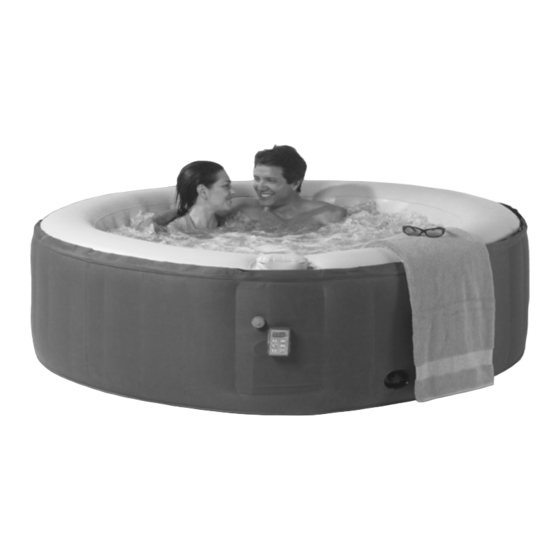
Page 4: Specifications
CAUTION: Place only on surface that can withstand the floor loading requirements of your spa. SAVE THESE INSTRUCTIONS. SPECIFICATIONS PH050006 Model: Up to 4 Adults Seating capacity: 800L / 211gallons Water capacity: 1.85m / 73”... -
Page 5: Installation Instruction
INSTALLATION INSTRUCTION Verify that all parts are present. PACKAGE CONTENTS: Spa Pool Spa Cover Inflation Filter Hose Cartridge(2) NPP5006 NPP5001 Filter Cartridge Repair Kit Cover Cover Lock NPP5002 NPP5004 NPP5005 SITE REQUIRMENTS: WARNING: The floor has to be capable of supporting the total expected load (filled spa plus bathers). -
Page 6: Outdoor Installation
moisture on exposed wood, paper, etc. in the proposed location. To minimize these effects it is best to provide plenty of ventilation to the selected area. An architect can help determine if more ventilation is needed. NOTE: Do not install the spa on carpet or other material that can be damaged by moisture. OUTDOOR INSTALLATION: No matter where you install the spa, it is important you have a solid support foundation which supports the filled spa. - Page 7 ASSEMBLY: 1. Remove the spa from the packaging. Verify that all parts are present. Unfold and spread out the spa pool and cover. Make sure both are right side up. 2. Open the air outlet on the spa located next to the Control Panel. Screw one end of the inflation hose onto it.
- Page 8 5. Inflate the spa pool by pressing the “BUBBLE” button on the control panel. When the spa is properly inflated, press the “BUBBLE” button to shut off the bubble function. ATTENTION: Do not over inflate the spa pool. NOTE: If you need to add additional air to the spa pool after it has been filled with water, you must first turn on the bubble function for 2-3 minutes by pressing the “BUBBLE”...
-
Page 9: Operation
11. Install cover lock. The combination lock is factory preset to open at 0-0-0. If you want to change the combination, push and hold the button down, then advance each number to the desired combination. Once a new combination is chosen, insert the lock wire and release button. DANGER: Risk of Accidental Drowning. -
Page 10: Maintenance
Bubble button: Press this button to activate the air jet system which has a 30-minute auto shut off for 10 minutes feature. The light of bubble button displays green when activated. Filter button: This button turns the filter pump on and off. The light of the water filtration button displays green when the filtration system is activated. - Page 11 resulting from improper water chemistry or imbalance is not covered by the warranty. Your dealer can supply you with kits of these products. Water sanitation is the responsibility of the spa owner, achieved through the regular and periodic (daily, if necessary) addition of an approved sanitizer. The sanitizer will chemically control the bacteria and viruses present in the fill water or introduced during use of the spa.
- Page 12 NOTE: The filter cartridge media eventually wears out and reduces its function. Replace the filter cartridge at least every 6 months to maintain water clarity. Draining your Spa: 1. Unplug the GFCI power cord from the electrical receptacle before attempting to drain the spa. 2.
-
Page 13: Troubleshooting
Spa Storage Make sure all water is drained from the spa and control box. This is essential to extend the life of the spa. We recommend the use of a wet/dry vacuum to blow out or suck up water from the spa pipes and pump lines. -
Page 14: Limited Warranty-Terms & Conditions
LIMITED WARRANTY—TERMS & CONDITIONS This warranty extends to the original purchaser only with proof of purchase. The warranty period commences on the original purchase date through the 90 day. The warranty is not transferable to subsequent purchasers. This warranty is subject to the limitations and exclusions listed below. Extent of warranty –...
Need help?
Do you have a question about the PH050006 and is the answer not in the manual?
Questions and answers