Advertisement
Table of Contents
- 1 Important Safety Information
- 2 Precautions to Avoid
- 3 Excessive Microwave Energy
- 4 Safety Precautions
- 5 Grounding Instructions
- 6 Adapter Plugs
- 7 Extension Cords
- 8 Cooking Controls
- 9 Defrosting Guide
- 10 About the Other Features
- 11 Delay Start
- 12 Microwave Terms
- 13 Before You Call for Service
- 14 Consumer Support
- Download this manual
Safety Instructions
Operating Instructions
Auto Feature . . . . . . . . . . . . . .21
Care and Cleaning . . . . . . .30, 31
Changing the Power Level . . . .14
Features of Your
Microwave Oven . . . . . . . .12, 13
Microwave Terms . . . . . . . . . . .29
Other Features . . . . . . . . . .26–28
Sensor Features . . . . . . . . .22–25
Time Features . . . . . . . . . .15–20
Troubleshooting Tips
Things That Are Normal
With Your Microwave Oven . . .34
Consumer Support
Consumer Support . . .Back Cover
Warranty . . . . . . . . . . . . . . . . .35
Write the model and serial numbers here:
________________________
Model #
________________________
Serial #
Find these numbers on a label inside
the oven.
ge.com
. . . . . . . . .2–11
. . . . .32, 33
Owner's Manual
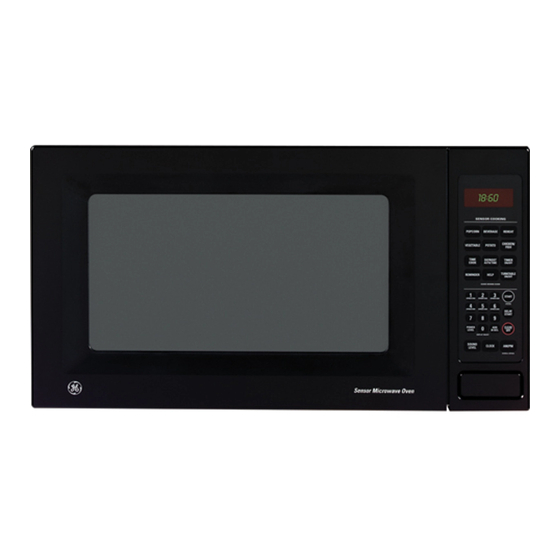
JE1860
3828W5A8488 49-40508
01-06 JR
Advertisement
Table of Contents

Related Manuals for GE JE1860BH


Summary of Contents for GE JE1860BH
- Page 1 Features of Your Microwave Oven ..12, 13 Microwave Terms ...29 Other Features ..26–28 Sensor Features ..22–25 Time Features .
-
Page 2: Important Safety Information
PRECAUTIONS TO AVOID POSSIBLE EXPOSURE TO EXCESSIVE MICROWAVE ENERGY I Do Not Attempt to operate this oven with the door open since open-door operation can result in harmful exposure to microwave energy. - Page 3 I This microwave oven is not approved or tested for marine use. I Do not mount this appliance over a sink. I Do not mount the microwave oven over or near any portion of a heating or cooking appliance. I Do not store anything directly...
- Page 4 READ ALL INSTRUCTIONS BEFORE USING. ARCING If you see arcing, press the CLEAR/OFF pad and correct the problem. Arcing is the microwave term for sparks in the oven. Arcing is caused by: I Metal or foil touching the side of the oven.
- Page 5 — Do not use straight-sided containers with narrow necks. — After heating, allow the container to stand in the microwave oven for a short time before removing the container. — Use extreme care when inserting a spoon or other utensil into the container.
- Page 6 When microwaved, the metal can burn the floor of the oven or ignite a paper towel. I Do not use the microwave to dry newspapers. I Not all plastic wrap is suitable for use in microwave ovens.
- Page 7 3/4″ high; remove the top foil cover and return the tray to the box. When using foil in the microwave oven, keep the foil at least 1 inch away from the sides of the oven.
-
Page 8: Grounding Instructions
IMPORTANT SAFETY INFORMATION. READ ALL INSTRUCTIONS BEFORE USING. Improper use of the grounding plug can result in a risk of electric shock. GROUNDING INSTRUCTIONS This appliance must be grounded. In the event of an electrical short circuit, grounding reduces the risk of electric shock by providing an escape wire for the electric current. -
Page 9: Adapter Plugs
ADAPTER PLUGS Usage situations where appliance’s power cord will be disconnected infrequently. Because of potential safety hazards under certain conditions, we strongly recommend against the use of an adapter plug. However, if you still elect to use an adapter, where local codes permit, a TEMPORARY CONNECTION may be made to a properly grounded two- prong wall receptacle by the use of a... -
Page 10: Extension Cords
Extension cords may be used if you are careful in using them. If an extension cord is used— If you use an extension cord, the interior light may flicker and the blower sound may vary when the microwave oven is on. Cooking times may be longer, too. WARNING! The marked electrical rating of the extension cord should be at least as great as the electrical rating of the appliance;... - Page 11 READ AND FOLLOW THIS SAFETY INFORMATION CAREFULLY. SAVE THESE INSTRUCTIONS...
- Page 12 About the features of your microwave oven. Throughout this manual, features and appearance may vary from your model. 1100 Watts Features of the Oven NOTE: Rating plate, oven vent(s) and oven light are located on the inside walls of the microwave oven.
-
Page 13: Cooking Controls
You can microwave by time, with the sensor features or with the auto feature. Cooking Controls Check the Convenience Guide before you begin. Time Features Press TIME COOK Press once or twice DEFROST AUTO/TIME Press twice EXPRESS COOK ADD 30 SEC... - Page 14 Each power level gives you microwave energy a certain percent of the time. Power level 7 is microwave energy 70% of the time. Power level 3 is energy 30% of the time.
- Page 15 About the time features. Time Cook Time Cook I Allows you to microwave for any time up to 99 minutes and 99 seconds. Power level 10 (High) is automatically set, but you may change it for more flexibility. Press TIME COOK.
- Page 16 About the time features. Cooking Guide for Time Cook NOTE: Use power level High (10) unless otherwise noted. Vegetable Amount Asparagus (fresh spears) 1 lb. (frozen spears) 10-oz. package Beans (fresh green) 1 lb. cut in half (frozen green) 10-oz. package (frozen lima) 10-oz.
- Page 17 Vegetable Amount Corn (frozen kernel) 10-oz. package Corn on the cob (fresh) 1 to 5 ears (frozen) 1 ear 2 to 6 ears Mixed vegetables (frozen) 10-oz. package Peas (fresh, shelled) 2 lbs. unshelled (frozen) 10-oz. package Potatoes (fresh, cubed, 4 potatoes white) (6 to 8 oz.
- Page 18 Auto Defrost. Be sure large meats are completely defrosted before cooking. I When defrosted, food should be cool but softened in all areas. If still slightly icy, return to the microwave very briefly, or let it stand a few minutes.
-
Page 19: Defrosting Guide
14 to 20 min. Place wrapped chicken in dish. Unwrap and turn over after first half of time. After second half of time, separate pieces and place in cooking dish. Microwave 2 to 4 minutes more, if necessary. Let stand a few minutes to finish defrosting. - Page 20 About the time features. Express Cook This is a quick way to set cooking time for 1–6 minutes. Press one of the Express Cook pads (from 1 to 6) for 1 to 6 minutes of cooking at power level 10. For example, press the 2 pad for 2 minutes of cooking time.
- Page 21 (Time Defrost is explained in the About the time features section.) There is a handy guide located on the inside front of the oven. I Remove meat from package and place on microwave- safe dish. I Twice during defrost, the oven signals TURN. At each TURN signal, turn the food over.
- Page 22 I Be sure the outside of the cooking containers and the inside of the microwave oven are dry before placing food in the oven. Beads of moisture turning into steam can mislead the sensor.
- Page 23 (less time) (more time) Use only with prepackaged microwave popcorn weighing 1.75 to 3.5 ounces. NOTE: Do not use this feature twice in succession on the same food portion— it may result in severely overcooked or burnt food. NOTE: Do not use...
- Page 24 About the sensor features. (less time) (more time) How to Change the Automatic Settings To reduce time by 10%: Press 1 after the feature pad. To add 10% to cooking time: Press 9 after the feature pad. NOTE: Do not use this feature twice in succession on the same food portion—...
- Page 25 Sensor cooking gives you easy, automatic results with a variety of foods (see the Cooking Guide below). NOTE: Do not use this feature twice in succession on the same food portion— it may result in severely overcooked or burnt food. Cooking Guide Food Type Amount...
-
Page 26: About The Other Features
About the other features. Cooking Complete Reminder To remind you that you have food in the oven, the oven will display FOOD IS READY and beep once a minute until you either open the oven door or press CLEAR/OFF. Help The HELP pad displays feature information and helpful hints. -
Page 27: Delay Start
REMINDER, then 0. The REM indicator will no longer be lit. Delay Start Delay Start allows you to set the microwave to delay cooking up to 24 hours. Press DELAY START. Enter the time you want the oven to start. (Be sure the microwave clock shows the correct time of day.) - Page 28 About the other features. Child Lock-Out You may lock the control panel to prevent the microwave from being accidentally started or used by children. To lock or unlock the controls, press and hold CLEAR/OFF for about three seconds. When the control panel is locked, LOCKED will appear in the display.
-
Page 29: Microwave Terms
Microwave terms. Term Definition Arcing Arcing is the microwave term for sparks in the oven. Arcing is caused by: I metal or foil touching the side of the oven. I foil that is not molded to food (upturned edges act like antennas). - Page 30 Care and cleaning of the microwave oven. Helpful Hints An occasional thorough wiping with a solution of baking soda and water keeps the inside fresh. Unplug the cord before cleaning any part of this oven. How to Clean the Inside...
- Page 31 Do not use cleaners containing ammonia or alcohol on the microwave oven. Ammonia or alcohol can damage the appearance of the microwave. Case Clean the outside of the microwave with a sudsy cloth. Rinse and then dry. Wipe the window clean with a damp cloth. Control Panel and Door Wipe with a damp cloth.
-
Page 32: Before You Call For Service
Food weight not entered after selecting Auto Defrost. What To Do • Replace fuse or reset circuit breaker. • Unplug the microwave oven, then plug it back in. • Make sure the 3-prong plug on the oven is fully inserted into wall outlet. - Page 33 Problem “LOCKED” appears in display “SENSOR ERROR” appears in display Food amount too large for Sensor Reheat Possible Causes The control has been locked. (When the control panel is locked an L will be displayed.) During Popcorn, Reheat, Beverage, Chicken/Fish, Potato or Vegetable program, the door was opened before steam...
- Page 34 Plug the microwave into a different electrical circuit, move the radio or TV as far away from the microwave as possible or check the position and signal of the TV/radio antenna.
- Page 35 This warranty is extended to the original purchaser and any succeeding owner for products purchased for home use within the USA. If the product is located in an area where service by a GE Authorized Servicer is not available, you may be responsible for a trip charge or you may be required to bring the product to an Authorized GE Service Location for service.
-
Page 36: Consumer Support
Contact Us If you are not satisfied with the service you receive from GE, contact us on our Website with all the details including your phone number, or write to: Register Your Appliance Register your new appliance on-line—at your convenience! Timely product...
Need help?
Do you have a question about the JE1860BH and is the answer not in the manual?
Questions and answers
what is the cubic inch of built in microwave Madel JE 1860 BH?
The GE built-in microwave model JE1860BH has a capacity of 1.8 cubic feet. To convert this to cubic inches:
1 cubic foot = 1,728 cubic inches
1.8 cubic feet × 1,728 cubic inches = 3,110.4 cubic inches
So, the cubic inch capacity is 3,110.4 cubic inches.
This answer is automatically generated