Table of Contents
Advertisement
Quick Links
Advertisement
Table of Contents

Summary of Contents for Zorg 3201
-
Page 2: Product Overview
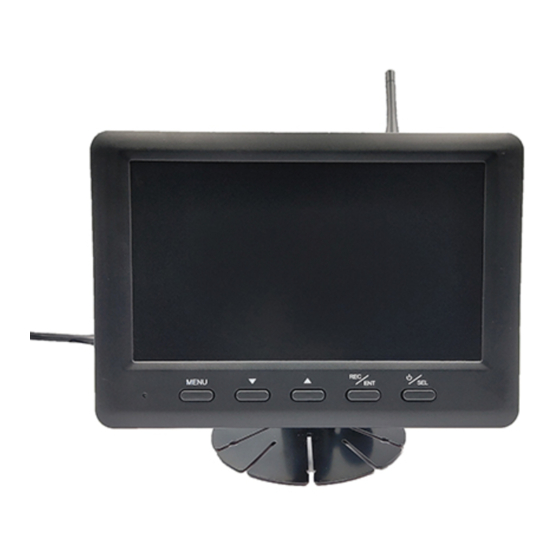
Product Overview The 3201 Wireless System represents a combination of the highest quality camera and LCD components combined with the most advanced digital wireless communication technology. The system operates at 2.4GHz. It uses Coded Differential Orthogonal Frequency Division Multiplexing (CDOFDM) technology to provide the highest quality, most secure, most reliable wireless signal available. - Page 3 Use Only a Class 10 or above SD memory card (Max 128 GB) for reliable recording and performance. Not Included Features & Specification 3201 Monitor Monitor size 7.0" IPS-LCD monitor Transmission frequency 2.4GHz (digital) Transmission resolution High definition Transmission delay (ave) <...
-
Page 4: Required Tool List
Required Tool List Supplied Parts list Screwdrivers Wireless camera with power cable Marker pencil Wireless monitor with wiring harness Drill Monitor stand Plyers Monitor sunshade Panel removal tool Installation screws/clips Soldering iron & solder Antenna rubber stoppers Voltmeter Safety Glasses Installing Antenna &... -
Page 5: Camera Installation
Camera Installation The 3202 Wireless Camera installation is simply a matter of bolting the camera onto the vehicle and supplying reverse power (DC 9V-36V). The only issue to take into account is the mounting location. There are three main factors to consider: 1.Wireless Performance –... - Page 6 Operation Instructions Button 1: System function setting MENU Button 2: Selection/adjustment down when in a menu Button 3: Selection/adjustment up when in a menu Button 4: Record-Pause (Normal) / Enter for Settings (Menu) Button 5: System power ON-OFF (Long Press) / CAM-CH selection Short Press Page 6...
- Page 7 To enter the system menu, press the "MENU" button and use the "" or "" button to move the cursor to the required sub-menu. Press the REC / ENT button to enter the selected sub-menu. 1. System Pairing The packaged set will have been 'paired' during the assembly process, so the initial operation should be as simple as powering on the system monitor and camera.
- Page 8 2. Picture settings Select the "PICTURE" icon to enter the sub-menu setting interface as shown, then select and adjust the brightness, contrast, saturation, and guideline feature. 3. Mirror-FLP Select the "MIR-FLP" icon to enter the sub-menu setting interface as shown, choose, and select the correct mode. When used as a backup camera, the image is MIRRORED;...
- Page 9 5. CAMERA SETUP Select the "CAM-SETUP" icon to enter the sub-menu setting interface, as shown. Choose and select each of the four cameras' ON-OFF status, scan time, and auto scan. The auto-scan feature will continuously loop the display of multiply cameras. The cycling time interval can be adjusted using the scan time feature.
-
Page 10: Troubleshooting
8. Record Select the "RECORD" icon to enter the sub-menu setting interface, as shown. Choose and select the rewrite and format settings. A new SD card must be formatted prior to using the record feature. To use the record feature, select the CAM-CH to be recorded, e.g., CAM1 or for multiple CAM recording, select the CAM-CH display mode combination, e.g., CAM1/CAM2 when the displayed CAM-CH is shown on monitor press the REC / ENT button to start recording (note the... - Page 11 Wiring Diagram Page 11...
-
Page 12: Fcc Declaration Of Conformity
FCC Declaration of Conformity Test Standards and Results The EUT has been tested according to AS/NZS 4268:2010(Refer to ETSI EN 300 328 v1.7.1. (2006-10)) ETSI EN 300 Electromagnetic compatibility and Radio spectrum Matters (ERM); Wideband Transmission system; Data transmission equipment in V1.1.1 (2006-10) the 2.4GHz ISM band ad using spread spectrum modulation techniques: Part2: Harmonized E covering essential requirements... -
Page 13: Warranty
The information in this manual was accurate at the time of printing. Changes in features, function, appearance, or other attributes may occur at any time. Zorg North America is not responsible for errors or omissions in this manual and makes every attempt to stay current.

Need help?
Do you have a question about the 3201 and is the answer not in the manual?
Questions and answers