Advertisement
ASSEMBLY
WARNING!
This technical manual is intended for use by professional mechanics.
Anyone who is not a qualified professional for bicycle assembly must not attempt to install and operate on the
components independently due to the risk of carrying out incorrect operations which could cause the components to malfunction, resulting in accidents,
physical injury or even death.
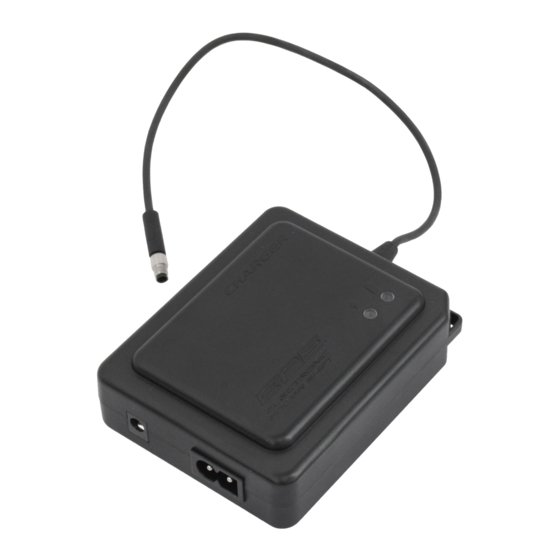
1 - EPS V2 POWER UNIT (SOLUTION 5)
1.1 - POSITIONING INSIDE THE SEAT TUBE WITH ELASTIC SUPPORT IN THE SEAT BRACKET TUBE
Depending on which elastic support you have you can secure the V2 power unit to the following seat bracket tubes:
EXTERNAL DIAMETER 27.9 mm
EXTERNAL DIAMETER 30.9/31.6 mm
In case of an aerodynamic seat bracket tube (teardrop), select the most suitable elastic support version for the geometry and
dimensions of the tube so that the support is stably inserted.
1
1
ROUND TUBE
ELASTIC SUPPORT COLOUR
GREY
BLACK
Rev. 01 /10-2016
EPS
Advertisement
Table of Contents

Summary of Contents for CAMPAGNOLO EPS V2
- Page 1 1 - EPS V2 POWER UNIT (SOLUTION 5) 1.1 - POSITIONING INSIDE THE SEAT TUBE WITH ELASTIC SUPPORT IN THE SEAT BRACKET TUBE...
- Page 2 • Cable guide magnet kit ATH EPS OPTIONS AVAILABLE: • Charging cable extension for EPS V2 Power Unit • Cable extension for EPS PU installation under the seat (Super Record/Record version) • Cable extension for EPS PU installation under the seat (Chorus/Athena version) •...
- Page 3 • For the single interface cable (25 cm) the “Cable extension for EPS PU under BB installation” is available (Super Record/ Record or Chorus/Athena version) • For the recharge connector cable (50 cm) the “Recharge extension cable for Power Unit EPS V2” is available Note Remember that if the extensions are not used, once the power unit is installed you may not be able to remove the seat support tube from the column tube.
- Page 4 7) If it is necessary to fit the charging cable exten- sion to the power unit, follow the instructions below, otherwise proceed to step 8. Undo the nut from the power unit connector and • fit the O-ring included with the extension onto the connector (Fig.
- Page 5 10) Rotate the power unit to the necessary angle, un- screwing or screwing in the pivot in order to align it to the column tub and to any encumbrances inside the frame (for example, be careful of the bottle holder rivets).
- Page 6 “Assem- bly: cable routing” chapter, available from our websi- te: www.campagnolo.com. To determine where to place the Campagnolo sticker that comes with the power unit and which will indica- te where to place the magnetic EPS shut-off strip, we recommend knowing the definitive seat height of the end customer.
Need help?
Do you have a question about the EPS V2 and is the answer not in the manual?
Questions and answers