
Summary of Contents for tedee TKV1.0
- Page 1 INSTALLATION GUIDE AND USER MANUAL tedee keypad TKV1.0 Read installation guide and user manual and learn how to use your device in a safe proper manner. www.tedee.com tedee keypad | page 1...
-
Page 2: Table Of Contents
Page 9 ƒ activation code Page 10 ƒ setup – 4 easy steps Page 11 step 1: download tedee app, create new account, and log in Page 11 ƒ step 2: power up your tedee keypad using batteries Page 12 ƒ... -
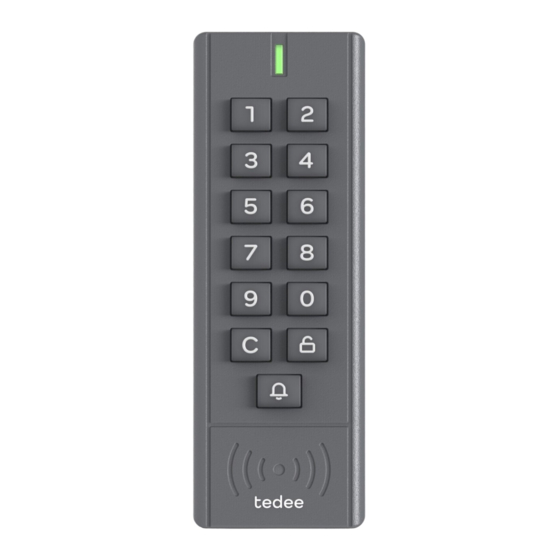
Page 3: X83; Quick Start With Tedee Keypad
Tedee keypad is an accessory for tedee smart lock. It allows you to open the door by entering a 6-10 digit access code. This booklet will give you an overview of the basic features of tedee keypad and will help you walk through the setup in four easy steps. -
Page 4: X83; Safety Information
Read installation guide in order to learn how to start working with your device and how to pair ƒ it with your tedee app and other tedee devices. You can also follow the link: www.tedee.com/ installation-guide page 4 | tedee keypad... -
Page 5: Battery Safety Guidelines / Warnings
/ warnings Battery-powered Tedee keypad set includes non-rechargeable and non-user-serviceable batter- ies. Do not Do not charge non-rechargeable batteries. ƒ Do not disassemble, puncture, modify, drop, throw, or cause other unnecessary shocks to ƒ batteries. Do not leave or store batteries in hot places such as near an oven, stove, direct sunlight or other ƒ... -
Page 6: Recommended Batteries
ƒ warnings and safety guidelines. By purchasing this device, the buyer acknowledges all risks as- sociated with the use of tedee equipment. If you do not agree to these terms, return the device to the manufacturer or distributor before use. -
Page 7: X83; Set Of Items - What's In The Box
– what’s in the box? tedee keypad Installation accessories: 1. Keyboard 4. Double-sided adhesive tape 6. Mounting screws (2x) 2. Mounting holes 5. AAA batteries (3x) 7. Wall plugs (2x) 3. Mounting screw 8. Customized Torx key www.tedee.com tedee keypad | page 7... -
Page 8: X83; What's Not In The Box (But Is Needed)
NOT in the box (but is needed)? necessary to prepare TIME (15-30 MIN) optional Note: Items below are necessary only if you choose to install tedee keypad with wall plugs. DRILLER RULER PENCIL PHILLIPS SCREWDRIVER page 8 | tedee keypad... -
Page 9: X83; Distance / Range Requirement
(recommended) up to 10 m* (in range) tedee bridge local Wi-Fi router *physical obstacles such as walls, doors, and furniture may weaken the radio signal and affect some of the functionalities of tedee devices. www.tedee.com tedee keypad | page 9... -
Page 10: X83; Activation Code
Location of a unique activation code (AC) of your tedee keypad Activation code (AC) of your tedee keypad is Helpful tip printed on: Before installing tedee keypad on ƒ the last page of this installation guide ƒ on battery compartment in keypad case... -
Page 11: X83; Setup - 4 Easy Steps
– 4 easy steps step 1: download tedee app, create new account, and log in (skip this step if you already have an account) Download tedee application. Create an account an log in. select WELCOME DOWNLOAD Create new account... -
Page 12: Step 2: Power Up Your Tedee Keypad Using Batteries
2: power up your tedee keypad using batteries Remove the screw mounting the rear cover using a Customized Torx key. KEYPAD SCREW remove Turn counter-clockwise page 12 | tedee keypad www.tedee.com... - Page 13 Remove the rear cover of tedee keypad. remove REAR COVER Note: The open the housing the cover must be leveraged. www.tedee.com tedee keypad | page 13...
- Page 14 Remove the insulation tape from the bottom of batteries. remove page 14 | tedee keypad www.tedee.com...
- Page 15 BUZZING Note: When all 3 AAA batteries are inserted or the protective foil is removed, you will see the GREEN-RED-GREEN-RED flashing light signal and hear the buzzer. Your tedee keypad is ready to be activated in tedee app. www.tedee.com...
- Page 16 Close the keypad by Fix the keypad housing with the placing the rear cover back. screw using a Customized Torx key. close turn SCREW clockwise page 16 | tedee keypad www.tedee.com...
-
Page 17: Step 3: Use Tedee App To Activate Your Tedee Keypad
3: use tedee app to activate your tedee keypad Enable Internet connection, Log into application and select "Add new Bluetooth ® , and location on your device" option from the menu. smartphone. select Bluetooth ® Your Account INTERNET CONNECTION... -
Page 18: Step 4: (Option A) Keypad Installation With Double-Sided Adhesive Tape
4: (option A) keypad installation with double-sided adhesive tape Remove the protective layer from the adhesive tape to get the sticky side ready. remove PROTECTIVE LAYER page 18 | tedee keypad www.tedee.com... - Page 19 Install tedee keypad by sticking it to the surface in the desired location (doorframe, wall, etc.). KEYPAD press DOORFRAME firmly Note: Make sure to press the keypad firmly against the surface you’re installing it on (door- frame, wall, etc.). While pressing avoid touching the buttons.
-
Page 20: Step 4: (Option B) Keypad Installation With Wall-Plugs
4: (option B) keypad installation with wall-plugs Press the back cover of the keypad against the wall. Use a pencil to mark the places for the wall plugs. Drill two holes in the marked places. page 20 | tedee keypad www.tedee.com... - Page 21 Insert the wall plugs into the holes. Place the back cover to the wall. Fix the back cover on the wall with the mounting screws from set using a Phillips screwdriver. WALL PHILLIPS PLUG SCREWDRIVER MOUNTING SCREWS www.tedee.com tedee keypad | page 21...
- Page 22 Hang the keypad on the back cover. hang KEYPAD DOORFRAME page 22 | tedee keypad www.tedee.com...
- Page 23 Fix the keypad housing with a screw using KEYPAD customized TORX key. DOORFRAME SCREW turn clockwise Note: Turn the customized TORX key clockwise until it stops. www.tedee.com tedee keypad | page 23...
-
Page 24: X83; Replacing Batteries In Tedee Keypad
NOT OK Note: When replacing batteries in the device use only one type of batteries (do not mix). page 24 | tedee keypad www.tedee.com... -
Page 25: X83; Technical Information
The color variant of the product is marked with a letter at the end of the model of color name, on the label and on the product rating plate. For example, a device with model TKV1.0 in color variant A is marked as "TKV1.0A". variants www.tedee.com... -
Page 26: X83; Radio Frequency, Power Supply, Software
Internet. In the event of a network failure or communication error, you can directly update the software using tedee app (Internet and Bluetooth® connections are required). You can also check the latest available software updates directly in tedee app: device / settings / general / software version. -
Page 27: X83; Factory Reset, Light And Sound Signals
LED lights ƒ Step 3: release both buttons to trigger factory reset (3 blinks of red LED will confirm it) ƒ Step 4: tedee keypad will restart ƒ light and sound signals Meaning... - Page 28 Factory reset buttons are released 3 short flashes (LED) no signal confirmed while triggering factory reset procedure. various combinations Hardware Please contact tedee support of short and long LED no signal error team. light signals page 28 | tedee keypad www.tedee.com...
-
Page 29: X83; Compliance And Warranty Information
/ environmental notes EU Declaration of Conformity Tedee Sp. z o.o. hereby declares that the Tedee Keypad TKV1.0 radio device is in accordance with Di- rective 2014/53/EU. The full text of the EU Declaration of Conformity is available at the following internet address: www. -
Page 30: Technical Support
For technical support please contact our support team support@tedee.com www.tedee.com/support (+48) 884 088 011 Mon-Fri 8am – 4pm (CET) Tedee Sp. z o.o. | ul. Altowa 2, 02-386 Warszawa, POLAND www.tedee.com | support@tedee.com page 30 | tedee keypad www.tedee.com... -
Page 31: X83; Your Activation Code
(AC) Note: the activation code is case-sensitive. When typing it in, please pay attention to capital / small letters. www.tedee.com tedee keypad | page 31...
Need help?
Do you have a question about the TKV1.0 and is the answer not in the manual?
Questions and answers